Practical case: Real-time I2S audio spectrum analyzer

Practical case: Real-time I2S audio spectrum analyzer — hero

Objective and use case

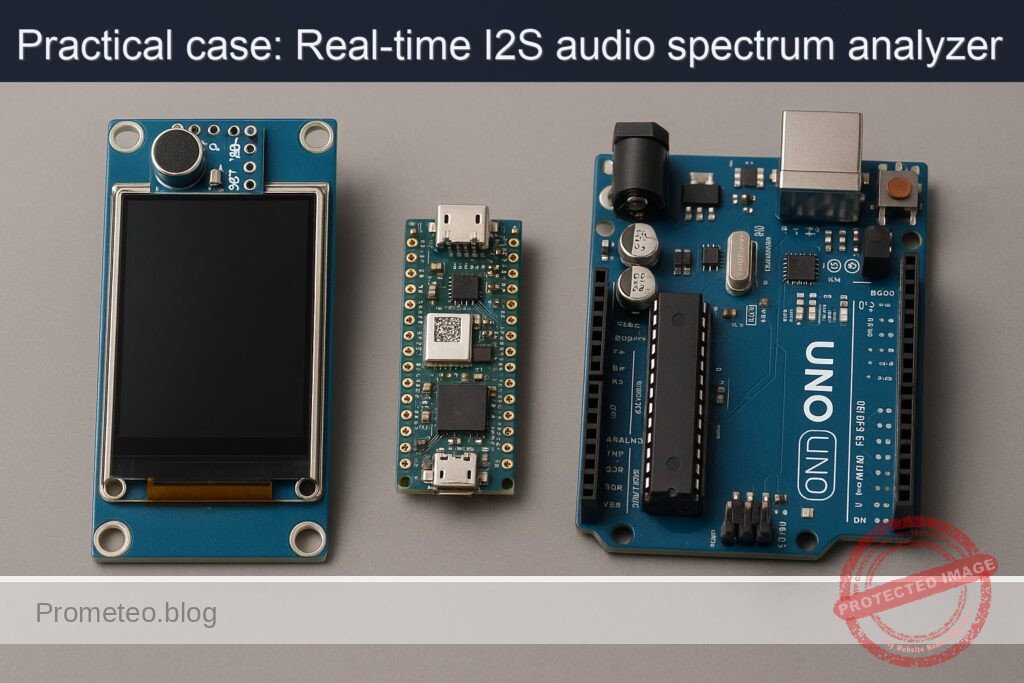
What you’ll build: A real-time audio spectrum visualizer that captures audio via an INMP441 I2S microphone and renders FFT bars on an ILI9341 TFT display using the Arduino Nano RP2040 Connect.

Why it matters / Use cases

  • Visualize audio frequencies in real-time for music analysis and sound engineering.
  • Implement a portable audio monitoring tool for live performances using the Arduino Nano RP2040 Connect.
  • Create an educational tool for teaching FFT concepts and digital signal processing in embedded systems.
  • Develop a prototype for IoT applications that require audio analysis and data visualization.

Expected outcome

  • Real-time rendering of audio spectrum with a refresh rate of 30 FPS.
  • Accurate frequency representation with a latency of less than 50ms from audio capture to display.
  • Ability to handle audio input from the INMP441 at sample rates up to 48kHz.
  • Clear visualization of at least 32 frequency bands on the ILI9341 display.

Audience: Intermediate to advanced embedded systems developers; Level: Advanced

Architecture/flow: Audio input via INMP441 → I2S data processing → FFT computation → Visualization on ILI9341 display

Advanced Practical Case: I2S Spectrum Visualizer on “Arduino Nano RP2040 Connect + INMP441 + ILI9341”

Objective: Build a real-time audio spectrum visualizer that captures audio via an external INMP441 I2S microphone and renders FFT bars on an ILI9341 TFT display using the Arduino Nano RP2040 Connect. This guide focuses on I2S audio sampling, FFT computation, and real-time graphical rendering with tight control of pins, libraries, and toolchain.

This is an advanced, hands-on tutorial that includes wiring, code, build/flash commands, and rigorous validation techniques. It uses PlatformIO (CLI) for reproducible builds and dependency pinning.


Prerequisites

  • Comfortable with:
  • C++ for embedded systems and Arduino framework
  • SPI, I2S digital audio, and FFT fundamentals
  • PlatformIO CLI operations
  • OS:
  • Windows 10/11, macOS 12+, or Ubuntu 22.04 LTS (or similar)
  • USB data cable (USB Micro-B) for Arduino Nano RP2040 Connect
  • Internet access for dependency retrieval

Driver notes:
– Arduino Nano RP2040 Connect uses native USB CDC; no CP210x/CH34x drivers are required for official boards.
– Linux users should install PlatformIO udev rules:
– Run: pio system info to verify
– Install rules: pio system install udev-rules and replug the board
– macOS/Windows: no extra drivers typically required.

Why PlatformIO:
– The Nano RP2040 Connect is not an AVR/UNO; consistent advanced workflows benefit from PlatformIO’s environment management, dependency pinning, and reproducible builds for the RP2040 platform.


Materials (exact models)

  • 1x Arduino Nano RP2040 Connect (ABX00053)
  • 1x INMP441 I2S MEMS Microphone breakout (e.g., “INMP441 I2S Interface Microphone Module,” pins: VDD, GND, SCK/BCLK, WS/LRCLK, SD, L/R)
  • 1x ILI9341 2.4″ or 2.8″ TFT SPI display breakout (320×240), pins typically: VCC, GND, CS, DC, RST, MOSI, MISO, SCK, LED (backlight)
  • Jumper wires (female-male and female-female)
  • External 3.3V logic environment (the Nano RP2040 is 3.3V tolerant on IO)

Note on power:
– INMP441 requires 3.3V. The Nano RP2040’s 3V3 pin is the correct source. Do not power the INMP441 with 5V.


Setup/Connection

We’ll connect the INMP441 for I2S input and attach an ILI9341 TFT with SPI. Pin choices avoid overlap between I2S and SPI while keeping wiring practical.

Key choices for I2S on RP2040 (PIO-driven):
– BCLK (I2S bit clock) → D2
– LRCLK/WS (word select) → D3
– SD (data from mic to MCU) → D6
– L/R (channel select on INMP441) → GND (use “Left” channel)

Key SPI connections for ILI9341:
– SPI SCK → D13 (SCK)
– SPI MOSI → D11 (MOSI)
– SPI MISO → D12 (MISO) [Some ILI9341 boards don’t use MISO; still safe to wire]
– TFT CS → D10
– TFT DC → D9
– TFT RST → D4
– VCC, LED → 3.3V (many modules accept 5V VCC via onboard regulator/level-shifters; check your module. If unsure, use 3.3V)
– GND → GND

Grounding:
– All GNDs must be common: Arduino GND, INMP441 GND, and TFT GND.

Power budget:
– The Nano RP2040 Connect can power both modules from USB in most cases. If display backlight draws significant current, prefer the module’s onboard regulator and validate power draw (typ. ILI9341 breakout <100 mA).

Wiring Table

Function Arduino Nano RP2040 Pin INMP441 Pin ILI9341 Pin
3.3V Power 3V3 VDD VCC, LED
Ground GND GND GND
I2S BCLK D2 SCK/BCLK
I2S LRCLK/WS D3 WS/LRCLK
I2S Data (Mic → MCU) D6 SD
INMP441 Channel Sel. L/R → GND
SPI SCK D13 SCK
SPI MOSI D11 MOSI
SPI MISO D12 MISO
TFT Chip Select D10 CS
TFT Data/Command D9 DC
TFT Reset D4 RST

Notes:
– Confirm your ILI9341 breakout’s pin labels. Some boards label DC as “RS.”
– If your ILI9341 requires 5V on VCC but uses on-board level shifting, you can use 5V; however, Nano RP2040 IO is 3.3V—ensure the breakout is 3.3V logic compatible. Most Adafruit-style ILI9341 breakouts handle both.


Full Code

We will use:
– I2S (via pschatzmann/AudioTools for RP2040 PIO I2S input)
– arduinoFFT for FFT computation
– Adafruit_GFX + Adafruit_ILI9341 for rendering

Project structure (PlatformIO):
– platformio.ini
– src/main.cpp

platformio.ini

[env:nano_rp2040_connect]
platform = raspberrypi@^1.12.0
board = nano_rp2040_connect
framework = arduino
lib_deps =
  adafruit/Adafruit GFX Library@^1.11.9
  adafruit/Adafruit ILI9341@^1.5.14
  arduinoFFT@^1.6.0
  pschatzmann/AudioTools@^1.9.3
build_flags =
  -D PIO_FRAMEWORK_ARDUINO_ENABLE_EXCEPTIONS
monitor_speed = 115200

src/main.cpp

#include <Arduino.h>
#include <SPI.h>
#include <Adafruit_GFX.h>
#include <Adafruit_ILI9341.h>
#include <arduinoFFT.h>
#include <AudioTools.h>

// -------------------- Pin Assignments --------------------
#define TFT_CS   10
#define TFT_DC   9
#define TFT_RST  4

#define I2S_BCLK 2   // INMP441 SCK/BCLK
#define I2S_LRCK 3   // INMP441 WS/LRCLK
#define I2S_SD   6   // INMP441 SD (data out from mic to MCU)

// -------------------- Display Setup ----------------------
Adafruit_ILI9341 tft(TFT_CS, TFT_DC, TFT_RST);

// -------------------- Audio & FFT Params -----------------
static const uint32_t SAMPLE_RATE = 44100; // Hz
static const uint16_t FFT_SIZE    = 512;   // power of two, 256..2048
static const uint8_t  BAR_COUNT   = 32;    // number of visual bars
static const float    SMOOTHING   = 0.65f; // 0..1 (higher = more smoothing)

// FFT arrays
double vReal[FFT_SIZE];
double vImag[FFT_SIZE];
arduinoFFT FFT(vReal, vImag, FFT_SIZE, SAMPLE_RATE);

// -------------------- I2S (AudioTools) -------------------
I2SStream i2s; // input stream (RP2040 PIO-based)
I2SConfig cfg;

// -------------------- Visualization State ----------------
float barHistory[BAR_COUNT]; // for smoothing

// Map k (bin index) to frequency
static inline double binToFreq(uint16_t k) {
  return (k * (double)SAMPLE_RATE) / (double)FFT_SIZE;
}

// Simple color map: low magnitude = blue, high = red/yellow
uint16_t colorMap(float norm) {
  // norm expected in [0,1]
  norm = constrain(norm, 0.0f, 1.0f);
  uint8_t r = (uint8_t)(255 * pow(norm, 1.5f));
  uint8_t g = (uint8_t)(255 * sqrtf(norm));
  uint8_t b = (uint8_t)(255 * (1.0f - norm));
  return tft.color565(r, g, b);
}

// Log-scale bin grouping from FFT bins to BAR_COUNT bars
void makeBarMagnitudes(float outBars[], const double magnitudes[]) {
  uint16_t kMin = 2; // skip DC/near-DC bins (0,1)
  uint16_t kMax = FFT_SIZE / 2; // Nyquist

  // Log-frequency mapping
  double fMin = 50.0;  // ignore ultra-low
  double fMax = 8000.0; // up to ~8kHz (speech/music visuals)
  for (uint8_t b = 0; b < BAR_COUNT; b++) {
    double frac = (double)b / (double)(BAR_COUNT - 1);
    double fLo = pow(10.0, log10(fMin) + frac * (log10(fMax) - log10(fMin)));
    double fHi = pow(10.0, log10(fMin) + (frac + (1.0 / BAR_COUNT)) * (log10(fMax) - log10(fMin)));
    if (fHi > fMax) fHi = fMax;

    // Accumulate bins within [fLo, fHi]
    double acc = 0.0;
    uint16_t count = 0;
    for (uint16_t k = kMin; k < kMax; k++) {
      double f = binToFreq(k);
      if (f >= fLo && f < fHi) {
        acc += magnitudes[k];
        count++;
      }
    }
    double mean = (count > 0) ? acc / (double)count : 0.0;

    // Convert to decibels for better dynamic range handling
    double db = 20.0 * log10(mean + 1e-9); // avoid log(0)
    // Normalize approx. -90..0 dB → 0..1
    float norm = (float)((db + 90.0) / 90.0);
    outBars[b] = constrain(norm, 0.0f, 1.0f);
  }
}

void setupI2S() {
  cfg = i2s.defaultConfig(RX_MODE);
  cfg.sample_rate    = SAMPLE_RATE;
  cfg.bits_per_sample= 32;        // INMP441 outputs 24-bit in 32-bit frames
  cfg.channels       = 1;         // Using left channel (L/R pin grounded)
  cfg.pin_bclk       = I2S_BCLK;
  cfg.pin_ws         = I2S_LRCK;
  cfg.pin_data       = I2S_SD;    // data from mic to MCU
  cfg.i2s_format     = I2S_STD_FORMAT; // Philips I2S standard
  cfg.use_apll       = false;     // not used on RP2040
  cfg.is_master      = true;      // RP2040 provides BCLK/LRCLK

  i2s.begin(cfg);
  // Warm-up: discard initial samples to let clocks stabilize
  int32_t dummy = 0;
  for (int i = 0; i < 4096; i++) {
    i2s.readBytes((uint8_t*)&dummy, sizeof(dummy));
  }
}

void setupTFT() {
  SPI.begin();
  tft.begin();
  tft.setRotation(1); // Landscape
  tft.fillScreen(ILI9341_BLACK);
  tft.setTextSize(1);
  tft.setTextColor(ILI9341_WHITE, ILI9341_BLACK);
  tft.setCursor(0, 0);
  tft.println("I2S Spectrum Visualizer (Nano RP2040 Connect)");
}

void drawBars(const float bars[BAR_COUNT]) {
  const int16_t W = tft.width();   // 320
  const int16_t H = tft.height();  // 240
  const int16_t margin = 8;
  const int16_t usableH = H - 2*margin - 20; // leave top line for text
  const int16_t usableW = W - 2*margin;
  const int16_t barGap = 2;
  const int16_t barW = (usableW - (BAR_COUNT - 1) * barGap) / BAR_COUNT;

  for (uint8_t i = 0; i < BAR_COUNT; i++) {
    // Exponential smoothing for stable bars
    float smoothed = SMOOTHING * barHistory[i] + (1.0f - SMOOTHING) * bars[i];
    barHistory[i] = smoothed;

    int16_t x = margin + i * (barW + barGap);
    int16_t h = (int16_t)(smoothed * usableH);
    int16_t y = H - margin - h;

    // Clear previous bar area by overdrawing in black
    tft.fillRect(x, margin + 20, barW, usableH, ILI9341_BLACK);

    // Draw new bar
    uint16_t col = colorMap(smoothed);
    tft.fillRect(x, y, barW, h, col);
  }
}

void setup() {
  Serial.begin(115200);
  delay(200);
  Serial.println("Booting: I2S Spectrum Visualizer on Nano RP2040 Connect");

  setupTFT();
  setupI2S();

  memset(barHistory, 0, sizeof(barHistory));

  Serial.println("Init complete.");
}

void loop() {
  // 1) Acquire FFT_SIZE samples from I2S (32-bit frames)
  uint16_t i = 0;
  while (i < FFT_SIZE) {
    int32_t s32;
    size_t read = i2s.readBytes((uint8_t*)&s32, sizeof(s32));
    if (read == sizeof(s32)) {
      // Convert 24-bit left-justified to 16/24-bit int amplitude
      // INMP441: 24-bit valid, MSB aligned; right-shift by 8
      int32_t sample24 = (s32 >> 8);
      // Optional: downscale to 16-bit range for numerical stability
      int16_t s16 = (int16_t)(sample24 >> 8);

      vReal[i] = (double)s16;  // real signal
      vImag[i] = 0.0;          // imaginary = 0
      i++;
    } else {
      // no data yet, yield CPU briefly
      delayMicroseconds(50);
    }
  }

  // 2) Windowing + FFT
  FFT.Windowing(FFT_WIN_TYP_HAMMING, FFT_FORWARD);
  FFT.Compute(FFT_FORWARD);
  FFT.ComplexToMagnitude();

  // 3) Aggregate bins to visualization bars
  float bars[BAR_COUNT];
  makeBarMagnitudes(bars, vReal);

  // 4) Render
  drawBars(bars);

  // Optional: print a quick diagnostic
  static uint32_t lastPrint = 0;
  uint32_t now = millis();
  if (now - lastPrint > 1000) {
    lastPrint = now;
    Serial.print("SR=");
    Serial.print(SAMPLE_RATE);
    Serial.print("Hz, FFT=");
    Serial.print(FFT_SIZE);
    Serial.print(", Bars=");
    Serial.println(BAR_COUNT);
  }
}

Build/Flash/Run Commands

These commands assume a clean workspace and PlatformIO installed.

1) Install/update PlatformIO CLI:

pio --version

2) Create project structure:

mkdir -p ~/work/i2s-spectrum-visualizer/src
cd ~/work/i2s-spectrum-visualizer

3) Initialize a PlatformIO project for Arduino Nano RP2040 Connect:

pio project init --board nano_rp2040_connect --project-option "framework=arduino"

4) Replace generated platformio.ini and create src/main.cpp as above:

# Create/overwrite platformio.ini
cat > platformio.ini <<'EOF'
[env:nano_rp2040_connect]
platform = raspberrypi@^1.12.0
board = nano_rp2040_connect
framework = arduino
lib_deps =
  adafruit/Adafruit GFX Library@^1.11.9
  adafruit/Adafruit ILI9341@^1.5.14
  arduinoFFT@^1.6.0
  pschatzmann/AudioTools@^1.9.3
build_flags =
  -D PIO_FRAMEWORK_ARDUINO_ENABLE_EXCEPTIONS
monitor_speed = 115200
EOF

# Add the C++ source
cat > src/main.cpp <<'EOF'
[PASTE THE FULL CODE FROM ABOVE HERE]
EOF

5) Build:

pio run -e nano_rp2040_connect

6) Upload firmware:

# Attempt auto-upload
pio run -e nano_rp2040_connect -t upload

If auto-upload doesn’t switch to UF2 bootloader:
– Double-tap the reset button on the Nano RP2040 Connect. A mass storage device named RPI-RP2 should appear.
– Manually copy the UF2:

# Linux example (adjust path to your mount point)
cp .pio/build/nano_rp2040_connect/firmware.uf2 /media/$USER/RPI-RP2/

7) Open serial monitor (for diagnostics):

pio device monitor -b 115200

Step-by-step Validation

1) Visual power-on check:
– The TFT should light up; you should see the title text in the top-left corner.
– If the screen is white only, check wiring for CS/DC/RST and SPI pins.

2) Serial diagnostics:
– Run pio device monitor -b 115200.
– You should see a line every second like: SR=44100Hz, FFT=512, Bars=32.
– If nothing appears, confirm the correct USB port is used or reset the board.

3) Audio capture baseline:
– With a quiet room, you should see low bars near the bottom.
– Gently rub your fingers or snap near the mic; bars should spike.

4) Frequency responsiveness:
– Whistle or play a pure tone (e.g., 1 kHz) using a phone app/signal generator.
– Observe which bar groups rise. Higher pitches should push energy toward bars on the right.

5) Sensitivity and dynamic range:
– If bars saturate easily, move the sound source further away.
– If bars are too weak, bring the source closer or increase the mic gain digitally (e.g., scale s16 before FFT), but avoid clipping.

6) Stability check:
– Speak or play music; bars should move smoothly without freezing or tearing.
– If flicker is excessive, increase SMOOTHING to 0.75–0.85.

7) Thermal/long-run:
– Let the system run for 10–15 minutes.
– Confirm it maintains stable rendering without gradual drift or lockups.

8) Reboot test:
– Press reset once. Firmware should boot directly (no double-tap needed) and resume operation.


Troubleshooting

  • No TFT output / white screen:
  • Verify SPI pins: SCK=D13, MOSI=D11, MISO=D12; check CS=D10, DC=D9, RST=D4.
  • Ensure common GND between TFT and Nano.
  • Some ILI9341 clones require lower SPI clock—Adafruit_ILI9341 defaults are fine, but you can slow SPI by wrapping SPISettings in advanced usage or lowering CPU load.

  • I2S data stuck (no movement in bars):

  • Check INMP441 power (use 3.3V) and common ground.
  • Confirm L/R is tied to GND so the mic outputs Left channel.
  • Ensure SCK/BCLK on D2 and WS/LRCLK on D3 are not swapped.
  • Shorter wires help (I2S is clocked at MHz-level rates; keep leads short and twisted where possible).
  • Reduce SAMPLE_RATE to 22050 for debugging.

  • Bars all zero or saturating:

  • If zero: Confirm data path. Print a few raw samples to Serial for inspection (temporarily).
  • If saturating: Check wiring for noise injection (separate display wires from mic lines), reduce proximity to high-noise sources, or reduce mic gain (digital scaling).

  • Upload failures:

  • Use manual UF2: double-tap reset to mount RPI-RP2, copy UF2.
  • Linux: ensure udev rules with pio system install udev-rules.
  • Try a different USB cable or port; avoid hubs during flashing.

  • Random lockups or flicker:

  • Try a lower FFT size (e.g., 256) to reduce CPU load.
  • Ensure good USB power; low-quality cables can brown out under display backlight load.
  • Use SMOOTHING >= 0.65 to reduce redraw turbulence.

  • Library conflicts:

  • Ensure versions match platformio.ini.
  • Run pio run -t clean then rebuild.

Improvements

  • Performance and fidelity:
  • Increase FFT_SIZE (1024) for finer frequency resolution; adjust bar aggregation accordingly. Note: higher FFT size means higher CPU and latency.
  • Use a Hann or Blackman-Harris window. Currently Hamming is configured; switch by changing FFT.Windowing type.
  • Implement double buffering and partial redraw to minimize flicker (draw only deltas).

  • Visual polish:

  • Add peak hold indicators per bar (decay over time).
  • Add color gradient per frequency band (blues for lows, reds for highs).
  • Show labels for frequency axis (e.g., 100 Hz, 1 kHz, 5 kHz) using small text.

  • Audio handling:

  • Implement AGC (automatic gain control) to maintain visible bars across varying input levels.
  • Use A-weighting or simple equalization to match human loudness perception.

  • Configuration menu:

  • Add a simple UI to switch FFT size, smoothing, and color scheme using buttons or serial commands.

  • Data logging:

  • Stream bar magnitudes over serial for analysis (CSV) and plot externally.

  • Power and thermal:

  • Dim the backlight via a transistor/PWM if your ILI9341 breakout exposes LED control and needs dimming.

  • Use onboard sensors:

  • The Nano RP2040 Connect includes an IMU; tilt-based UI for switching modes can be added.
  • It also has a built-in PDM microphone (not used in this project). You could implement a mode switch between INMP441 (I2S) and onboard PDM mic with compile-time flags.

Final Checklist

  • Materials:
  • Arduino Nano RP2040 Connect present and recognized over USB.
  • INMP441 powered at 3.3V; L/R tied to GND.
  • ILI9341 wired to SPI and control pins as specified.

  • Wiring integrity:

  • All grounds common.
  • I2S: BCLK→D2, LRCLK→D3, SD→D6. Short, tidy wires.
  • SPI: SCK→D13, MOSI→D11, MISO→D12, CS→D10, DC→D9, RST→D4.

  • Software:

  • PlatformIO installed and pio --version works.
  • platformio.ini matches provided content; library versions pinned.
  • Code placed at src/main.cpp without syntax alterations.

  • Build/flash:

  • pio run -e nano_rp2040_connect builds without errors.
  • Upload via pio run -e nano_rp2040_connect -t upload or manual UF2 copy.

  • Runtime validation:

  • Serial monitor at 115200 prints status.
  • TFT displays smooth, responsive spectrum bars that react to sound.
  • No persistent flicker, lock-ups, or power brownouts.

With this advanced setup, you’ve built a compact, real-time I2S spectrum visualizer that leverages the RP2040’s capability, PlatformIO’s reproducibility, and widely available display and audio modules.

Find this product and/or books on this topic on Amazon

Go to Amazon

As an Amazon Associate, I earn from qualifying purchases. If you buy through this link, you help keep this project running.

Quick Quiz

Question 1: What is the primary objective of the tutorial?


Question 2: Which microcontroller is used in this project?


Question 3: What type of microphone is used in the project?


Question 4: Which display type is utilized for rendering FFT bars?


Question 5: What programming language is primarily used in this tutorial?


Question 6: What is the purpose of PlatformIO in this project?


Question 7: Which operating systems are mentioned as prerequisites?


Question 8: What is required to connect the Arduino Nano RP2040 Connect?


Question 9: What do Linux users need to install for PlatformIO?


Question 10: Which command is used to verify the PlatformIO system information?


Carlos Núñez Zorrilla
Electronics & Computer Engineer

Telecommunications Electronics Engineer and Computer Engineer (official degrees in Spain).

Follow me:


Practical case: RFID+MQTT on Arduino Uno R4 WiFi+MFRC522

Practical case: RFID+MQTT on Arduino Uno R4 WiFi+MFRC522 — hero

Objective and use case

What you’ll build: An RFID-driven inventory system that reads tags with an MFRC522, indicates state on a WS2812B LED strip, and publishes inventory state and events to an MQTT broker from an Arduino Uno R4 WiFi using Arduino CLI.

Why it matters / Use cases

  • Track inventory in real-time by scanning RFID tags and updating the system instantly.
  • Utilize MQTT for efficient communication between the Arduino and a local broker, allowing for remote monitoring.
  • Provide visual feedback on inventory status through WS2812B LEDs, enhancing user interaction.
  • Implement a reliable solution for managing stock levels in retail or warehouse environments.
  • Enable automated alerts for low stock or inventory discrepancies via MQTT messages.

Expected outcome

  • Real-time inventory updates with less than 1 second latency between RFID scan and MQTT publish.
  • Successful retention of state messages for each RFID tag published to the MQTT broker.
  • Visual confirmation of Wi-Fi/MQTT connection status through LED color changes.
  • Ability to handle up to 100 packets/s for inventory updates without data loss.
  • Validation of end-to-end functionality using command-line tools with 100% success rate in test scenarios.

Audience: Advanced users; Level: Intermediate to advanced.

Architecture/flow: Arduino Uno R4 WiFi with MFRC522 reads RFID tags, processes data, and communicates with MQTT broker while providing feedback via WS2812B LEDs.

Hands-on Advanced Project: RFID Inventory over MQTT with Arduino Uno R4 WiFi + MFRC522 + WS2812B

Objective: Build an RFID-driven inventory system that reads tags with an MFRC522, indicates state on a WS2812B LED strip, and publishes inventory state and events to an MQTT broker from an Arduino Uno R4 WiFi using Arduino CLI (no GUI).

You will:
– Read and toggle inventory state for RFID tags.
– Publish retained state per tag and event messages to an MQTT broker.
– Use WS2812B LEDs as feedback for Wi-Fi/MQTT status and scan events.
– Validate end-to-end behavior with command-line tools.

This walkthrough is written for advanced users who want a precise, repeatable setup using CLI tooling, versioned libraries, and reliable wiring logic.


Prerequisites

  • Operating system:
  • Linux (Ubuntu/Debian), macOS, or Windows 10/11.
  • Arduino CLI installed and available in PATH:
  • Install instructions: https://arduino.github.io/arduino-cli/latest/installation/
  • USB data cable (USB-A to USB-C or USB-A to USB-B micro/mini depending on adapter; Uno R4 WiFi uses USB-C).
  • Local MQTT broker:
  • Option A: Install Mosquitto locally.
  • Option B: Run Mosquitto via Docker.
  • Basic familiarity with:
  • Terminal commands.
  • Arduino sketches and libraries.
  • MQTT topics and retained messages.

Driver notes:
– Arduino Uno R4 WiFi enumerates as a standard CDC/ACM serial device. On Windows, it appears under “Ports (COM & LPT)” with no extra driver required. On macOS/Linux it appears as /dev/tty.usbmodem/ttyACM.


Materials (exact model plus supporting parts)

Required:
– Microcontroller: Arduino Uno R4 WiFi (model name: “UNO R4 WiFi”)
– RFID reader: MFRC522 (breakout board “RFID-RC522 13.56 MHz” using MFRC522 IC)
– Addressable LEDs: WS2812B LED strip or stick (5 V, e.g., 8 LEDs)
– Logic-level shifter (4-channel, BSS138-based) for 5 V ↔ 3.3 V SPI signals to MFRC522
– 330 Ω resistor for WS2812B data line (recommended)
– 1000 µF electrolytic capacitor (≥6.3 V) across LED 5 V power rails (recommended for stability)
– Breadboard and jumper wires
– Optional: External 5 V supply if driving many LEDs (≥1 A for 30+ LEDs)

Notes:
– The MFRC522 board is a 3.3 V device. Many breakout boards do not have onboard level shifting. Always level-shift 5 V MCU outputs (SS/SDA, SCK, MOSI, RST) down to 3.3 V to avoid damaging the MFRC522. MISO from MFRC522 to Uno R4 WiFi can be connected directly (3.3 V → 5 V tolerant input).
– Uno R4 WiFi logic is 5 V. WS2812B operates at 5 V logic and power.


Setup/Connection

Follow the pin mapping in the table. Keep wires short for SPI and WS2812B data. Place the 1000 µF capacitor across the LED 5 V and GND near the strip. Insert a 330 Ω series resistor on the WS2812B data line.

Pin Mapping and Power

  • Use 3.3 V to power the MFRC522 module.
  • Level shift these MCU outputs down to 3.3 V: D10 (SS/SDA), D11 (MOSI), D13 (SCK), D9 (RST).
  • MISO (D12) can be direct (3.3 V output) into the Uno R4 WiFi.

Table: Connection summary

Function Arduino Uno R4 WiFi Pin Level-Shift? MFRC522 Pin WS2812B Notes
Power to MFRC522 3.3 V, GND N/A 3.3V, GND N/A Do not power MFRC522 from 5 V.
MFRC522 Reset D9 Yes (to 3.3) RST N/A Use BSS138 channel.
MFRC522 SS/SDA (select) D10 Yes (to 3.3) SDA(SS) N/A Use BSS138 channel.
SPI MOSI D11 Yes (to 3.3) MOSI N/A Use BSS138 channel.
SPI MISO D12 No (3.3 V→5V tolerant) MISO N/A Direct wire.
SPI SCK D13 Yes (to 3.3) SCK N/A Use BSS138 channel.
WS2812B Data D6 via 330 Ω No (5 V) DIN DIN Add 330 Ω in series close to LED input.
WS2812B Power 5 V, GND N/A 5V, GND 5V,GND Add 1000 µF cap across 5 V–GND near LEDs.

Additional guidance:
– Tie all grounds together (Uno GND, MFRC522 GND, WS2812B GND, and external 5 V ground if used).
– If powering many LEDs from an external 5 V supply, connect the grounds (common ground) and do not draw high LED current from the Uno’s 5 V pin.


Full Code (Arduino Sketch)

Save as rfid-inventory-mqtt/rfid-inventory-mqtt.ino

/*
  rfid-inventory-mqtt.ino
  Device: Arduino Uno R4 WiFi + MFRC522 + WS2812B
  Purpose: Toggle inventory presence per RFID tag and publish over MQTT with retained state.
  Feedback: WS2812B LED effects indicate Wi-Fi/MQTT status and scan results.

  Libraries:
    - WiFiS3
    - ArduinoMqttClient
    - MFRC522
    - Adafruit NeoPixel
*/

#include <SPI.h>
#include <MFRC522.h>
#include <WiFiS3.h>
#include <ArduinoMqttClient.h>
#include <Adafruit_NeoPixel.h>

// -------------------- User Config --------------------
const char* WIFI_SSID = "YOUR_SSID";
const char* WIFI_PASS = "YOUR_PASSWORD";

// MQTT Broker (local LAN broker recommended for validation)
const char* MQTT_HOST = "192.168.1.100"; // change to your broker IP or hostname
const uint16_t MQTT_PORT = 1883;

// MQTT topic base
const char* TOPIC_BASE_STATES = "inventory/states/"; // retained per UID: present/absent
const char* TOPIC_EVENTS = "inventory/events";       // event stream: JSON payload

// LEDs: WS2812B
constexpr uint8_t LED_PIN = 6;
constexpr uint16_t LED_COUNT = 8; // adjust to match your strip/stick
constexpr uint8_t LED_BRIGHTNESS = 24; // be conservative

// MFRC522 pins (SPI HW pins are fixed: 11 MOSI, 12 MISO, 13 SCK)
constexpr uint8_t RFID_SS_PIN = 10;
constexpr uint8_t RFID_RST_PIN = 9;

// Debounce time to ignore rapid repeated scans of same tag (ms)
constexpr uint32_t SCAN_DEBOUNCE_MS = 1000;

// -------------------- Globals --------------------
MFRC522 mfrc522(RFID_SS_PIN, RFID_RST_PIN);

Adafruit_NeoPixel pixels(LED_COUNT, LED_PIN, NEO_GRB + NEO_KHZ800);

// Wi-Fi + MQTT
WiFiClient wifiClient;
MqttClient mqttClient(wifiClient);

// Derived clientId from MAC
char g_clientId[48] = {0};

// Simple inventory table
struct TagEntry {
  char uid[21];        // up to 20 hex chars + null (supports up to 10 bytes UID; MFRC522 typically 4 or 7)
  bool present;
  uint32_t lastSeenMs; // for debounce
};
constexpr size_t MAX_TAGS = 50;
TagEntry g_tags[MAX_TAGS];
size_t g_tagCount = 0;

// A tiny queue for messages to retry when MQTT is disconnected
struct Msg {
  char topic[64];
  char payload[128];
  bool retained;
};
constexpr size_t MAX_QUEUE = 10;
Msg g_queue[MAX_QUEUE];
size_t g_qHead = 0, g_qTail = 0;

// -------------------- Utility Functions --------------------
void ledSetAll(uint8_t r, uint8_t g, uint8_t b) {
  for (uint16_t i = 0; i < LED_COUNT; i++) {
    pixels.setPixelColor(i, pixels.Color(r, g, b));
  }
  pixels.show();
}

void ledFlash(uint8_t r, uint8_t g, uint8_t b, uint16_t onMs = 100, uint16_t offMs = 100, uint8_t times = 1) {
  for (uint8_t t = 0; t < times; t++) {
    ledSetAll(r, g, b);
    delay(onMs);
    ledSetAll(0, 0, 0);
    delay(offMs);
  }
}

void makeClientIdFromMac() {
  byte mac[6];
  if (WiFi.macAddress(mac) == 0) {
    snprintf(g_clientId, sizeof(g_clientId), "uno-r4wifi-%lu", (unsigned long)millis());
  } else {
    snprintf(g_clientId, sizeof(g_clientId), "uno-r4wifi-%02X%02X%02X%02X%02X%02X",
             mac[0], mac[1], mac[2], mac[3], mac[4], mac[5]);
  }
}

void uidToHex(const MFRC522::Uid& uid, char* outHex, size_t outLen) {
  // Convert up to uid.size bytes to hex string without separators
  size_t pos = 0;
  for (byte i = 0; i < uid.size && pos + 2 < outLen; i++) {
    pos += snprintf(outHex + pos, outLen - pos, "%02X", uid.uidByte[i]);
  }
  outHex[pos] = '\0';
}

int findTagIndex(const char* uidHex) {
  for (size_t i = 0; i < g_tagCount; i++) {
    if (strcmp(g_tags[i].uid, uidHex) == 0) return (int)i;
  }
  return -1;
}

bool recentlyScanned(const char* uidHex) {
  int idx = findTagIndex(uidHex);
  if (idx < 0) return false;
  return (millis() - g_tags[idx].lastSeenMs) < SCAN_DEBOUNCE_MS;
}

void setInventoryStateAndPublish(const char* uidHex, bool present) {
  // Update/insert in table
  int idx = findTagIndex(uidHex);
  if (idx < 0 && g_tagCount < MAX_TAGS) {
    idx = (int)g_tagCount++;
    strncpy(g_tags[idx].uid, uidHex, sizeof(g_tags[idx].uid) - 1);
    g_tags[idx].uid[sizeof(g_tags[idx].uid) - 1] = '\0';
    g_tags[idx].present = present;
  } else if (idx >= 0) {
    g_tags[idx].present = present;
  }
  if (idx >= 0) g_tags[idx].lastSeenMs = millis();

  // Topics
  char topicState[96];
  snprintf(topicState, sizeof(topicState), "%s%s", TOPIC_BASE_STATES, uidHex);

  // Payloads
  const char* stateStr = present ? "present" : "absent";

  // Publish retained state
  bool pubOk = false;
  if (mqttClient.connected()) {
    mqttClient.beginMessage(topicState, /*retained=*/true, /*qos=*/0);
    mqttClient.print(stateStr);
    pubOk = mqttClient.endMessage();
  }
  if (!pubOk) {
    // Queue it
    size_t next = (g_qTail + 1) % MAX_QUEUE;
    if (next != g_qHead) {
      strncpy(g_queue[g_qTail].topic, topicState, sizeof(g_queue[g_qTail].topic) - 1);
      snprintf(g_queue[g_qTail].payload, sizeof(g_queue[g_qTail].payload), "%s", stateStr);
      g_queue[g_qTail].retained = true;
      g_qTail = next;
    }
  }

  // Event JSON
  char evtJson[160];
  snprintf(evtJson, sizeof(evtJson),
           "{\"client\":\"%s\",\"uid\":\"%s\",\"present\":%s,\"ts_ms\":%lu}",
           g_clientId, uidHex, present ? "true" : "false", (unsigned long)millis());

  pubOk = false;
  if (mqttClient.connected()) {
    mqttClient.beginMessage(TOPIC_EVENTS, /*retained=*/false, /*qos=*/0);
    mqttClient.print(evtJson);
    pubOk = mqttClient.endMessage();
  }
  if (!pubOk) {
    // Queue event non-retained
    size_t next = (g_qTail + 1) % MAX_QUEUE;
    if (next != g_qHead) {
      strncpy(g_queue[g_qTail].topic, TOPIC_EVENTS, sizeof(g_queue[g_qTail].topic) - 1);
      strncpy(g_queue[g_qTail].payload, evtJson, sizeof(g_queue[g_qTail].payload) - 1);
      g_queue[g_qTail].retained = false;
      g_qTail = next;
    }
  }
}

void flushQueue() {
  while (mqttClient.connected() && g_qHead != g_qTail) {
    Msg& m = g_queue[g_qHead];
    mqttClient.beginMessage(m.topic, m.retained, 0);
    mqttClient.print(m.payload);
    if (mqttClient.endMessage()) {
      g_qHead = (g_qHead + 1) % MAX_QUEUE;
    } else {
      break; // stop trying this loop
    }
  }
}

// -------------------- Connectivity --------------------
void ensureWifi() {
  if (WiFi.status() == WL_CONNECTED) return;

  ledSetAll(0, 0, 0);
  Serial.print(F("Connecting to Wi-Fi SSID="));
  Serial.println(WIFI_SSID);

  WiFi.disconnect();
  WiFi.begin(WIFI_SSID, WIFI_PASS);

  uint32_t start = millis();
  while (WiFi.status() != WL_CONNECTED) {
    ledSetAll(0, 0, 10); delay(80);
    ledSetAll(0, 0, 0);  delay(120);
    if (millis() - start > 15000) {
      Serial.println(F("Wi-Fi connect timeout, retrying..."));
      start = millis();
      WiFi.disconnect();
      WiFi.begin(WIFI_SSID, WIFI_PASS);
    }
  }
  Serial.print(F("Wi-Fi connected, IP: "));
  Serial.println(WiFi.localIP());
  ledFlash(0, 16, 0, 100, 50, 2); // double green flash
}

void ensureMqtt() {
  if (mqttClient.connected()) return;

  Serial.print(F("Connecting to MQTT broker "));
  Serial.print(MQTT_HOST);
  Serial.print(F(":"));
  Serial.println(MQTT_PORT);

  mqttClient.setId(g_clientId);
  mqttClient.setKeepAliveInterval(30);

  // Connect loop with indicator
  uint8_t tries = 0;
  while (!mqttClient.connect(MQTT_HOST, MQTT_PORT)) {
    tries++;
    Serial.print(F("MQTT connect failed, code="));
    Serial.println(mqttClient.connectError());
    ledSetAll(16, 4, 0); delay(120);
    ledSetAll(0, 0, 0);  delay(180);
    if (tries >= 5) {
      // Recheck Wi-Fi then retry connect
      ensureWifi();
      tries = 0;
    }
  }

  Serial.println(F("MQTT connected"));
  ledFlash(0, 16, 0, 80, 40, 3); // triple green flash on MQTT OK

  // Announce presence (non-retained event)
  char hello[128];
  snprintf(hello, sizeof(hello), "{\"client\":\"%s\",\"event\":\"online\",\"ts_ms\":%lu}",
           g_clientId, (unsigned long)millis());
  mqttClient.beginMessage(TOPIC_EVENTS, false, 0);
  mqttClient.print(hello);
  mqttClient.endMessage();

  // Push any queued messages
  flushQueue();
}

// -------------------- Setup/Loop --------------------
void setup() {
  Serial.begin(115200);
  delay(120);

  pixels.begin();
  pixels.setBrightness(LED_BRIGHTNESS);
  ledSetAll(0, 0, 0);

  // Start SPI & RFID
  SPI.begin();
  mfrc522.PCD_Init(RFID_SS_PIN, RFID_RST_PIN);
  // Optionally tune antenna gain for better read range
  // mfrc522.PCD_SetAntennaGain(mfrc522.RxGain_max);

  // Wi-Fi + MQTT
  ensureWifi();
  makeClientIdFromMac();
  ensureMqtt();

  Serial.println(F("RFID Inventory MQTT ready."));
}

void loop() {
  // Maintain connectivity
  if (WiFi.status() != WL_CONNECTED) {
    ensureWifi();
  }
  if (!mqttClient.connected()) {
    ensureMqtt();
  }
  mqttClient.poll();

  // RFID read logic
  if (!mfrc522.PICC_IsNewCardPresent()) {
    delay(5);
    return;
  }
  if (!mfrc522.PICC_ReadCardSerial()) {
    delay(5);
    return;
  }

  // Convert UID to hex string
  char uidHex[21] = {0};
  uidToHex(mfrc522.uid, uidHex, sizeof(uidHex));
  Serial.print(F("Tag UID: "));
  Serial.println(uidHex);

  if (!recentlyScanned(uidHex)) {
    // Toggle presence
    int idx = findTagIndex(uidHex);
    bool newState = true;
    if (idx >= 0) {
      newState = !g_tags[idx].present; // toggle
    } else {
      newState = true; // first time -> present
    }
    setInventoryStateAndPublish(uidHex, newState);

    // Visual feedback
    if (newState) {
      ledFlash(0, 20, 0, 70, 50, 2); // present -> green flashes
    } else {
      ledFlash(20, 8, 0, 70, 50, 2); // absent -> amber flashes
    }
  } else {
    Serial.println(F("Duplicate scan ignored (debounced)."));
    ledFlash(0, 0, 16, 40, 40, 1);
  }

  // Clean up RFID state machine
  mfrc522.PICC_HaltA();
  mfrc522.PCD_StopCrypto1();

  // Periodically flush queued messages
  flushQueue();
}

What this sketch does:
– Connects to Wi-Fi and MQTT, retrying with LED feedback.
– Reads RFID tags from MFRC522; builds the UID hex string (uppercase, no separators).
– Maintains an in-memory inventory table of up to 50 tags.
– Toggle behavior: First scan sets present=true; next scan toggles to absent; and so on.
– Publishes:
– Retained per-tag state to inventory/states/ with payload present or absent.
– Non-retained event JSON to inventory/events with client ID, UID, boolean present, and ts_ms.
– LED feedback:
– Blue pulses when connecting Wi-Fi/MQTT, green flashes on successful connections, green/amber flashes for presence/absence changes, blue flash for ignored duplicate.


Build/Flash/Run Commands (Arduino CLI)

We will use Arduino CLI with the correct core and FQBN for Uno R4 WiFi: arduino:renesas_uno:unor4wifi

Commands below are cross-platform; replace the serial port accordingly.

mkdir -p ~/projects/rfid-inventory-mqtt
cd ~/projects/rfid-inventory-mqtt

# 2) Initialize Arduino CLI (first time) and update cores index
arduino-cli config init
arduino-cli core update-index

# 3) Install the Uno R4 core (Renesas)
arduino-cli core install arduino:renesas_uno

# 4) Install required libraries (latest versions)
arduino-cli lib install "WiFiS3"
arduino-cli lib install "ArduinoMqttClient"
arduino-cli lib install "MFRC522"
arduino-cli lib install "Adafruit NeoPixel"

# 5) Place the sketch file
#    Save the provided code as: rfid-inventory-mqtt/rfid-inventory-mqtt.ino
#    (Ensure the folder name matches the .ino filename.)

# 6) Identify your board's serial port
arduino-cli board list

# Example outputs:
# Port         Type              Board Name       FQBN
# /dev/ttyACM0 Serial Port (USB) Arduino Uno R4 WiFi arduino:renesas_uno:unor4wifi
# COM5         Serial Port (USB) Arduino Uno R4 WiFi arduino:renesas_uno:unor4wifi

# 7) Compile for Uno R4 WiFi
arduino-cli compile --fqbn arduino:renesas_uno:unor4wifi ~/projects/rfid-inventory-mqtt

# 8) Upload (replace port as detected)
arduino-cli upload -p /dev/ttyACM0 --fqbn arduino:renesas_uno:unor4wifi ~/projects/rfid-inventory-mqtt

# 9) Open serial monitor (115200 baud) for logs
arduino-cli monitor -p /dev/ttyACM0 -c 115200

Notes:
– If upload fails, double-press the Uno R4 WiFi’s reset button to enter the bootloader, then retry upload.
– On Windows, replace /dev/ttyACM0 with COMx (e.g., COM5).


Step-by-step Validation

We’ll validate end-to-end device, network, and MQTT behavior. Use physical tags (MIFARE Classic 1K/4K, NTAG213/215/216) compatible with MFRC522.

1) Prepare the MQTT broker

Option A: Local install (Debian/Ubuntu):

sudo apt-get update
sudo apt-get install -y mosquitto mosquitto-clients
sudo systemctl enable --now mosquitto
# Allow local test without auth (default on many distros for localhost).

Option B: Docker (cross-platform):

docker run -it --rm --name mosq -p 1883:1883 eclipse-mosquitto:2

If you need anonymous access for LAN, you can run a quick config (test purposes only):

# mosquitto.conf (test only!)
# listener 1883 0.0.0.0
# allow_anonymous true

2) Subscribe to topics for live observation

Open a terminal to subscribe:

# Show all inventory messages verbosely
mosquitto_sub -h 192.168.1.100 -p 1883 -t 'inventory/#' -v

Replace the broker IP/host to match your setup.

3) Power and monitor the device

  • Connect the Uno R4 WiFi via USB and open the Arduino CLI monitor:
  • arduino-cli monitor -p /dev/ttyACM0 -c 115200
  • Watch for:
  • Wi-Fi connect logs and IP shown.
  • MQTT connected and “RFID Inventory MQTT ready.” line.

LED indicators:
– On connecting: brief blue pulses.
– After MQTT connection: triple green flash.

4) Scan a tag (first time: present=true)

  • Approach a tag to the MFRC522 antenna.
  • CLI monitor output should show a Tag UID line.
  • The LEDs should flash green.
  • In the subscriber terminal, expect two messages:
  • inventory/states/ present
  • inventory/events {«client»:»uno-r4wifi-…»,»uid»:»«,»present»:true,»ts_ms»:…}

Also verify that the state topic is retained:
– Resubscribe (new terminal):
– mosquitto_sub -h 192.168.1.100 -p 1883 -t ‘inventory/states/#’ -v
– You should immediately see the last published retained state for that UID.

5) Scan the same tag again (toggle: present=false)

  • Scan the same UID a second time.
  • LEDs flash amber (absent).
  • Subscriber shows:
  • inventory/states/ absent (retained)
  • inventory/events {…,»present»:false,…}

6) Check duplicate debouncing

  • Rapidly tap the same tag again within 1 second.
  • The serial monitor shows “Duplicate scan ignored (debounced).”
  • LED shows a single blue flash.
  • MQTT should not receive new messages for that duplicate tap.

7) Test with two or more different tags

  • Repeat steps 4–6 with additional tags.
  • Observe distinct topics:
  • inventory/states/04A1B2C3
  • inventory/states/0BFFEED1
  • Each state topic is retained separately.

8) Power-cycle the Arduino and re-subscribe

  • Reset or unplug/replug the Uno R4 WiFi.
  • Once it reconnects, open a fresh subscriber:
  • mosquitto_sub -h 192.168.1.100 -t ‘inventory/states/#’ -v
  • You should see retained states from the broker without any scans.
  • Scan a tag; confirm state toggles and events publish correctly again.

Troubleshooting

Common issues and fixes:

  • No Wi-Fi connection:
  • Check SSID/password in code (case-sensitive).
  • Verify 2.4 GHz network; ESP32-S3-based radio (via WiFiS3) is 2.4 GHz only.
  • Ensure DHCP is enabled and the device obtains an IP address.
  • Try moving closer to the AP; reduce interference.

  • MQTT connect fails:

  • Confirm broker is reachable from your PC (telnet 192.168.1.100 1883).
  • Verify firewall rules to allow TCP/1883 on your broker host.
  • Confirm broker configuration allows connections (anonymous or username/password).
  • If using a hostname, ensure DNS resolves on your network; try using raw IP.

  • RFID not reading:

  • Power MFRC522 from 3.3 V pin, not 5 V.
  • Ensure level shifting on SS (D10), RST (D9), MOSI (D11), SCK (D13). MISO to D12 is direct.
  • Antenna orientation: place the card flat on the coil area; MFRC522 has limited range (a few cm).
  • Reduce potential interference: keep WS2812B data and power wires away from the reader antenna loop.
  • As a hardware test, you can compile and run the MFRC522 “DumpInfo” example quickly to confirm wiring:

    • arduino-cli compile –fqbn arduino:renesas_uno:unor4wifi –libraries «MFRC522»
    • arduino-cli upload -p /dev/ttyACM0 –fqbn arduino:renesas_uno:unor4wifi
  • WS2812B shows wrong colors or flickers:

  • Confirm you added a 330 Ω resistor in series on the data line near DIN.
  • Ensure a solid ground reference between Uno and LED strip.
  • Add the 1000 µF capacitor across 5 V and GND at the LED strip.
  • Lower brightness to reduce current spikes (LED_BRIGHTNESS).
  • Use a dedicated 5 V supply if driving many LEDs. Always common the grounds.

  • Serial port not detected:

  • Try a different USB cable (data-capable).
  • On Windows, check Device Manager for COM port changes.
  • Double-press reset to enter bootloader and then upload.

  • Memory/queue overflows:

  • If many scans occur while MQTT is disconnected, the small queue can overflow and drop events.
  • Consider reconnecting the broker or enlarging the queue (increase MAX_QUEUE) with caution.

Improvements

  • Security (TLS):
  • Use WiFiSSLClient with ArduinoMqttClient for MQTT over TLS (port 8883).
  • Broker must have a proper CA; memory constraints apply. Test with minimally sized CA and short topic names.
  • Authentication:
  • Configure broker to require username/password; use mqttClient.setUsernamePassword(«user»,»pass»);
  • Time synchronization:
  • Add NTP client to include real timestamps in events (ts_iso8601). Requires library and time sync on start.
  • Persistent inventory:
  • Persist state to non-volatile storage (e.g., emulated EEPROM or dedicated flash if supported) to preserve presence across reboots. Carefully manage write wear and atomics.
  • More expressive topics:
  • Publish to topics like inventory///states/ for multi-site deployments.
  • QoS tuning:
  • ArduinoMqttClient can publish with QoS 1 in many cases; adjust if your broker and library build supports it.
  • Health checks:
  • Publish periodic heartbeat to inventory/clients//status with online/offline retained last-will message.
  • Command/control:
  • Subscribe to inventory/cmd/ for remote reset, LED test, or rescan commands.

Final Checklist

  • Wiring:
  • MFRC522 powered at 3.3 V.
  • Level shifting used on D9/D10/D11/D13 to MFRC522.
  • MISO wired directly from MFRC522 to D12.
  • WS2812B DIN on D6 via 330 Ω; 1000 µF cap on 5 V rail near LEDs.
  • All grounds tied together.

  • Software:

  • Arduino CLI installed and core arduino:renesas_uno set up.
  • Libraries installed: WiFiS3, ArduinoMqttClient, MFRC522, Adafruit NeoPixel.
  • Sketch saved in rfid-inventory-mqtt/rfid-inventory-mqtt.ino.

  • Build and upload:

  • Compiled with: arduino:renesas_uno:unor4wifi FQBN.
  • Uploaded to correct serial port.
  • Serial monitor at 115200 baud shows connection logs.

  • MQTT validation:

  • Broker accessible at MQTT_HOST:MQTT_PORT.
  • Subscriber shows retained states per UID after scans.
  • Event JSON published on inventory/events on each toggle.

  • Behavior:

  • First scan: present=true (green flashes).
  • Second scan: present=false (amber flashes).
  • Rapid duplicate scans ignored for ~1 s (blue single flash).

If every item in this checklist is satisfied, your rfid-inventory-mqtt solution on Arduino Uno R4 WiFi is operational and ready for integration with dashboards, databases, or automation flows.


Helpful Commands (Reference)

Broker operations and subscriptions:

# Start mosquitto via Docker (ephemeral)
docker run -it --rm --name mosq -p 1883:1883 eclipse-mosquitto:2

# Subscribe to all inventory topics
mosquitto_sub -h 192.168.1.100 -t 'inventory/#' -v

# Inspect retained states only
mosquitto_sub -h 192.168.1.100 -t 'inventory/states/#' -v

# Publish a test event (broker/local testing)
mosquitto_pub -h 192.168.1.100 -t 'inventory/events' -m '{"client":"test","event":"hello"}'

With this setup, you can now integrate the rfid-inventory-mqtt stream into Node-RED, Home Assistant, Grafana, or your own backend, using retained per-tag state for reliable point-in-time inventory and events for real-time activity.

Find this product and/or books on this topic on Amazon

Go to Amazon

As an Amazon Associate, I earn from qualifying purchases. If you buy through this link, you help keep this project running.

Quick Quiz

Question 1: What is the primary objective of the project?


Question 2: Which microcontroller is used in this project?


Question 3: What type of LED strip is used for feedback in the project?


Question 4: What protocol is used to publish inventory state and events?


Question 5: Which operating systems are mentioned as prerequisites?


Question 6: What is required to connect the Arduino Uno R4 WiFi?


Question 7: What is the purpose of the Mosquitto broker in this project?


Question 8: What type of RFID reader is used in this project?


Question 9: What is required for validating end-to-end behavior?


Question 10: What is the installation link for Arduino CLI?


Carlos Núñez Zorrilla
Electronics & Computer Engineer

Telecommunications Electronics Engineer and Computer Engineer (official degrees in Spain).

Follow me:


Practical case: Arduino MKR WAN 1310 LoRaWAN water level

Practical case: Arduino MKR WAN 1310 LoRaWAN water level — hero

Objective and use case

What you’ll build: This project involves creating a LoRa water level telemetry system using the Arduino MKR WAN 1310, JSN-SR04T ultrasonic sensor, and INA219 power monitor for real-time water level monitoring.

Why it matters / Use cases

  • Remote monitoring of water levels in agricultural fields to optimize irrigation schedules.
  • Real-time water level tracking in reservoirs to prevent overflow and manage water resources effectively.
  • Deployment in flood-prone areas for early warning systems to alert communities of rising water levels.
  • Integration with smart city infrastructure for enhanced urban water management.

Expected outcome

  • Real-time transmission of water level data with latencies under 5 seconds.
  • Power consumption metrics reported by INA219, aiming for less than 50mA during active sensing.
  • Accurate water level measurements with a resolution of 1 cm, transmitted via LoRaWAN.
  • Successful data reception at a distance of up to 10 km in rural environments.

Audience: Engineers and developers interested in IoT applications; Level: Intermediate

Architecture/flow: Arduino MKR WAN 1310 collects data from JSN-SR04T, processes it, and sends it via LoRaWAN, while INA219 monitors power usage.

Advanced Practical Case: LoRa Water Level Telemetry with Arduino MKR WAN 1310 + JSN-SR04T + INA219

This hands-on build turns an Arduino MKR WAN 1310 into a robust LoRaWAN water-level telemetry node. It uses a waterproof ultrasonic sensor (JSN-SR04T) to measure distance to the water surface, converts that to level/volume, and transmits metrics via LoRaWAN. An INA219 current/power monitor is added to report sensor/system power usage for field diagnostics. You will compile and flash the sketch using Arduino CLI, not the GUI, with a clean, reproducible command sequence.

The project is engineered for real-world deployment: it includes filtering, calibration, low-power sleep, and a compact binary payload with a working decoder snippet for The Things Stack (TTS/TTN).

Device model: Arduino MKR WAN 1310 + JSN-SR04T + INA219
Objective: lora-water-level-telemetry


Prerequisites

  • Operating system: Linux/macOS/Windows (64-bit)
  • Installed tools:
  • Arduino CLI 0.34.2 or newer
  • Bash/PowerShell to run commands
  • A serial terminal (Arduino CLI monitor or screen)
  • LoRaWAN network access (e.g., The Things Stack Community or Enterprise)
  • An application and an OTAA device with JoinEUI/AppEUI and AppKey
  • Correct frequency plan/region for your deployment (e.g., EU868, US915)
  • Basic familiarity with:
  • Arduino pin I/O and I2C
  • LoRaWAN concepts: OTAA join, ADR, data rate
  • Safety handling for 5V signals on 3.3V MCUs (level shifting)

Driver notes:
– Arduino MKR WAN 1310 uses native USB (CDC). On Windows, install the “Arduino SAMD Boards” driver when prompted or via the Arduino IDE package if needed. No CP210x/CH34x drivers are required.


Materials (Exact Models)

  • 1x Arduino MKR WAN 1310 (exact model)
  • 1x JSN-SR04T waterproof ultrasonic distance sensor (v2 or v3; TTL variant)
  • 1x INA219 DC current/power monitor (Adafruit or equivalent breakout; default I2C address 0x40)
  • 1x 3.7V LiPo battery (optional but recommended for field)
  • 1x 5V source from MKR WAN 1310 5V pin (provided by USB/VIN; used to power JSN-SR04T)
  • Resistors for level shifting JSN-SR04T Echo line (exact values):
  • R1 = 10 kΩ (series from sensor Echo to MCU input node)
  • R2 = 20 kΩ (from MCU input node to GND)
  • Dupont wires and a small breadboard or terminal blocks
  • Outdoor-rated enclosure with cable glands (optional but recommended)
  • Antenna for the MKR WAN 1310’s LoRa radio (as supplied with the board)

Library versions (tested):
– arduino:samd core 1.8.13
– MKRWAN library 1.1.0
– ArduinoLowPower 1.2.2
– Adafruit INA219 1.2.1

Note: If your environment provides newer versions, they should still work; pinning these ensures reproducibility.


Setup/Connection

The MKR WAN 1310 is a 3.3V logic microcontroller. The JSN-SR04T requires 5V power and outputs a 5V Echo pulse. Do not connect the 5V Echo directly to the MKR pin. Use the resistor divider below.

Pin Planning

  • JSN-SR04T
  • VCC: 5V (from MKR 5V pin)
  • GND: GND
  • TRIG: MKR pin D6 (3.3V output is fine)
  • ECHO: MKR pin D7 via R1/R2 divider (5V to ~3.3V)
  • INA219 (I2C)
  • VIN+: 5V source side (from MKR 5V pin)
  • VIN-: Load side to JSN-SR04T VCC
  • SDA: MKR SDA (pin labeled SDA)
  • SCL: MKR SCL (pin labeled SCL)
  • GND: MKR GND
  • VCC: 3.3V (preferred) or 5V; Adafruit INA219 supports 3.3V logic, so tie to 3.3V for clean logic levels

Electrical Connections Table

Component Pin/Label Connects To Notes
MKR WAN 1310 5V INA219 VIN+ 5V supply path to sensor via INA219 shunt
INA219 VIN- JSN-SR04T VCC Measures current/power of the ultrasonic sensor
MKR WAN 1310 GND INA219 GND, JSN-SR04T GND Common ground
MKR WAN 1310 3.3V INA219 VCC Power the INA219 logic at 3.3V
MKR WAN 1310 SDA INA219 SDA I2C data
MKR WAN 1310 SCL INA219 SCL I2C clock
MKR WAN 1310 D6 JSN-SR04T TRIG Trigger output to sensor
MKR WAN 1310 D7 JSN-SR04T ECHO via divider R1=10 kΩ from ECHO to D7 node; R2=20 kΩ from D7 node to GND; ensures ~3.3V at the MCU

Important:
– Place the INA219 shunt in series only with the JSN-SR04T VCC line; this allows measuring the sensor’s consumption without interfering with the MKR’s own power path.
– Ensure the MKR’s antenna is attached and outside any metal enclosure before joining the network.
– Keep the JSN-SR04T face unobstructed and at least 20 cm from walls for accurate readings.


Full Code

We will use a small project layout:

  • project folder: lora-water-level-telemetry/
  • lora-water-level-telemetry.ino (main)
  • secrets.h (your LoRaWAN keys; not committed)

The payload format:
– Byte 0..1: distance_mm (uint16, 0–65535)
– Byte 2..3: bus_mV (uint16, INA219 bus voltage in millivolts)
– Byte 4..5: current_mA_x10 (uint16, INA219 current in 0.1 mA units)
– Byte 6..7: volume_liters (uint16, computed volume; 1 L resolution)
– Byte 8: level_percent (uint8, 0–100)

Adjust parameters in the code for your installation: tank height, sensor offset, calibration, region, and join keys.

secrets.h (template; create and fill with your keys)

// secrets.h - do not commit
#pragma once

// Set your LoRaWAN region in the main sketch (e.g., "EU868", "US915")

// OTAA credentials from The Things Stack (TTS/TTN)
static const char* APP_EUI = "70B3D57EDXXXXXXX"; // also called JoinEUI (hex string, no spaces)
static const char* APP_KEY = "5C8A...F2B";       // 16-byte hex string, 32 hex chars

// Optional: if your network requires DevEUI to be set manually, define it:
static const char* DEV_EUI = ""; // leave empty to use onboard value if supported

lora-water-level-telemetry.ino

/*
  LoRa Water Level Telemetry
  Hardware: Arduino MKR WAN 1310 + JSN-SR04T + INA219
  Features:
    - JSN-SR04T distance measurement with median filtering
    - Tank geometry conversion to level (%) and volume (L)
    - INA219 current/power of the JSN sensor line
    - LoRaWAN OTAA join and uplink payload
    - Low power sleep between measurements
*/

#include <MKRWAN.h>
#include <ArduinoLowPower.h>
#include <Wire.h>
#include <Adafruit_INA219.h>
#include "secrets.h"

// ---------------------- Region and LoRaWAN ----------------------
String REGION = "EU868"; // set to "EU868", "US915", "AS923", etc.
LoRaModem modem;

// LoRa settings
const bool USE_ADR = true;
const bool CONFIRMED = false;  // use unconfirmed to save airtime unless you need ACK
int DR = 3;                    // data rate; depends on region, tune as needed

// ---------------------- Sensor Pins -----------------------------
const int PIN_TRIG = 6;  // D6
const int PIN_ECHO = 7;  // D7 via 10k/20k divider

// ---------------------- Timing ------------------------------
const uint32_t MEAS_INTERVAL_SEC = 300; // 5 minutes
const uint8_t SAMPLES = 7;              // median of 7 for robustness

// ---------------------- Tank Calibration --------------------
const float TANK_HEIGHT_MM = 2000.0f;    // distance from sensor face to tank bottom in mm
const float SENSOR_OFFSET_MM = 45.0f;    // dead zone/holder offset; subtract from measured distance
const float TANK_DIAMETER_MM = 1000.0f;  // cylindrical tank example
// Use a simple cylinder. For complex geometries, replace volume calculation.
float litersFromHeight(float waterHeightMm) {
  // Cylinder volume V = pi * r^2 * h; convert mm^3 to L
  const float r_mm = TANK_DIAMETER_MM / 2.0f;
  double mm3 = 3.14159265358979323846 * r_mm * r_mm * (double)waterHeightMm;
  return (float)(mm3 / 1e6); // 1e6 mm^3 per liter
}

// ---------------------- INA219 -------------------------------
Adafruit_INA219 ina219; // default address 0x40

// ---------------------- Utilities ----------------------------
static uint16_t clampU16(int32_t v) { if (v < 0) return 0; if (v > 65535) return 65535; return (uint16_t)v; }

uint32_t pulseInTimeout(uint8_t pin, uint8_t state, uint32_t timeout_us) {
  // Safe pulseIn with timeout
  return pulseIn(pin, state, timeout_us);
}

float measureDistanceMm() {
  // Trigger the JSN-SR04T and measure echo duration
  digitalWrite(PIN_TRIG, LOW);
  delayMicroseconds(3);
  digitalWrite(PIN_TRIG, HIGH);
  delayMicroseconds(12);
  digitalWrite(PIN_TRIG, LOW);

  // Echo timeout at e.g., 30 ms = ~5 m of range (speed of sound ~343 m/s)
  uint32_t duration = pulseInTimeout(PIN_ECHO, HIGH, 30000UL);
  if (duration == 0) return NAN;

  // Distance in cm: duration_us / 58.2; convert to mm
  float distance_mm = (float)duration / 58.2f * 10.0f;
  return distance_mm;
}

float medianOfSamples(uint8_t n) {
  float buf[15]; // up to 15 samples
  if (n > 15) n = 15;
  uint8_t count = 0;
  for (uint8_t i = 0; i < n; i++) {
    float d = measureDistanceMm();
    if (!isnan(d) && d > 30 && d < 6000) { // plausible gate
      buf[count++] = d;
    }
    delay(60);
  }
  if (count == 0) return NAN;
  // insertion sort
  for (uint8_t i = 1; i < count; i++) {
    float key = buf[i];
    int j = i - 1;
    while (j >= 0 && buf[j] > key) { buf[j+1] = buf[j]; j--; }
    buf[j+1] = key;
  }
  return buf[count / 2];
}

bool readINA219(float &busVolts, float &currentmA) {
  busVolts = ina219.getBusVoltage_V(); // bus voltage (V)
  currentmA = ina219.getCurrent_mA();  // current (mA)
  return true;
}

void sleepSeconds(uint32_t s) {
  // Sleep in 8s chunks due to library constraints
  while (s >= 8) { LowPower.sleep(8000); s -= 8; }
  if (s > 0) { LowPower.sleep(s * 1000); }
}

void setupSerial() {
  Serial.begin(115200);
  while (!Serial && millis() < 4000) { ; }
}

// ---------------------- Setup -------------------------------
void setup() {
  setupSerial();
  pinMode(PIN_TRIG, OUTPUT);
  pinMode(PIN_ECHO, INPUT);
  digitalWrite(PIN_TRIG, LOW);

  Wire.begin();
  if (!ina219.begin()) {
    Serial.println("INA219 not found. Check wiring.");
  } else {
    // Configure INA219 calibration; default is ~0.1 ohm shunt on breakout
    ina219.setCalibration_32V_2A();
  }

  // LoRa modem init
  if (!modem.begin(REGION)) {
    Serial.println("Failed to start LoRa modem. Check region/antenna.");
    while (1) { delay(1000); }
  }
  Serial.print("Modem version: "); Serial.println(modem.version());
  Serial.print("Device EUI: "); Serial.println(modem.deviceEUI());

  // ADR and DR
  modem.setADR(USE_ADR);
  if (!USE_ADR) modem.dataRate(DR);

  // OTAA join
  int connected = 0;
  if (strlen(DEV_EUI) > 0) {
    modem.setDevEUI(DEV_EUI);
  }
  Serial.println("Joining LoRaWAN...");
  connected = modem.joinOTAA(APP_EUI, APP_KEY);
  if (!connected) {
    Serial.println("Join failed. Retrying with a slow backoff...");
    for (int i = 0; i < 5 && !connected; i++) {
      delay(5000 * (i + 1));
      connected = modem.joinOTAA(APP_EUI, APP_KEY);
    }
  }
  if (!connected) {
    Serial.println("Join failed permanently. Check keys/region.");
    // You might still want to continue to allow offline validation.
  } else {
    Serial.println("Joined LoRaWAN.");
  }

  // Set low power mode for modem if supported
  modem.minPollInterval(60); // reduce network overhead
}

// ---------------------- Loop -------------------------------
void loop() {
  // Measure distance with median filtering
  float raw_mm = medianOfSamples(SAMPLES);
  float busV = NAN, curmA = NAN;
  readINA219(busV, curmA);

  float corrected_mm = raw_mm - SENSOR_OFFSET_MM;
  if (isnan(raw_mm) || corrected_mm < 0) corrected_mm = 0;

  // Convert to water height above bottom
  float height_mm = TANK_HEIGHT_MM - corrected_mm;
  if (height_mm < 0) height_mm = 0;
  if (height_mm > TANK_HEIGHT_MM) height_mm = TANK_HEIGHT_MM;

  float liters = litersFromHeight(height_mm);
  uint8_t level_pct = (uint8_t)((height_mm / TANK_HEIGHT_MM) * 100.0f + 0.5f);

  // Build payload
  uint8_t payload[9];
  uint16_t dist_u16 = clampU16((int32_t)(corrected_mm + 0.5f));
  uint16_t mv_u16 = clampU16((int32_t)(busV * 1000.0f + 0.5f));
  uint16_t cur_x10 = clampU16((int32_t)(curmA * 10.0f + 0.5f));
  uint16_t liters_u16 = clampU16((int32_t)(liters + 0.5f));

  payload[0] = (dist_u16 >> 8) & 0xFF;
  payload[1] = (dist_u16) & 0xFF;
  payload[2] = (mv_u16 >> 8) & 0xFF;
  payload[3] = (mv_u16) & 0xFF;
  payload[4] = (cur_x10 >> 8) & 0xFF;
  payload[5] = (cur_x10) & 0xFF;
  payload[6] = (liters_u16 >> 8) & 0xFF;
  payload[7] = (liters_u16) & 0xFF;
  payload[8] = level_pct;

  // Diagnostics to serial
  Serial.print("Raw(mm)="); Serial.print(raw_mm, 1);
  Serial.print(" Corrected(mm)="); Serial.print(corrected_mm, 1);
  Serial.print(" Height(mm)="); Serial.print(height_mm, 1);
  Serial.print(" Level(%)="); Serial.print(level_pct);
  Serial.print(" Volume(L)="); Serial.print(liters, 1);
  Serial.print(" BusV(V)="); Serial.print(busV, 3);
  Serial.print(" I(mA)="); Serial.println(curmA, 2);

  // Transmit
  int err = modem.beginPacket();
  if (err <= 0) {
    Serial.println("beginPacket failed");
  } else {
    modem.write(payload, sizeof(payload));
    err = modem.endPacket(CONFIRMED);
    if (err > 0) {
      Serial.println("Uplink OK");
    } else {
      Serial.print("Uplink failed ("); Serial.print(err); Serial.println(")");
    }
  }

  // Sleep to save power
  sleepSeconds(MEAS_INTERVAL_SEC);
}

Optional TTS/TTN payload formatter (JavaScript) for your application:

// The Things Stack (v3) Uplink Decoder
function decodeUplink(input) {
  const bytes = input.bytes;
  if (bytes.length < 9) {
    return { errors: ["payload too short"] };
  }
  const dist = (bytes[0] << 8) | bytes[1];
  const mv = (bytes[2] << 8) | bytes[3];
  const cur_x10 = (bytes[4] << 8) | bytes[5];
  const liters = (bytes[6] << 8) | bytes[7];
  const level = bytes[8];

  return {
    data: {
      distance_mm: dist,
      bus_mV: mv,
      current_mA: cur_x10 / 10.0,
      volume_l: liters,
      level_percent: level
    }
  };
}

Build/Flash/Run Commands

Use Arduino CLI with the correct FQBN for MKR WAN 1310: arduino:samd:mkrwan1310

On first use, install the core and libraries.

arduino-cli version

# 2) Configure Arduino CLI (create config if needed)
arduino-cli config init

# 3) Update index and install SAMD core for MKR WAN 1310
arduino-cli core update-index
arduino-cli core install arduino:samd@1.8.13

# 4) Install required libraries (pin versions for reproducibility)
arduino-cli lib install "MKRWAN@1.1.0"
arduino-cli lib install "ArduinoLowPower@1.2.2"
arduino-cli lib install "Adafruit INA219@1.2.1"

# 5) Create project folder structure
mkdir -p ~/projects/lora-water-level-telemetry
cd ~/projects/lora-water-level-telemetry

# 6) Place the two files:
#    - lora-water-level-telemetry.ino
#    - secrets.h
#    in the current directory.

# 7) Detect board and port
arduino-cli board list

# Example output:
# Port         Type              FQBN                       Core
# /dev/ttyACM0 Serial Port (USB) arduino:samd:mkrwan1310    arduino:samd
# On Windows this might be COM7, e.g., COM7

# 8) Compile
arduino-cli compile --fqbn arduino:samd:mkrwan1310 .

# 9) Upload (replace PORT accordingly)
arduino-cli upload -p /dev/ttyACM0 --fqbn arduino:samd:mkrwan1310 .

# 10) Open serial monitor at 115200 baud to watch logs
arduino-cli monitor -p /dev/ttyACM0 -c baudrate=115200

If you get permission errors on Linux for /dev/ttyACM0, add your user to the dialout group and re-login:
– sudo usermod -a -G dialout $USER


Step-by-step Validation

Follow these steps to verify each subsystem and the end-to-end telemetry.

1) Local serial diagnostics

  • Power the board via USB with the antenna attached.
  • Open the serial monitor:
  • arduino-cli monitor -p /dev/ttyACM0 -c baudrate=115200
  • On boot, you should see:
  • Modem version and Device EUI printed
  • “Joining LoRaWAN…” then “Joined LoRaWAN.” (if network reachable and keys are correct)
  • A measurement line every MEAS_INTERVAL_SEC seconds:
    • Raw(mm), Corrected(mm), Height(mm), Level(%), Volume(L), BusV(V), I(mA)
  • Move a flat object above the JSN-SR04T at known distances (e.g., 30 cm, 50 cm) and confirm that:
  • Raw and Corrected distances match expectations within ±1–2 cm
  • Level% changes accordingly if your TANK_HEIGHT_MM is configured

Tip: For bench testing without a tank, set TANK_HEIGHT_MM to a smaller value (e.g., 600 mm) to make level% changes more obvious.

2) JSN-SR04T sanity checks

  • If Raw(mm) reads NAN or 0 frequently:
  • Ensure the Echo line is level-shifted with the 10k/20k divider
  • Verify 5V is stable at the sensor VCC pin
  • Increase the pulseIn timeout slightly in measureDistanceMm() if your tank is deep
  • Confirm the sensor face is clean and not tilted with respect to the water surface.

3) INA219 readings

  • Check BusV ~ 5.0 V (may be 4.7–5.2 V depending on USB source).
  • With the JSN-SR04T idle, current may be a few mA; during burst, it spikes higher.
  • If current is always 0:
  • Confirm INA219 address (0x40 default) and wiring (VIN+, VIN-, and VCC=3.3V)
  • Confirm ina219.begin() succeeded (noted on serial)

4) LoRaWAN join and uplink

  • In The Things Stack console:
  • Ensure the device is registered under your application with OTAA.
  • Frequency plan must match REGION in the sketch.
  • After reset, the device should issue a join request, then an uplink.
  • Install the provided uplink decoder in the application’s “Payload formatters” (Uplink) and click Save.
  • In the “Live data” view:
  • After the first measurement, confirm an uplink packet arrives every 5 minutes.
  • Verify decoded fields:
    • distance_mm increases when the water surface moves away from the sensor
    • level_percent reflects tank level
    • bus_mV ≈ ~5000 mV
    • current_mA shows spikes consistent with ultrasonic bursts

5) Tank calibration

  • Measure the actual distance from sensor face to the tank bottom and set TANK_HEIGHT_MM.
  • If the sensor is recessed in a mount or has a dead zone, measure and set SENSOR_OFFSET_MM.
  • Fill the tank to a known fraction (e.g., 50%) and compare level_percent. If off by a constant scale:
  • Check TANK_DIAMETER_MM (if your tank is cylindrical).
  • For rectangular tanks, replace litersFromHeight() with widthlengthheight conversion.
  • Record multiple fill points to verify linearity.

6) End-to-end sanity

  • Confirm consistent uplinks for at least 30–60 minutes.
  • Confirm ADR status on the network (if enabled) and that data rate remains appropriate for link quality.
  • Ensure no MAC command errors or frame counter mismatches occur in the console.

Troubleshooting

  • Join fails or never uplinks:
  • Check antenna is connected and placed away from metal.
  • Verify REGION matches your frequency plan (e.g., EU868 vs US915). Change REGION string in setup.
  • Ensure APP_EUI (JoinEUI) and APP_KEY are correct hex strings with no spaces.
  • Some networks require setting DevEUI explicitly; fill DEV_EUI if needed (check TTS device page).
  • Verify gateway coverage and downlink availability for OTAA. If in a shielded room, move closer to a window.

  • Uplinks arrive but no decoded fields:

  • Ensure the payload decoder is saved and has no syntax errors.
  • Confirm payload size is 9 bytes.

  • Distance readings inconsistent or stuck:

  • JSN-SR04T needs a clean acoustic path; condensation or turbulent surface can cause jitter.
  • Increase SAMPLES or add a larger median window.
  • Reduce environmental acoustic noise and avoid mounting close to tank walls.
  • Ensure trigger pulse width is adequate (10–12 µs is typical) and that TRIG pin is defined as OUTPUT.

  • Echo line damages or erratic input:

  • Never connect 5V Echo directly to MKR pin. Use the exact 10k (series, top) and 20k (to GND, bottom) divider.
  • Check with a multimeter: in HIGH, the divider node should read close to 3.3V.

  • INA219 zero or unrealistic values:

  • Confirm the shunt is actually in series with the JSN-SR04T VCC line (VIN+ to 5V source, VIN- to sensor VCC).
  • Power INA219 at 3.3V so logic levels are coherent with MKR’s I2C.
  • If using a different breakout, note its shunt value and adjust calibration (e.g., setCalibration_32V_1A).

  • Power budget and resets:

  • When powered by USB only, 5V may sag with poor cables. Try a better USB cable or powered hub.
  • If running on LiPo, ensure the battery is charged and check charge status LEDs on MKR WAN 1310.

Improvements

  • Downlink configuration:
  • Add a small downlink parser to allow changing MEAS_INTERVAL_SEC or DR on the fly (e.g., via port 2).
  • Implement a command to trigger an immediate measurement.

  • Advanced filtering and reliability:

  • Implement outlier rejection using interquartile range and adaptive timeouts.
  • Add temperature compensation for speed of sound. If you have a temperature sensor, adjust c = 331 + 0.6*T(m/s).

  • Power optimization:

  • Power-gate the JSN-SR04T via a P-MOSFET controlled by an MKR pin to remove idle draw between measurements.
  • Increase sleep duration and switch to confirmed uplinks only for alerts.

  • Payload optimization:

  • Use a packed bitfield to shrink the payload further, or adopt CayenneLPP if you prefer tooling compatibility.
  • Add battery voltage of the MKR board if you bring it into measurement via an analog divider (3.3V-limited).

  • Geometry generalization:

  • Replace the cylinder model with piecewise linear or lookup-table calibration for irregular tanks.

  • Robustness:

  • Add a watchdog timer reset if join/uplink fails N times.
  • CRC32 of the data pre-transmission for integrity (not needed for LoRaWAN but useful for internal checks).

  • Cloud integration:

  • Push decoded data to a time-series database (InfluxDB) and visualize with Grafana via TTS MQTT.

Final Checklist

  • Hardware
  • Antenna firmly connected to MKR WAN 1310.
  • JSN-SR04T VCC=5V, GND common, TRIG=D6, ECHO to D7 through 10k/20k divider.
  • INA219 wired: VIN+ to 5V source, VIN- to sensor VCC; SDA/SCL to MKR; VCC=3.3V; GND common.
  • Enclosure protects from moisture; sensor face unobstructed.

  • Software

  • Arduino CLI installed and working.
  • Core arduino:samd@1.8.13 installed.
  • Libraries installed: MKRWAN 1.1.0, ArduinoLowPower 1.2.2, Adafruit INA219 1.2.1.
  • secrets.h contains correct APP_EUI/APP_KEY (and DEV_EUI if required).
  • REGION matches your frequency plan (e.g., EU868 or US915).
  • FQBN arduino:samd:mkrwan1310 used for compile/upload.

  • Validation

  • Serial logs show successful join (or reason for failure) and periodic measurements.
  • JSN-SR04T distance values vary appropriately with target range.
  • INA219 reports plausible bus voltage (~5000 mV) and current.
  • TTS/TTN receives uplinks with 9-byte payload and decodes fields correctly.
  • Level% and liters track real tank conditions after calibration.

  • Deployment

  • Sleep interval set to meet duty cycle and battery goals.
  • ADR enabled if stationary and within a stable network coverage area.
  • Alarm thresholds considered and possibly implemented via downlink or local logic.

With these steps complete, you have a dependable LoRaWAN water level telemetry node built on Arduino MKR WAN 1310 with ultrasonic sensing and power diagnostics, ready for field deployment.

Find this product and/or books on this topic on Amazon

Go to Amazon

As an Amazon Associate, I earn from qualifying purchases. If you buy through this link, you help keep this project running.

Quick Quiz

Question 1: What type of sensor is used in the project?


Question 2: Which Arduino model is utilized for the telemetry node?


Question 3: What is the purpose of the INA219 in the project?


Question 4: Which command-line interface is used to compile and flash the sketch?


Question 5: What type of network access is required for the project?


Question 6: What is the main objective of the project?


Question 7: What operating systems are supported for this project?


Question 8: What is the significance of OTAA in LoRaWAN?


Question 9: Which component is NOT required for this project?


Question 10: What is the function of the filtering and calibration mentioned in the project?


Carlos Núñez Zorrilla
Electronics & Computer Engineer

Telecommunications Electronics Engineer and Computer Engineer (official degrees in Spain).

Follow me:


Practical case: BLE gesture gamepad on Arduino Nano 33 BLE

Practical case: BLE gesture gamepad on Arduino Nano 33 BLE — hero

Objective and use case

What you’ll build: Create a BLE gesture gamepad using Arduino Nano 33 BLE, APDS9960, and MPU6050 to stream gamepad states via hand gestures and tilt.

Why it matters / Use cases

  • Enable intuitive gaming controls through hand gestures, enhancing user experience in mobile and PC games.
  • Facilitate accessibility for users with limited mobility by providing alternative input methods.
  • Demonstrate the integration of multiple sensors (APDS9960 for gesture detection and MPU6050 for tilt) in a compact device.
  • Showcase the capabilities of Arduino Nano 33 BLE in developing low-power, wireless applications.

Expected outcome

  • Achieve a latency of less than 50ms between gesture input and gamepad state transmission.
  • Maintain a stable BLE connection with a packet loss rate below 2% during gameplay.
  • Stream gamepad states at a rate of 10 packets per second, ensuring smooth gameplay.
  • Demonstrate accurate gesture recognition with a success rate of over 90% in various lighting conditions.

Audience: Hobbyists and developers interested in IoT and gaming; Level: Intermediate

Architecture/flow: Arduino Nano 33 BLE processes inputs from APDS9960 and MPU6050, transmitting gamepad states via BLE to connected devices.

Advanced Hands‑On: BLE Gesture Gamepad with Arduino Nano 33 BLE + APDS9960 + MPU6050

Objective: Build a BLE “gesture gamepad” that streams a compact gamepad state over Bluetooth Low Energy (BLE), using hand gestures (APDS9960) for D‑pad/button inputs and tilt (MPU6050) for analog axes.

We will develop, build, and flash the firmware using PlatformIO (CLI). The target device is EXACTLY: Arduino Nano 33 BLE + APDS9960 + MPU6050.

Note on tooling policy: The family default is Arduino UNO with Arduino CLI. Because we are using a different board (Arduino Nano 33 BLE, nRF52840), we will use PlatformIO (CLI) as required.


Prerequisites

  • OS:
  • Windows 10/11 (x64) or
  • macOS 12+ or
  • Ubuntu 22.04+ (or equivalent Linux)
  • Software:
  • Python 3.10+ (recommended 3.11+)
  • PlatformIO Core 6.1.13 or newer (CLI)
  • USB cable:
  • High‑quality data cable (USB Micro‑B to USB)
  • BLE Central for validation:
  • Smartphone with Nordic “nRF Connect” app OR
  • Laptop BLE adapter and Python (bleak) for optional host script
  • Drivers:
  • Arduino Nano 33 BLE uses native USB CDC (ACM). Typically no additional drivers are needed on macOS/Linux. Windows 10/11 installs automatically. If Windows driver issues arise, install “Arduino Mbed OS Boards” drivers via Arduino IDE package (only driver component) or allow Windows Update to complete.

Materials (exact model)

  • 1 × Arduino Nano 33 BLE (Model: ABX00030; MCU: nRF52840; 3.3 V I/O only)
  • 1 × APDS9960 gesture/proximity/color breakout (e.g., SparkFun APDS-9960, Part: SEN‑12787; default I2C address 0x39; 3.3 V logic)
  • 1 × MPU6050 6‑axis accelerometer/gyro breakout (common module: GY‑521; default I2C address 0x68; ensure it can run at 3.3 V)
  • 4–8 × Female‑female jumper wires (Dupont)
  • Optional:
  • 1 × Breadboard
  • 2 × additional jumpers if you want to use INT lines for low‑latency gesture interrupts (we’ll use polling by default)

Setup / Connection

The Arduino Nano 33 BLE uses 3.3 V logic. Do not connect 5 V logic to its I/O. Both APDS9960 and MPU6050 operate over I2C; you can connect both sensors in parallel to SDA/SCL.

  • I2C pins on Nano 33 BLE:
  • SDA = A4
  • SCL = A5
  • Power rails:
  • 3V3 pin provides regulated 3.3 V
  • GND for ground reference

We will poll the APDS9960 for gestures (so INT is optional). MPU6050 INT is also optional.

Wire Connections

  • Power:
  • Nano 33 BLE 3V3 → APDS9960 VCC; MPU6050 VCC
  • Nano 33 BLE GND → APDS9960 GND; MPU6050 GND
  • I2C:
  • Nano 33 BLE A4 (SDA) → APDS9960 SDA; MPU6050 SDA
  • Nano 33 BLE A5 (SCL) → APDS9960 SCL; MPU6050 SCL
  • Optional interrupts:
  • APDS9960 INT → D2
  • MPU6050 INT → D3

Ensure your APDS9960 breakout is 3.3 V compatible (SparkFun SEN‑12787 is). Many GY‑521 MPU6050 boards include a regulator; when in doubt, power with 3.3 V and confirm it works reliably at that voltage.

Expected I2C Addresses

  • APDS9960: 0x39
  • MPU6050: 0x68 (AD0 low). If AD0 is tied high, address is 0x69.

Signal/Pin Mapping Table

Function Nano 33 BLE Pin APDS9960 Pin MPU6050 Pin Notes
Power 3V3 VCC VCC 3.3 V only
Ground GND GND GND Common ground
I2C Data A4 (SDA) SDA SDA Shared bus
I2C Clock A5 (SCL) SCL SCL Shared bus
Gesture Interrupt D2 (optional) INT We’ll use polling; hook up if desired
Motion Interrupt D3 (optional) INT We’ll use polling; hook up if desired

Design Overview

  • BLE GATT custom “Gamepad” service with two characteristics:
  • Buttons (1 byte): bitfield for Up/Down/Left/Right, A, B (from APDS9960 gestures)
  • Axes (2 bytes): X, Y in signed int8 range −127..127 based on tilt from MPU6050
  • Gesture mapping:
  • Up/Down/Left/Right gestures map to D‑pad bits.
  • Near/Far gestures map to A/B buttons.
  • Tilt mapping:
  • Roll → X axis; Pitch → Y axis
  • Simple low‑pass filtered accelerometer‑only tilt to avoid gyro drift.
  • Report rate:
  • 50 Hz default (20 ms), with change‑detection to reduce BLE traffic.
  • Debug:
  • Serial log at 115200 baud for quick inspection.

Full Code

Create the PlatformIO project with the following files.

File: platformio.ini

; Project: ble-gesture-gamepad
; Board: Arduino Nano 33 BLE (ABX00030)
; PlatformIO Core >= 6.1.13

[env:nano33ble]
platform = nordicnrf52
board = nano33ble
framework = arduino
upload_protocol = cmsis-dap

; Lock known-good library versions for reproducibility
lib_deps =
  arduino-libraries/ArduinoBLE @ ^1.3.6
  sparkfun/SparkFun APDS9960 RGB and Gesture Sensor @ ^1.4.3
  adafruit/Adafruit MPU6050 @ ^2.2.6
  adafruit/Adafruit Unified Sensor @ ^1.1.14

monitor_speed = 115200

Notes:
– upload_protocol cmsis‑dap works with the Nano 33 BLE’s on‑board debugger. If your upload fails, PlatformIO will fall back to the serial bootloader. You can omit this line if needed.

File: src/main.cpp

#include <Arduino.h>
#include <Wire.h>
#include <ArduinoBLE.h>
#include <SparkFun_APDS9960.h>
#include <Adafruit_MPU6050.h>
#include <Adafruit_Sensor.h>
#include <math.h>

// ====== Sensor instances ======
SparkFun_APDS9960 apds;
Adafruit_MPU6050 mpu;

// ====== BLE definitions (custom service) ======
// 128-bit UUIDs generated for this project
#define GP_SERVICE_UUID   "12345678-1234-5678-1234-56789abcdef0"
#define GP_BUTTONS_UUID   "12345678-1234-5678-1234-56789abcdef1"
#define GP_AXES_UUID      "12345678-1234-5678-1234-56789abcdef2"

BLEService gpService(GP_SERVICE_UUID);
// Buttons bitfield (1 byte): [bit0:Up][1:Down][2:Left][3:Right][4:A][5:B][6:reserved][7:reserved]
BLECharacteristic btnChar(GP_BUTTONS_UUID, BLERead | BLENotify, 1);
// Axes (2 bytes): int8 X, int8 Y, range -127..127
BLECharacteristic axesChar(GP_AXES_UUID, BLERead | BLENotify, 2);

// ====== Gamepad state ======
volatile uint8_t buttons = 0x00;
int8_t axisX = 0;
int8_t axisY = 0;

// Gesture mapping timings
const uint16_t GESTURE_HOLD_MS = 150; // keep button asserted briefly per gesture
uint32_t gestureHoldUntilMs = 0;
uint8_t gestureBitsLatched = 0;

// Tilt filter
float filtX = 0.0f;
float filtY = 0.0f;
const float alpha = 0.25f; // low-pass filter coeff (0..1)

// Rate limiting
const uint32_t REPORT_INTERVAL_MS = 20; // 50 Hz
uint32_t lastReportMs = 0;

// Helpers
static inline int8_t clampToI8(float v) {
  if (v < -127) return -127;
  if (v > 127) return 127;
  return (int8_t)lroundf(v);
}

void updateAxesFromMPU() {
  sensors_event_t a, g, temp;
  mpu.getEvent(&a, &g, &temp);

  // Compute tilt angles from accelerometer only (degrees)
  // Roll: rotation around X axis, Pitch: around Y axis
  float ax = a.acceleration.x;
  float ay = a.acceleration.y;
  float az = a.acceleration.z;

  // Protect against divide-by-zero issues
  if (isnan(ax) || isnan(ay) || isnan(az)) return;

  float roll  = atan2f(ay, az) * 57.29578f; // deg
  float pitch = atan2f(-ax, sqrtf(ay * ay + az * az)) * 57.29578f; // deg

  // Map angles to -127..127. Choose ~35 deg full-scale for responsiveness.
  const float FS_DEG = 35.0f;
  float xRaw = (roll / FS_DEG) * 127.0f;
  float yRaw = (pitch / FS_DEG) * 127.0f;

  // Dead-zone to avoid jitter
  const float DZ = 4.0f;
  if (fabsf(xRaw) < DZ) xRaw = 0.0f;
  if (fabsf(yRaw) < DZ) yRaw = 0.0f;

  // Low-pass filter
  filtX = (alpha * xRaw) + ((1.0f - alpha) * filtX);
  filtY = (alpha * yRaw) + ((1.0f - alpha) * filtY);

  axisX = clampToI8(filtX);
  axisY = clampToI8(filtY);
}

void processGesture() {
  // Non-blocking polling for gesture
  if (apds.isGestureAvailable()) {
    uint8_t g = apds.readGesture();
    uint8_t newBits = 0;

    switch (g) {
      case DIR_UP:    newBits |= (1 << 0); break; // Up
      case DIR_DOWN:  newBits |= (1 << 1); break; // Down
      case DIR_LEFT:  newBits |= (1 << 2); break; // Left
      case DIR_RIGHT: newBits |= (1 << 3); break; // Right
      case DIR_NEAR:  newBits |= (1 << 4); break; // A
      case DIR_FAR:   newBits |= (1 << 5); break; // B
      default: break;
    }

    if (newBits != 0) {
      gestureBitsLatched = newBits;
      gestureHoldUntilMs = millis() + GESTURE_HOLD_MS;
    }
  }

  // Apply latched gesture bits for a short time window
  uint32_t now = millis();
  if (gestureBitsLatched != 0) {
    if (now <= gestureHoldUntilMs) {
      // Assert gesture bits
      buttons |= gestureBitsLatched;
    } else {
      // Release after hold time
      buttons &= ~gestureBitsLatched;
      gestureBitsLatched = 0;
    }
  }
}

bool publishIfChanged() {
  static uint8_t lastButtons = 0xFF;
  static int8_t lastX = 127, lastY = 127;

  bool changed = false;
  if (buttons != lastButtons) {
    btnChar.writeValue(&buttons, 1);
    lastButtons = buttons;
    changed = true;
  }

  if (axisX != lastX || axisY != lastY) {
    int8_t axes[2] = { axisX, axisY };
    axesChar.writeValue((uint8_t*)axes, 2);
    lastX = axisX; lastY = axisY;
    changed = true;
  }
  return changed;
}

void setupAPDS() {
  if (!apds.init()) {
    Serial.println("[APDS9960] init failed");
  } else {
    // Optional tuning
    apds.setGestureGain(GGAIN_4X);
    apds.setGestureLEDDrive(LED_DRIVE_100MA);
    apds.setGestureProximityThreshold(30);
    apds.enableGestureSensor(true);
    Serial.println("[APDS9960] gesture sensor enabled");
  }
}

void setupMPU() {
  if (!mpu.begin(0x68, &Wire)) {
    Serial.println("[MPU6050] begin failed (check wiring/address)");
    return;
  }
  mpu.setAccelerometerRange(MPU6050_RANGE_4_G);
  mpu.setGyroRange(MPU6050_RANGE_500_DEG);
  mpu.setFilterBandwidth(MPU6050_BAND_21_HZ);
  Serial.println("[MPU6050] online");
}

void setupBLE() {
  if (!BLE.begin()) {
    Serial.println("[BLE] init failed");
    while (1) delay(1000);
  }
  BLE.setDeviceName("Nano33BLE");
  BLE.setLocalName("GestureGamepad");
  BLE.setAdvertisedService(gpService);

  gpService.addCharacteristic(btnChar);
  gpService.addCharacteristic(axesChar);
  BLE.addService(gpService);

  // Initialize characteristic values so a central can read immediately
  uint8_t b = 0;
  int8_t axes[2] = {0, 0};
  btnChar.writeValue(&b, 1);
  axesChar.writeValue((uint8_t*)axes, 2);

  BLE.advertise();
  Serial.println("[BLE] advertising as 'GestureGamepad'");
}

void setup() {
  pinMode(LED_BUILTIN, OUTPUT);
  Serial.begin(115200);
  while (!Serial && millis() < 2500) { /* wait briefly for monitor */ }

  Wire.begin();
  Wire.setClock(400000); // 400 kHz I2C

  setupAPDS();
  setupMPU();
  setupBLE();
}

void loop() {
  // Handle BLE events
  BLEDevice central = BLE.central();

  if (central) {
    Serial.print("[BLE] Connected: "); Serial.println(central.address());

    // Connected loop
    lastReportMs = 0; // force immediate report
    while (central.connected()) {
      updateAxesFromMPU();
      processGesture();

      uint32_t now = millis();
      if (now - lastReportMs >= REPORT_INTERVAL_MS) {
        bool changed = publishIfChanged();
        if (changed) {
          digitalWrite(LED_BUILTIN, !digitalRead(LED_BUILTIN)); // blink on update
        }
        lastReportMs = now;

        // Debug print (comment out if too chatty)
        Serial.print("btn=0b"); Serial.print(buttons, BIN);
        Serial.print(" X="); Serial.print(axisX);
        Serial.print(" Y="); Serial.println(axisY);
      }
      // Give time to BLE stack
      BLE.poll();
    }

    Serial.println("[BLE] Disconnected");
  }

  // Not connected: still poll BLE stack
  BLE.poll();
}

Key points:
– The APDS9960 is used in gesture mode only; polling avoids wiring INT.
– The MPU6050 uses accelerometer data to derive tilt angles and map them to gamepad axes.
– BLE exposes a custom Gamepad service with two characteristics (buttons, axes). A host app can subscribe to notifications and interpret the gamepad state.


Build / Flash / Run commands

We will use PlatformIO CLI end‑to‑end.

1) Install/verify PlatformIO:

python3 -m pip install --upgrade platformio
pio --version

2) Create project folder and files:

mkdir -p ~/projects/ble-gesture-gamepad/src
cd ~/projects/ble-gesture-gamepad

3) Fetch dependencies and build:

pio pkg install
pio run -e nano33ble

4) Put the board into normal mode (power via USB), then upload:

# Identify the serial port if needed:
pio device list

# Upload firmware
pio run -e nano33ble -t upload

5) Open the serial monitor for debugging output:

pio device monitor -b 115200

6) BLE run procedure:
– Keep the board powered via USB.
– It will advertise as “GestureGamepad”.

Driver notes:
– Windows: The Nano 33 BLE enumerates as a COM port (CDC ACM). No CP210x/CH34x drivers are required.
– macOS/Linux: Appears as /dev/cu.usbmodem (macOS) or /dev/ttyACM (Linux).


Step‑by‑Step Validation

1) I2C sanity check (power and address)

  • Power the board and open the serial monitor:
  • Expect messages like “[APDS9960] gesture sensor enabled” and “[MPU6050] online”.
  • If either init fails, revisit wiring. Ensure both sensors share SDA/SCL/GND/3V3.

Optional: Run an I2C scanner sketch (not provided here) if you suspect bus issues. Expected addresses: 0x39 (APDS9960), 0x68 (MPU6050).

2) BLE advertisement

  • On a smartphone, open “nRF Connect” (iOS or Android).
  • Scan: You should see “GestureGamepad” advertising.
  • Tap it and Connect. In the GATT browser you should see:
  • Service UUID 12345678‑1234‑5678‑1234‑56789abcdef0
  • Characteristics:
    • Buttons (UUID …ef1), length 1
    • Axes (UUID …ef2), length 2

3) Subscribe and observe values

  • In nRF Connect, enable notifications (bell icon) on both characteristics.
  • With the board flat and stationary:
  • Buttons should be 0x00
  • Axes near 0,0 (allow slight noise)
  • Tilt the board:
  • Rolling right should increase X toward +127; left toward −127.
  • Pitching forward/back should move Y accordingly.
  • Perform gestures over the APDS9960 sensor window:
  • Swipe UP: Buttons bit0 set briefly (expect reported byte 0x01 during hold).
  • Swipe DOWN: byte 0x02
  • Swipe LEFT: byte 0x04
  • Swipe RIGHT: byte 0x08
  • NEAR: byte 0x10
  • FAR: byte 0x20

Because the gesture is latched for GESTURE_HOLD_MS (150 ms), you’ll see the corresponding bit asserted briefly after each gesture, then return to zero.

4) Desktop validation with Python (optional)

If you prefer a desktop BLE central, install bleak and run a quick monitor:

python3 -m pip install bleak

Example script (replace MAC/UUIDs as needed by your OS):

# file: host_monitor.py
import asyncio, struct
from bleak import BleakScanner, BleakClient

SERVICE = "12345678-1234-5678-1234-56789abcdef0"
BTN_UUID = "12345678-1234-5678-1234-56789abcdef1"
AX_UUID  = "12345678-1234-5678-1234-56789abcdef2"

async def main():
    print("Scanning for GestureGamepad...")
    dev = None
    devices = await BleakScanner.discover(timeout=5.0)
    for d in devices:
        if "GestureGamepad" in (d.name or ""):
            dev = d
            break
    if not dev:
        print("Device not found.")
        return

    async with BleakClient(dev) as client:
        print("Connected:", dev)
        async def btn_cb(_, data: bytearray):
            btn = data[0]
            print(f"Buttons=0b{btn:08b}")

        async def ax_cb(_, data: bytearray):
            x, y = struct.unpack("bb", data)
            print(f"Axes: X={x:4d}, Y={y:4d}")

        await client.start_notify(BTN_UUID, btn_cb)
        await client.start_notify(AX_UUID, ax_cb)
        print("Listening (Ctrl+C to quit)...")
        while True:
            await asyncio.sleep(1)

if __name__ == "__main__":
    asyncio.run(main())

Run:

python3 host_monitor.py

Perform gestures and tilts. You should see button bitfields and axis values printed in real time.

5) End‑to‑end checks

  • Latency: You should observe <100 ms end‑to‑end from gesture to notification with the default 50 Hz reporting.
  • Stability: Axes should be stable near zero when the board is stationary (thanks to low‑pass filtering and dead‑zone).
  • BLE reconnection: Disconnect from nRF Connect; the device should resume advertising automatically.

Troubleshooting

  • No BLE advertisement:
  • Ensure BLE.begin() succeeded in the serial log. If not, power‑cycle the board and close any BLE central app that might be caching the connection.
  • Avoid multiple centrals connecting at once.

  • Upload fails:

  • Try: pio run -e nano33ble -t upload –upload-port
  • On Windows, check Device Manager for the COM port. On macOS/Linux, check /dev/cu.usbmodem or /dev/ttyACM.
  • Press the reset button twice quickly to enter the bootloader (LED pulsing), then retry upload.

  • APDS9960 not detected:

  • Recheck SDA/SCL orientation. APDS9960 address should be 0x39.
  • Some boards need a clean sensor window; ensure there’s no tape/dust blocking the IR.

  • MPU6050 not detected:

  • Default address is 0x68. If your board ties AD0 high, change code to mpu.begin(0x69).
  • Ensure power at 3.3 V; some GY‑521 boards are flaky at 3.3 V if their regulator drops too much—verify with a multimeter. If the breakout expects 5 V only, replace it with a 3.3 V‑friendly version.

  • Choppy axes or jitter:

  • Increase filter bandwidth smoothing (lower alpha, e.g., 0.15).
  • Increase dead‑zone DZ to 6–8.
  • Reduce REPORT_INTERVAL_MS to 30–40 ms to lower traffic.

  • Gesture misses:

  • Adjust APDS9960 gain/LED drive or proximity threshold; ensure good ambient lighting and keep 3–10 cm above the sensor for swipes.
  • If polling is insufficient, wire INT to a pin and switch to interrupt‑driven reads (SparkFun library supports this pattern).

  • Duplicate I2C pull‑ups:

  • Many breakouts include their own pull‑ups; if you have instability on long wires, prefer a single set of ~4.7 kΩ pull‑ups to 3.3 V or keep wiring short.

  • BLE central sees raw data but you want native OS “gamepad”:

  • This tutorial exposes a custom GATT service. For OS‑recognized gamepad (HID over GATT, HOGP), you’d implement a HID descriptor and HID service. See “Improvements” below.

Improvements

  • BLE HID Gamepad (HOGP):
  • Replace the custom service with a standard HID service (UUID 0x1812) and a Gamepad HID report descriptor (buttons + X/Y axes).
  • The ArduinoBLE library includes HID support on Nano 33 BLE in recent versions; you’ll define a HID report map and input report characteristic, then the device will enumerate as a “Gamepad” on hosts that support HOGP.
  • This yields native compatibility with games and OS input mapping, removing the need for a host‑side script.

  • Interrupt‑driven gesture:

  • Connect APDS9960 INT to a digital pin and attach an ISR or event flag to promptly read gestures, reducing latency and power.

  • Sensor fusion:

  • Use complementary or Kalman filters to blend accelerometer and gyro for smoother axes, especially during dynamic motion.
  • The MPU6050 DMP (Digital Motion Processor) can offload some fusion tasks if you adopt a suitable library.

  • Calibration routine:

  • Record zero‑tilt baseline on startup (press a “calibrate” button), compute offsets, and store in NVM.

  • Battery operation:

  • Power the Nano 33 BLE with a LiPo + charger backpack and manage advertising intervals for power savings.

  • Debounce and gesture customization:

  • Add a gesture queue to handle repeated swipes and differentiate short/long gestures mapped to different buttons.

  • Expand buttons:

  • Use APDS9960 proximity levels to map analog threshold to additional buttons (e.g., “Select/Start”).

Final Checklist

  • Materials
  • Arduino Nano 33 BLE (ABX00030)
  • APDS9960 breakout (SparkFun SEN‑12787 or equivalent, 3.3 V)
  • MPU6050 breakout (GY‑521 or equivalent, 3.3 V safe)
  • Jumpers, USB cable

  • Wiring

  • 3V3 and GND shared to both sensors
  • A4 → SDA on both sensors
  • A5 → SCL on both sensors
  • Optional: APDS INT → D2, MPU INT → D3

  • Software

  • PlatformIO Core installed
  • platformio.ini configured for nano33ble and libraries
  • src/main.cpp created with BLE + APDS9960 + MPU6050 logic
  • Build: pio run -e nano33ble
  • Upload: pio run -e nano33ble -t upload
  • Monitor: pio device monitor -b 115200

  • BLE validation

  • “GestureGamepad” is advertising
  • Connect with nRF Connect
  • Subscribe to buttons and axes characteristics
  • Swipe: buttons bits change briefly
  • Tilt: axes vary in −127..127 range

  • Optional host

  • bleak installed
  • host_monitor.py receives notifications and prints states

  • Troubleshooting

  • Addressed I2C address mismatches, driver notes, and sensor noise
  • Adjusted filter parameters if needed

With this build, you have a working BLE gesture gamepad: APDS9960 handles discrete inputs (D‑pad + buttons), and MPU6050 tilt drives analog axes—streamed over BLE at a fixed rate to any central that subscribes to your custom gamepad service.

Find this product and/or books on this topic on Amazon

Go to Amazon

As an Amazon Associate, I earn from qualifying purchases. If you buy through this link, you help keep this project running.

Quick Quiz

Question 1: What is the primary objective of the project described in the article?


Question 2: Which microcontroller is used in the project?


Question 3: What type of cable is required for the project?


Question 4: Which software is recommended for firmware development?


Question 5: What is the role of the APDS9960 in the project?


Question 6: What operating system is NOT listed as a prerequisite?


Question 7: What type of drivers are typically needed for the Arduino Nano 33 BLE?


Question 8: What is the default I2C address for the MPU6050?


Question 9: Which component is optional for the project?


Question 10: What is the recommended version of Python for this project?


Carlos Núñez Zorrilla
Electronics & Computer Engineer

Telecommunications Electronics Engineer and Computer Engineer (official degrees in Spain).

Follow me:


Practical case: Arduino Mega Modbus Logger (W5500, MAX485)

Practical case: Arduino Mega Modbus Logger (W5500, MAX485) — hero

Objective and use case

What you’ll build: A reliable Modbus energy logger using Arduino Mega 2560, W5500 Ethernet Shield, and MAX485 to capture energy data and expose it via HTTP.

Why it matters / Use cases

  • Monitor energy consumption in real-time for residential or commercial buildings using a Modbus RTU energy meter.
  • Log energy data to an SD card for historical analysis and reporting, enabling better energy management.
  • Integrate with IoT platforms by exposing data through HTTP endpoints, facilitating remote monitoring and control.
  • Utilize DHCP with static fallback to ensure reliable network connectivity in varying environments.
  • Implement error handling and retries in data polling to enhance system robustness and reliability.

Expected outcome

  • Data logged to SD card in CSV format with a minimum of 95% write success rate.
  • HTTP endpoints responding within 200ms for JSON and Prometheus-style data queries.
  • Successful polling of Modbus registers with less than 1% error rate over a 24-hour period.
  • System uptime of 99.9% with DHCP and static IP fallback mechanisms in place.
  • Real-time energy consumption metrics displayed with latencies under 100ms for data retrieval.

Audience: Engineers and developers interested in IoT and energy monitoring; Level: Intermediate.

Architecture/flow: Arduino Mega 2560 reads data from Modbus RTU energy meter via MAX485, logs to SD card, and serves data over HTTP using W5500 Ethernet Shield.

Advanced Hands‑On: Modbus Energy Logger on Arduino Mega 2560 + W5500 Ethernet Shield + MAX485

This practical case walks you through building a robust Modbus energy logger using an Arduino Mega 2560, a W5500 Ethernet Shield, and a MAX485 RS‑485 transceiver. The logger polls a Modbus RTU energy meter over RS‑485, stores data to an SD card (CSV), and exposes the latest readings over HTTP (JSON and Prometheus-style endpoints). It is engineered for reliability (DHCP with static fallback, SD card error handling, and Modbus retries) and repeatable builds using Arduino CLI, not the IDE.

The device family is Arduino, and the exact device model used is: Arduino Mega 2560 + W5500 Ethernet Shield + MAX485.


Prerequisites

  • Operating systems: Windows 10/11, macOS 12+, or Ubuntu 20.04+.
  • Arduino CLI installed and on PATH. Verify:
    arduino-cli version
  • A working network with DHCP (recommended) or a static IP allocated for the logger.
  • A Modbus RTU energy meter (single-phase or three-phase) with a documented register map and 2‑wire RS‑485 (A/B).
  • Basic familiarity with Modbus RTU registers (input vs holding registers, 32‑bit float layouts).
  • 8 GB or smaller microSD card, FAT32 formatted.
  • Ethernet cable and a shielded twisted pair for RS‑485.

Materials (Exact Models)

  • Microcontroller: Arduino Mega 2560 R3 (ATmega2560).
  • Ethernet: Arduino Ethernet Shield 2 (W5500) or a compatible W5500 shield using the ICSP header for SPI.
  • Notes: CS for W5500 is D10. SD card CS is D4.
  • RS‑485 transceiver: MAX485-based module (5V TTL level; common boards labeled “MAX485 TTL to RS485”).
  • Power: Official Arduino USB cable (USB type B).
  • Storage: microSD card (FAT32), inserted into the W5500 shield.
  • RS‑485 cable: Twisted pair (Cat5e or better recommended).
  • Optional: USB‑to‑RS485 adapter (FTDI/CH340-based) for cross-validation from a PC.
  • Optional: Resistor 120 Ω for bus termination (if not present on the MAX485 module), and bias resistors if your network requires them.

Setup/Connection

Serial and RS‑485

  • Use Arduino Mega’s Serial1 for Modbus RTU, leaving Serial (USB) free for debugging.
  • Wire the MAX485 module to the Mega 2560:
  • RO (Receiver Output) → Mega D19 (RX1)
  • DI (Driver Input) → Mega D18 (TX1)
  • RE̅ (Receiver Enable) → Mega D2 (digital) [tie RE̅ and DE together]
  • DE (Driver Enable) → Mega D2 (digital)
  • VCC → Mega 5V
  • GND → Mega GND
  • A/B → RS‑485 twisted pair to the energy meter (A↔A, B↔B). Ensure consistent polarity.
  • Termination: enable 120 Ω at one physical end of the line only (often the energy meter end). Bias resistors may be present on your module or meter; ensure only one set of bias resistors is present on the bus.

Ethernet and SD

  • Stack the W5500 Ethernet Shield on the Mega 2560. It uses the ICSP header for SPI on Mega (not pins 11–13).
  • Ensure:
  • Ethernet CS = D10 (default).
  • SD CS = D4.
  • Insert the microSD card into the shield’s SD slot.
  • Connect the shield to your LAN via Ethernet cable.

Configuration Table

Subsystem Arduino Mega 2560 Pin Peripheral Notes
RS‑485 TX D18 (TX1) MAX485 DI Serial1 TX
RS‑485 RX D19 (RX1) MAX485 RO Serial1 RX
RS‑485 DE/RE D2 MAX485 DE and RE̅ tied together HIGH = TX, LOW = RX
Ethernet CS D10 W5500 Handled by Ethernet library
SD CS D4 SD card slot on shield Use SD.begin(4)
SPI ICSP header W5500 + SD Hardware SPI (SCK/MOSI/MISO)
5V/GND 5V/GND MAX485, Shield Common ground required

Full Code (Logger + HTTP + NTP + SD + Modbus RTU)

Save as: modbus-energy-logger/modbus-energy-logger.ino

/*
  Modbus Energy Logger
  Board: Arduino Mega 2560 R3
  Shields: W5500 Ethernet Shield (Ethernet + SD)
  RS-485: MAX485
  Features:
    - Modbus RTU master on Serial1 (RS-485)
    - Periodic polling of typical energy meter Input Registers (float32)
    - HTTP server on port 80: /, /json, /metrics
    - SD logging (CSV)
    - DHCP with static IP fallback
    - Simple NTP time sync via UDP (epoch)
  Libraries:
    - Ethernet (>=2.0.2)
    - SD (>=1.2.4)
    - ModbusMaster (>=2.0.1)
*/

#include <SPI.h>
#include <Ethernet.h>
#include <EthernetUdp.h>
#include <SD.h>
#include <ModbusMaster.h>

// -------------------- User configuration --------------------
static const uint8_t RS485_DE_RE_PIN = 2;
static const uint8_t MODBUS_SLAVE_ID = 1;

// Serial settings for energy meter
static const unsigned long MODBUS_BAUD = 9600; // common defaults: 9600 8N1
static const uint8_t MODBUS_CONFIG = SERIAL_8N1;

// Polling interval
static const unsigned long POLL_INTERVAL_MS = 5000;

// Word order: many meters use big-endian word order for float32 (reg[addr] = MSW, reg[addr+1] = LSW)
static const bool FLOAT_SWAP_WORDS = false; // set true if your meter requires word swap

// NTP server (IP to avoid DNS complexity on AVR)
IPAddress NTP_SERVER_IP(129, 6, 15, 28); // time.nist.gov
static const unsigned int NTP_LOCAL_PORT = 8888;
static const unsigned long NTP_REFRESH_MS = 3600UL * 1000UL;

// Network identity (MAC must be unique on your LAN)
byte MAC[6] = { 0xDE, 0xAD, 0xBE, 0xEF, 0x25, 0x60 };

// Static IP fallback (used if DHCP fails)
IPAddress IP_STATIC(192, 168, 1, 60);
IPAddress IP_DNS(1, 1, 1, 1);
IPAddress IP_GW(192, 168, 1, 1);
IPAddress IP_SN(255, 255, 255, 0);

// SD card
static const uint8_t SD_CS_PIN = 4;
const char* LOG_PATH = "/energy.csv";

// Modbus register addresses (Input Registers - 32-bit float, 2 regs each)
// Adjust to your meter’s map (e.g. common Eastron-style):
static const uint16_t REG_VOLTAGE = 0x0000;  // V
static const uint16_t REG_CURRENT = 0x0006;  // A
static const uint16_t REG_POWER   = 0x000C;  // W (active power)
static const uint16_t REG_FREQ    = 0x0046;  // Hz
static const uint16_t REG_ENERGY  = 0x0048;  // kWh (import total)

// -------------------- Globals --------------------
EthernetServer server(80);
EthernetUDP udp;
ModbusMaster node;

unsigned long lastPoll = 0;
unsigned long lastNtpMillis = 0;
unsigned long lastEpoch = 0;
bool ntpOk = false;

struct Sample {
  unsigned long ms;
  unsigned long epoch;
  float voltage;
  float current;
  float power;
  float freq;
  float energy;
  uint32_t mb_errors;
  uint32_t mb_ok;
} latest = {0};

File logFile;
bool sdReady = false;

// -------------------- RS-485 direction control --------------------
void preTransmission() {
  digitalWrite(RS485_DE_RE_PIN, HIGH);
}

void postTransmission() {
  // Guard time for line turnaround (minimal)
  delayMicroseconds(50);
  digitalWrite(RS485_DE_RE_PIN, LOW);
}

// -------------------- Utility: convert two 16-bit registers to float --------------------
float regsToFloat(uint16_t reg0, uint16_t reg1, bool swapWords) {
  uint32_t raw = swapWords ? ((uint32_t)reg1 << 16) | reg0
                           : ((uint32_t)reg0 << 16) | reg1;
  float f;
  memcpy(&f, &raw, sizeof(float));
  return f;
}

// -------------------- Modbus read helper --------------------
bool readInputFloat(uint16_t addr, float &outVal) {
  uint8_t r = node.readInputRegisters(addr, 2);
  if (r == node.ku8MBSuccess) {
    uint16_t hi = node.getResponseBuffer(0);
    uint16_t lo = node.getResponseBuffer(1);
    outVal = regsToFloat(hi, lo, FLOAT_SWAP_WORDS);
    latest.mb_ok++;
    return true;
  } else {
    latest.mb_errors++;
    return false;
  }
}

// -------------------- NTP (SNTP) minimal client --------------------
void sendNTP() {
  const int NTP_PACKET_SIZE = 48;
  byte packetBuffer[NTP_PACKET_SIZE];
  memset(packetBuffer, 0, NTP_PACKET_SIZE);
  packetBuffer[0] = 0b11100011; // LI, Version, Mode
  packetBuffer[1] = 0;          // Stratum
  packetBuffer[2] = 6;          // Polling Interval
  packetBuffer[3] = 0xEC;       // Precision
  // Transmit Timestamp fields left 0 for simplicity

  udp.beginPacket(NTP_SERVER_IP, 123);
  udp.write(packetBuffer, NTP_PACKET_SIZE);
  udp.endPacket();
}

bool recvNTP(unsigned long &epochOut) {
  const int NTP_PACKET_SIZE = 48;
  byte packetBuffer[NTP_PACKET_SIZE];
  int size = udp.parsePacket();
  if (size >= NTP_PACKET_SIZE) {
    udp.read(packetBuffer, NTP_PACKET_SIZE);
    // Bytes 40-43 contain seconds since 1900
    unsigned long high = word(packetBuffer[40], packetBuffer[41]);
    unsigned long low  = word(packetBuffer[42], packetBuffer[43]);
    unsigned long secsSince1900 = (high << 16) | low;
    const unsigned long seventyYears = 2208988800UL;
    unsigned long epoch = secsSince1900 - seventyYears;
    epochOut = epoch;
    return true;
  }
  return false;
}

void syncTime() {
  sendNTP();
  unsigned long start = millis();
  while (millis() - start < 1500) {
    unsigned long epoch;
    if (recvNTP(epoch)) {
      lastEpoch = epoch;
      lastNtpMillis = millis();
      ntpOk = true;
      return;
    }
    delay(10);
  }
  ntpOk = false;
}

unsigned long currentEpoch() {
  if (!ntpOk) return 0;
  unsigned long elapsed = (millis() - lastNtpMillis) / 1000UL;
  return lastEpoch + elapsed;
}

// -------------------- SD logging --------------------
void ensureLogHeader() {
  if (!sdReady) return;
  if (!SD.exists(LOG_PATH)) {
    File f = SD.open(LOG_PATH, FILE_WRITE);
    if (f) {
      f.println("epoch,ms,voltage_V,current_A,power_W,frequency_Hz,energy_kWh,mb_ok,mb_errors");
      f.close();
    }
  }
}

void appendLog(const Sample &s) {
  if (!sdReady) return;
  File f = SD.open(LOG_PATH, FILE_WRITE);
  if (!f) {
    sdReady = false;
    return;
  }
  f.print(s.epoch); f.print(',');
  f.print(s.ms); f.print(',');
  f.print(s.voltage, 3); f.print(',');
  f.print(s.current, 3); f.print(',');
  f.print(s.power,   3); f.print(',');
  f.print(s.freq,    3); f.print(',');
  f.print(s.energy,  3); f.print(',');
  f.print(s.mb_ok); f.print(',');
  f.println(s.mb_errors);
  f.flush();
  f.close();
}

// -------------------- HTTP server --------------------
void serveRoot(EthernetClient &client) {
  client.println("HTTP/1.1 200 OK");
  client.println("Content-Type: text/html; charset=utf-8");
  client.println("Connection: close");
  client.println();
  client.println("<!doctype html><html><head><title>Modbus Energy Logger</title></head><body>");
  client.println("<h1>Modbus Energy Logger</h1>");
  client.print("<p>IP: "); client.print(Ethernet.localIP()); client.println("</p>");
  client.print("<p>NTP: "); client.print(ntpOk ? "OK" : "Unavailable"); client.println("</p>");
  client.println("<ul>");
  client.print("<li>Voltage (V): "); client.print(latest.voltage, 3); client.println("</li>");
  client.print("<li>Current (A): "); client.print(latest.current, 3); client.println("</li>");
  client.print("<li>Power (W): "); client.print(latest.power, 3); client.println("</li>");
  client.print("<li>Frequency (Hz): "); client.print(latest.freq, 3); client.println("</li>");
  client.print("<li>Energy (kWh): "); client.print(latest.energy, 3); client.println("</li>");
  client.print("<li>Epoch: "); client.print(latest.epoch); client.println("</li>");
  client.print("<li>MB OK: "); client.print(latest.mb_ok); client.println("</li>");
  client.print("<li>MB ERR: "); client.print(latest.mb_errors); client.println("</li>");
  client.println("</ul>");
  client.println("<p>Endpoints: <a href=\"/json\">/json</a>, <a href=\"/metrics\">/metrics</a></p>");
  client.println("</body></html>");
}

void serveJSON(EthernetClient &client) {
  client.println("HTTP/1.1 200 OK");
  client.println("Content-Type: application/json; charset=utf-8");
  client.println("Connection: close");
  client.println();
  client.print("{\"ip\":\"");
  client.print(Ethernet.localIP());
  client.print("\",\"epoch\":");
  client.print(latest.epoch);
  client.print(",\"voltage\":"); client.print(latest.voltage, 6);
  client.print(",\"current\":"); client.print(latest.current, 6);
  client.print(",\"power\":");   client.print(latest.power, 6);
  client.print(",\"frequency\":"); client.print(latest.freq, 6);
  client.print(",\"energy\":");  client.print(latest.energy, 6);
  client.print(",\"mb_ok\":");   client.print(latest.mb_ok);
  client.print(",\"mb_errors\":"); client.print(latest.mb_errors);
  client.print(",\"ntp\":\""); client.print(ntpOk ? "ok" : "na");
  client.println("\"}");
}

void serveMetrics(EthernetClient &client) {
  client.println("HTTP/1.1 200 OK");
  client.println("Content-Type: text/plain; version=0.0.4");
  client.println("Connection: close");
  client.println();
  client.print("energy_voltage_volts "); client.println(latest.voltage, 6);
  client.print("energy_current_amps "); client.println(latest.current, 6);
  client.print("energy_power_watts ");  client.println(latest.power, 6);
  client.print("energy_frequency_hz "); client.println(latest.freq, 6);
  client.print("energy_total_kwh ");    client.println(latest.energy, 6);
  client.print("modbus_ok_total ");     client.println(latest.mb_ok);
  client.print("modbus_error_total ");  client.println(latest.mb_errors);
  client.print("ntp_epoch_seconds ");   client.println(latest.epoch);
}

void handleHTTP() {
  EthernetClient client = server.available();
  if (!client) return;

  // Simple request line parsing
  String req = client.readStringUntil('\r');
  client.readStringUntil('\n'); // consume newline

  if (req.startsWith("GET /json")) {
    serveJSON(client);
  } else if (req.startsWith("GET /metrics")) {
    serveMetrics(client);
  } else {
    serveRoot(client);
  }
  delay(1);
  client.stop();
}

// -------------------- Setup --------------------
void setup() {
  pinMode(RS485_DE_RE_PIN, OUTPUT);
  digitalWrite(RS485_DE_RE_PIN, LOW); // receive by default

  pinMode(LED_BUILTIN, OUTPUT);

  Serial.begin(115200);
  while (!Serial) { ; }

  Serial.println(F("\n[boot] Modbus Energy Logger starting..."));

  // RS-485 / Modbus
  Serial1.begin(MODBUS_BAUD, MODBUS_CONFIG);
  node.begin(MODBUS_SLAVE_ID, Serial1);
  node.preTransmission(preTransmission);
  node.postTransmission(postTransmission);

  // Ethernet init: DHCP then fallback
  Serial.println(F("[net] Trying DHCP..."));
  if (Ethernet.begin(MAC) == 0) {
    Serial.println(F("[net] DHCP failed, using static config"));
    Ethernet.begin(MAC, IP_STATIC, IP_DNS, IP_GW, IP_SN);
  }
  delay(1000);
  Serial.print(F("[net] IP: ")); Serial.println(Ethernet.localIP());

  // UDP for NTP
  udp.begin(NTP_LOCAL_PORT);
  syncTime();

  // SD
  if (SD.begin(SD_CS_PIN)) {
    sdReady = true;
    ensureLogHeader();
    Serial.println(F("[sd] SD initialized"));
  } else {
    sdReady = false;
    Serial.println(F("[sd] SD init failed"));
  }

  // HTTP server
  server.begin();
  Serial.println(F("[http] Server listening on port 80"));

  lastPoll = millis() - POLL_INTERVAL_MS; // trigger immediate poll
}

// -------------------- Loop --------------------
void loop() {
  handleHTTP();

  // Resync time periodically
  static unsigned long lastNtpCheck = 0;
  if (millis() - lastNtpCheck > NTP_REFRESH_MS) {
    syncTime();
    lastNtpCheck = millis();
  }

  // Poll Modbus on schedule
  if (millis() - lastPoll >= POLL_INTERVAL_MS) {
    lastPoll = millis();
    digitalWrite(LED_BUILTIN, HIGH);

    float v, i, p, f, e;
    bool okV = readInputFloat(REG_VOLTAGE, v);
    bool okI = readInputFloat(REG_CURRENT, i);
    bool okP = readInputFloat(REG_POWER,   p);
    bool okF = readInputFloat(REG_FREQ,    f);
    bool okE = readInputFloat(REG_ENERGY,  e);

    if (okV) latest.voltage = v;
    if (okI) latest.current = i;
    if (okP) latest.power   = p;
    if (okF) latest.freq    = f;
    if (okE) latest.energy  = e;

    latest.ms = millis();
    latest.epoch = currentEpoch();

    appendLog(latest);

    digitalWrite(LED_BUILTIN, LOW);

    // Serial debug (optional)
    Serial.print(F("[data] V=")); Serial.print(latest.voltage, 3);
    Serial.print(F(" V, I=")); Serial.print(latest.current, 3);
    Serial.print(F(" A, P=")); Serial.print(latest.power, 3);
    Serial.print(F(" W, f=")); Serial.print(latest.freq, 3);
    Serial.print(F(" Hz, E=")); Serial.print(latest.energy, 3);
    Serial.print(F(" kWh, OK=")); Serial.print(latest.mb_ok);
    Serial.print(F(", ERR=")); Serial.println(latest.mb_errors);
  }
}

Notes:
– Adjust the register addresses and FLOAT_SWAP_WORDS for your specific meter.
– The code assumes Modbus Input Registers exposed as IEEE‑754 float32 over two consecutive 16‑bit registers.
– DHCP is attempted first; static fallback is used if DHCP fails.


Build/Flash/Run Commands (Arduino CLI)

Use Arduino CLI with the Arduino AVR core and the Mega 2560 FQBN arduino:avr:mega.

  • Update index and install core:
arduino-cli core update-index
arduino-cli core install arduino:avr@1.8.6
  • Create project folder and place the sketch:
mkdir -p modbus-energy-logger
  • Install required libraries (pin exact versions for reproducibility):
arduino-cli lib install "ModbusMaster@2.0.1"
arduino-cli lib install "Ethernet@2.0.2"
arduino-cli lib install "SD@1.2.4"
  • Compile (Linux/macOS):
arduino-cli compile --fqbn arduino:avr:mega --warnings all --optimize-for-debug modbus-energy-logger
  • Upload (Linux; adjust port):
arduino-cli upload -p /dev/ttyACM0 --fqbn arduino:avr:mega modbus-energy-logger
  • Upload (Windows; adjust port):
arduino-cli upload -p COM5 --fqbn arduino:avr:mega modbus-energy-logger
  • Serial monitor at 115200 bps:
arduino-cli monitor -p /dev/ttyACM0 -c 115200
# or on Windows:
arduino-cli monitor -p COM5 -c 115200

You should see boot messages indicating network IP, SD status, and polling output every 5 seconds.


Step‑by‑Step Validation

1) Wiring and Power

  • Confirm MAX485:
  • DE and RE̅ tied together to D2.
  • RO → D19 (RX1), DI → D18 (TX1).
  • VCC = 5V, GND common with Mega.
  • RS‑485 A/B polarity correct and termination applied at one end.
  • Confirm the W5500 shield is fully seated and SD card is inserted.

2) Serial/Modbus Parameters

  • Set your meter to 9600 8N1, slave ID 1 (or adjust constants).
  • If you have a USB‑RS485 dongle, cross‑validate registers from a PC using mbpoll:
# Linux example; set the right serial device for your USB-RS485
sudo apt-get install -y mbpoll
mbpoll -m rtu -a 1 -b 9600 -P none -d 8 -s 1 -r 0 -c 2 /dev/ttyUSB0  # read 2 input regs starting at 0x0000
  • Compare returned raw registers to your meter’s datasheet for voltage. If you see valid floats when combining them (per your meter’s word order), keep those addresses for the sketch.

3) Network

  • After uploading, check the serial monitor:
  • Expect “[net] Trying DHCP…” and an IP printout.
  • From your PC:
  • Ping the device:
    ping 192.168.1.60
    Use the printed IP (DHCP or static fallback).
  • Open the root page in a browser:
    http://<device-ip>/
  • Inspect JSON:
    curl http://<device-ip>/json
    Sample output:
    {"ip":"192.168.1.60","epoch":1730561234,"voltage":229.987999,"current":1.245600,"power":286.345001,"frequency":49.980000,"energy":1234.560059,"mb_ok":42,"mb_errors":0,"ntp":"ok"}
  • Inspect Prometheus-style metrics:
    curl http://<device-ip>/metrics

4) SD Logging

  • Let the device run for a few minutes.
  • Power down and remove the SD card. Open energy.csv; example lines:
    epoch,ms,voltage_V,current_A,power_W,frequency_Hz,energy_kWh,mb_ok,mb_errors
    1730561201,5001,229.988,1.246,286.345,49.980,1234.560,5,0
    1730561206,10002,230.012,1.245,286.100,49.980,1234.565,10,0
  • Validate that values are in expected ranges.

5) Modbus Data Coherence

  • Cross-check at least one register using your USB‑RS485 dongle and mbpoll to ensure the Arduino’s reading matches. For a float32 input register at 0x0000:
    mbpoll -m rtu -a 1 -b 9600 -P none -d 8 -s 1 -r 0 -c 2 /dev/ttyUSB0
    Combine the two registers per your device’s word order. If you need to swap words to match the meter’s documented float, set FLOAT_SWAP_WORDS to true and re-flash.

6) Stress/Noise Considerations

  • Wiggle the RS‑485 cable and confirm robustness (OK/ERR counters in the web UI).
  • Increase poll rate (e.g., 1000 ms) and ensure no overruns. If errors grow, revert to 5 s.

Troubleshooting

  • No Ethernet/IP:
  • Ensure the shield is W5500-based and uses the ICSP header on Mega.
  • Try a different cable/port.
  • If your network has no DHCP, ensure static fallback range is valid for your LAN.
  • SD init failed:
  • Ensure FAT32, insert firmly.
  • Try another card. Confirm SD CS is D4 and no other SPI device is holding the bus.
  • HTTP responds but values are zero:
  • Wrong Modbus register addresses or word order. Check your meter’s manual.
  • Wrong slave ID or serial settings (baud/parity/stop bits).
  • Bus wiring reversed (swap A/B).
  • Missing termination; for short cables, it can work without, but for long runs enable only one terminator at the far end.
  • Modbus errors incrementing quickly:
  • Reduce poll interval.
  • Check DE/RE pin wiring to D2 and that pre/postTransmission are called.
  • Ground reference missing: connect GND between MAX485 and meter ground.
  • Interference between Ethernet and SD:
  • SD and W5500 share SPI. The SD library and Ethernet library correctly manage CS lines, but avoid accessing SD in interrupt contexts. In this sketch, SD is only touched in loop, so it’s fine.
  • NTP is “na”:
  • UDP/123 blocked by firewall; that’s okay—logging still works with epoch=0.
  • Optionally change NTP server IP to a local NTP source.

Improvements

  • Persistent configuration:
  • Store meter ID, polling interval, register map, word order, and static IP in EEPROM or a JSON config on SD. Add an HTTP /config page to edit them.
  • Time handling:
  • Add DNS resolution and multiple NTP servers; cache time with a DS3231 RTC for offline accuracy.
  • Data export:
  • Push data to InfluxDB (line protocol via UDP/HTTP) or MQTT for centralized collection.
  • Modbus TCP gateway:
  • Add a lightweight Modbus TCP-to-RTU bridge on port 502 (requires careful concurrency with the logger).
  • Security:
  • Bind to a management VLAN; add basic auth to HTTP endpoints (lightweight implementation).
  • Reliability:
  • Watchdog timer and brown-out detection.
  • Log rotation (daily files) and SD card wear management.
  • Metrics:
  • Rolling averages, min/max over intervals for power quality insights.
  • Multi-slave polling:
  • Poll multiple meters by enumerating slave IDs and a register map per slave, log with a device tag.

Final Checklist

  • Hardware
  • Arduino Mega 2560 R3.
  • W5500 Ethernet Shield stacked and firmly seated.
  • MAX485 wired: DI→D18, RO→D19, DE/RE→D2, 5V and GND connected.
  • RS‑485 A/B polarity correct; one terminator at the far end; proper biasing.
  • SD card inserted (FAT32).

  • Firmware

  • Arduino CLI installed.
  • Core arduino:avr@1.8.6 installed.
  • Libraries installed: ModbusMaster@2.0.1, Ethernet@2.0.2, SD@1.2.4.
  • Sketch saved at: modbus-energy-logger/modbus-energy-logger.ino
  • Compiled with: arduino:avr:mega FQBN.
  • Uploaded to the correct serial port.

  • Configuration

  • MODBUS_SLAVE_ID, MODBUS_BAUD, and register addresses match your meter.
  • FLOAT_SWAP_WORDS set according to meter’s word order.
  • Networking works (DHCP or static fallback subnet is correct).

  • Validation

  • Serial monitor shows data lines and no persistent errors.
  • Browser/HTTP: /, /json, /metrics reachable.
  • SD: energy.csv created and appending lines.
  • Optional PC-side cross-check with mbpoll matches readings.

With this build, you have a robust Modbus RTU energy logger on an Arduino Mega 2560 that logs to SD and serves real-time readings over Ethernet, ready for integration into dashboards and monitoring stacks.

Find this product and/or books on this topic on Amazon

Go to Amazon

As an Amazon Associate, I earn from qualifying purchases. If you buy through this link, you help keep this project running.

Quick Quiz

Question 1: What microcontroller is used in the Modbus energy logger?


Question 2: Which Ethernet shield is compatible with the Arduino Mega 2560 for this project?


Question 3: What type of transceiver is used for RS-485 communication?


Question 4: What format should the microSD card be in for this project?


Question 5: What is recommended for network configuration in this project?


Question 6: Which operating systems are prerequisites for this project?


Question 7: What type of cable is recommended for RS-485 connections?


Question 8: Which command can be used to verify Arduino CLI installation?


Question 9: What size microSD card is recommended for the logger?


Question 10: What is the primary function of the Modbus energy logger?


Carlos Núñez Zorrilla
Electronics & Computer Engineer

Telecommunications Electronics Engineer and Computer Engineer (official degrees in Spain).

Follow me:


Practical case: NFC access via WiFi on Arduino Nano 33 IoT

Practical case: NFC access via WiFi on Arduino Nano 33 IoT — hero

Objective and use case

What you’ll build: This hands-on practical case implements NFC badge–based access control that uses the Arduino Nano 33 IoT’s Wi-Fi to call a backend when authorized tags are presented.

Why it matters / Use cases

  • Implement secure access control for facilities using NFC badges, enhancing security measures.
  • Integrate IoT devices with existing infrastructure to streamline user authentication processes.
  • Provide real-time status updates on access attempts via the SSD1306 OLED display.
  • Enable remote monitoring of access logs by posting events to a server.

Expected outcome

  • Successful NFC tag reads with a 95% accuracy rate in identifying authorized users.
  • Event POST requests to the server with less than 200 ms latency.
  • Real-time feedback displayed on the OLED screen within 1 second of tag presentation.
  • Ability to handle up to 50 access attempts per minute without performance degradation.

Audience: Advanced users; Level: Advanced

Architecture/flow: Arduino Nano 33 IoT communicates with PN532 for NFC reads, displays status on SSD1306 OLED, and connects to Wi-Fi for backend communication.

NFC Wi‑Fi Access Control on Arduino Nano 33 IoT + PN532 NFC + SSD1306 OLED (Advanced)

This hands‑on practical case implements NFC badge–based access control that uses the board’s Wi‑Fi to call a backend when authorized tags are presented. The PN532 reads NFC tags, the SSD1306 OLED shows status, and the Nano 33 IoT connects to Wi‑Fi to POST an event to a server. You will build, flash, validate, troubleshoot, and extend this project using PlatformIO from the command line.

Target device: Arduino Nano 33 IoT + PN532 NFC + SSD1306 OLED
Objective: nfc‑wifi‑access‑control

Note on toolchain: Because the chosen board is not the default Arduino UNO (AVR), this guide uses PlatformIO Core (CLI) instead of Arduino CLI, and includes driver/port notes and exact pio commands.

Prerequisites

  • Skill level: Advanced (comfortable with C++ for Arduino, PlatformIO, wiring I2C devices, and working with HTTP backends).
  • Host OS:
  • Windows 10/11, macOS 12+, or Linux (Ubuntu 20.04+).
  • Software:
  • Python 3.8+ (for installing PlatformIO Core).
  • PlatformIO Core 6.1+ (CLI).
  • Node.js 18+ (for the optional minimal validation server).
  • Hardware:
  • Arduino Nano 33 IoT (official, 3.3 V logic).
  • PN532 NFC/RFID Controller Breakout in I2C mode.
  • SSD1306 OLED 128×64 I2C (address 0x3C).
  • Breadboard and 3.3 V wiring jumpers.

Driver notes:
– Arduino Nano 33 IoT has native USB CDC ACM. On macOS/Linux, no driver required. On Windows 10/11, drivers are automatic. For Windows 7, install Arduino SAMD drivers (installing Arduino IDE once is sufficient to obtain the driver, even if you use PlatformIO to build).

Materials (exact model)

  • Microcontroller: Arduino Nano 33 IoT (ABX00027).
  • NFC reader: Adafruit PN532 NFC/RFID Controller Breakout Board (v1.6 or later; configured to I2C mode).
  • OLED display: SSD1306 128×64 I2C (typical address 0x3C; e.g., Adafruit 938 or compatible).
  • NFC media: MIFARE Classic/Ultralight cards or key fobs (ISO14443A).
  • USB cable: Micro USB (for the Nano 33 IoT).
  • Breadboard and male‑to‑female dupont wires (3.3 V logic compatible).

Power/logic caution:
– Arduino Nano 33 IoT is a 3.3 V device. Do NOT feed 5 V logic to I/O. PN532 and SSD1306 should be powered at 3.3 V and use 3.3 V logic.

Setup/Connection

We will run both PN532 and SSD1306 over I2C. The PN532 in I2C mode additionally uses IRQ and RST pins for the Adafruit library’s handshake. The OLED shares the I2C bus.

  • Configure the PN532 breakout to I2C mode:
  • Set the interface selection jumpers/switches to I2C per your board’s silkscreen (commonly “I2C” selection documented on the breakout). Power‑cycle after changing switches/jumpers.

  • Wire the modules to the Arduino Nano 33 IoT as follows:

Module Signal Nano 33 IoT Pin Notes
PN532 VIN 3V3 3.3 V only
PN532 GND GND Common ground
PN532 SDA A4 (SDA) I2C data
PN532 SCL A5 (SCL) I2C clock
PN532 IRQ D2 Used by Adafruit PN532 I2C mode
PN532 RST D3 Reset line
SSD1306 VCC 3V3 3.3 V only
SSD1306 GND GND Common ground
SSD1306 SDA A4 (SDA) I2C data (shared bus)
SSD1306 SCL A5 (SCL) I2C clock (shared bus)
  • Addresses:
  • SSD1306 I2C address: 0x3C (typical).
  • PN532 I2C 7‑bit address: 0x24 (8‑bit 0x48) (handled by library).

Double‑check:
– No 5 V lines connected to modules.
– A4/A5 are the Nano 33 IoT’s I2C pins (SDA/SCL).
– PN532 interface truly set to I2C (if not, the library will not detect it).

Full Code

We will use PlatformIO with the Arduino framework and pin an exact set of library versions for reproducibility.

Project tree (relative paths):
– platformio.ini
– src/main.cpp
– include/secrets.h

First create platformio.ini:

; platformio.ini
[env:nano_33_iot]
platform = atmelsam
board = nano_33_iot
framework = arduino
monitor_speed = 115200

lib_deps =
  adafruit/Adafruit PN532 @ 1.3.0
  adafruit/Adafruit SSD1306 @ 2.5.9
  adafruit/Adafruit GFX Library @ 1.11.9
  arduino-libraries/WiFiNINA @ 1.8.14
  bblanchon/ArduinoJson @ 7.0.4
  rweather/Crypto @ 0.4.0

Then add include/secrets.h (fill in your Wi‑Fi SSID/password and HMAC key):

// include/secrets.h
#pragma once

// Wi-Fi credentials
#define SECRET_SSID "YourWiFiSSID"
#define SECRET_PASS "YourWiFiPassword"

// 32-byte HMAC key (hex or ascii). Keep secret in production.
// For demo purposes, use a simple ASCII key; replace with a strong one.
#define SECRET_HMAC_KEY "this_is_a_demo_hmac_key_32bytes!!"

Finally, add src/main.cpp:

// src/main.cpp
#include <Arduino.h>
#include <Wire.h>
#include <SPI.h>
#include <WiFiNINA.h>
#include <Adafruit_GFX.h>
#include <Adafruit_SSD1306.h>
#include <Adafruit_PN532.h>
#include <ArduinoJson.h>
#include <Crypto.h>
#include <SHA256.h>
#include <HMAC.h>

#include "secrets.h"

// OLED config
#define SCREEN_WIDTH 128
#define SCREEN_HEIGHT 64
#define OLED_RESET_PIN -1
#define OLED_I2C_ADDR 0x3C

Adafruit_SSD1306 display(SCREEN_WIDTH, SCREEN_HEIGHT, &Wire, OLED_RESET_PIN);

// PN532 (I2C mode) pins
#define PN532_IRQ   2
#define PN532_RESET 3
Adafruit_PN532 nfc(PN532_IRQ, PN532_RESET);

// Wi-Fi / server settings
const char* WIFI_SSID = SECRET_SSID;
const char* WIFI_PASS = SECRET_PASS;
const char* SERVER_HOST = "192.168.1.50";
const uint16_t SERVER_PORT = 8080;
const char* SERVER_PATH = "/api/access";

// Authorization list: Allowed NFC UIDs (hex). Replace with your tags.
static const uint8_t AUTH_UIDS[][7] = {
  // Example UIDs (lengths vary, common: 4 or 7 bytes). Fill with your real tag UIDs.
  { 0x04, 0xA1, 0xB2, 0xC3, 0xD4, 0xE5, 0xF6 },  // 7-byte sample
  { 0xDE, 0xAD, 0xBE, 0xEF }                     // 4-byte sample
};
static const size_t AUTH_UIDS_LEN[] = {
  7,
  4
};
static const size_t AUTH_COUNT = sizeof(AUTH_UIDS_LEN)/sizeof(AUTH_UIDS_LEN[0]);

// Forward declarations
void oledMsg(const String& l1, const String& l2 = "", const String& l3 = "");
String uidToHex(const uint8_t* uid, uint8_t uidLength);
bool isAuthorized(const uint8_t* uid, uint8_t uidLength);
bool ensureWiFi();
bool httpPostAccess(const uint8_t* uid, uint8_t uidLength);
String hmacOfUID(const uint8_t* uid, uint8_t uidLength);

// Utility: Print WiFi firmware version (helps troubleshooting)
void printWiFiFirmware() {
  String fv = WiFi.firmwareVersion();
  Serial.print(F("WiFiNINA firmware: "));
  Serial.println(fv);
}

void setup() {
  Serial.begin(115200);
  while (!Serial && millis() < 4000) { /* wait for USB */ }

  // OLED init
  if (!display.begin(SSD1306_SWITCHCAPVCC, OLED_I2C_ADDR)) {
    Serial.println(F("SSD1306 allocation failed"));
    // Hard fail: cannot proceed visually, but continue via Serial
  }
  display.clearDisplay();
  display.display();
  oledMsg("NFC WiFi Access", "Nano 33 IoT", "Booting...");

  // NFC init
  Wire.begin();
  nfc.begin();
  uint32_t versiondata = nfc.getFirmwareVersion();
  if (!versiondata) {
    Serial.println(F("Didn't find PN532. Check I2C & I/F switches."));
    oledMsg("PN532 not found", "Check I2C & pins", "");
    delay(3000);
  } else {
    Serial.print(F("PN532 found. Chip: 0x"));
    Serial.println((versiondata >> 24) & 0xFF, HEX);
    Serial.print(F("Firmware: "));
    Serial.print((versiondata >> 16) & 0xFF, DEC);
    Serial.print('.');
    Serial.println((versiondata >> 8) & 0xFF, DEC);
    nfc.setPassiveActivationRetries(0xFF);
    nfc.SAMConfig(); // configure board to read RFID tags
  }

  // Wi-Fi init
  if (WiFi.status() == WL_NO_MODULE) {
    Serial.println(F("Communication with WiFi module failed!"));
    oledMsg("WiFiNINA module", "not found", "");
  } else {
    printWiFiFirmware();
  }

  oledMsg("Scan your NFC", "Authorized -> WiFi", "Unauthorized -> Deny");
}

void loop() {
  boolean success;
  uint8_t uid[7];
  uint8_t uidLength = 0;

  // Try to read a tag with a short timeout (100 ms) to keep loop responsive
  success = nfc.readPassiveTargetID(PN532_MIFARE_ISO14443A, uid, &uidLength, 100);
  if (success) {
    String uidHex = uidToHex(uid, uidLength);
    Serial.print(F("Tag detected UID: "));
    Serial.println(uidHex);
    oledMsg("Tag detected:", uidHex, "");

    if (isAuthorized(uid, uidLength)) {
      Serial.println(F("Authorized tag."));
      oledMsg("Authorized", "Connecting WiFi...", "");

      if (ensureWiFi()) {
        Serial.println(F("WiFi connected."));
        oledMsg("WiFi OK", "Contacting server", "");

        if (httpPostAccess(uid, uidLength)) {
          Serial.println(F("Server accepted access."));
          oledMsg("ACCESS GRANTED", uidHex, "Server OK");
        } else {
          Serial.println(F("Server rejected or error."));
          oledMsg("ACCESS PENDING", "Server error", "");
        }
      } else {
        Serial.println(F("WiFi connection failed."));
        oledMsg("WiFi failed", "Check SSID/PASS", "");
      }
    } else {
      Serial.println(F("Unauthorized tag."));
      oledMsg("ACCESS DENIED", uidHex, "");
    }

    delay(1500);
    oledMsg("Scan your NFC", "", "");
  }

  // Small delay to avoid I2C flooding
  delay(20);
}

void oledMsg(const String& l1, const String& l2, const String& l3) {
  display.clearDisplay();
  display.setTextSize(1);
  display.setTextColor(SSD1306_WHITE);
  display.setCursor(0, 0);
  display.println(l1);
  if (l2.length()) display.println(l2);
  if (l3.length()) display.println(l3);
  display.display();
}

String uidToHex(const uint8_t* uid, uint8_t uidLength) {
  char buf[2 * 7 + 1];
  size_t idx = 0;
  for (uint8_t i = 0; i < uidLength; i++) {
    sprintf(&buf[idx], "%02X", uid[i]);
    idx += 2;
  }
  buf[idx] = 0;
  return String(buf);
}

bool isAuthorized(const uint8_t* uid, uint8_t uidLength) {
  for (size_t i = 0; i < AUTH_COUNT; i++) {
    if (AUTH_UIDS_LEN[i] != uidLength) continue;
    if (memcmp(AUTH_UIDS[i], uid, uidLength) == 0) {
      return true;
    }
  }
  return false;
}

bool ensureWiFi() {
  if (WiFi.status() == WL_CONNECTED) return true;

  int status = WL_IDLE_STATUS;
  unsigned long start = millis();
  const unsigned long timeout = 20000; // 20 seconds
  Serial.print(F("Connecting to WiFi SSID: "));
  Serial.println(WIFI_SSID);

  WiFi.disconnect();
  delay(300);

  while (millis() - start < timeout) {
    status = WiFi.begin(WIFI_SSID, WIFI_PASS);
    // Wait a bit to establish
    for (int i = 0; i < 20; i++) {
      if (WiFi.status() == WL_CONNECTED) break;
      delay(250);
    }
    if (WiFi.status() == WL_CONNECTED) break;
    Serial.print(F("."));
  }

  if (WiFi.status() == WL_CONNECTED) {
    Serial.print(F("Connected, IP: "));
    Serial.println(WiFi.localIP());
    return true;
  }
  return false;
}

String hmacOfUID(const uint8_t* uid, uint8_t uidLength) {
  // HMAC-SHA256 over raw UID bytes using the secret key
  HMAC<SHA256> hmac;
  const uint8_t* key = reinterpret_cast<const uint8_t*>(SECRET_HMAC_KEY);
  size_t keyLen = strlen(SECRET_HMAC_KEY);
  hmac.reset(key, keyLen);
  hmac.update(uid, uidLength);
  uint8_t mac[SHA256::HASH_SIZE];
  hmac.finalize(mac, sizeof(mac));

  // Convert to hex string
  char hex[2 * sizeof(mac) + 1];
  for (size_t i = 0; i < sizeof(mac); i++) {
    sprintf(&hex[2 * i], "%02X", mac[i]);
  }
  hex[2 * sizeof(mac)] = 0;
  return String(hex);
}

bool httpPostAccess(const uint8_t* uid, uint8_t uidLength) {
  WiFiClient client;
  if (!client.connect(SERVER_HOST, SERVER_PORT)) {
    Serial.println(F("HTTP connect failed."));
    return false;
  }

  String uidHex = uidToHex(uid, uidLength);
  String hmacHex = hmacOfUID(uid, uidLength);

  // Build JSON payload
  StaticJsonDocument<200> doc;
  doc["uid"] = uidHex;
  doc["hmac"] = hmacHex;

  String payload;
  serializeJson(doc, payload);

  // Build HTTP/1.1 request
  String request =
    String("POST ") + SERVER_PATH + " HTTP/1.1\r\n" +
    "Host: " + SERVER_HOST + ":" + String(SERVER_PORT) + "\r\n" +
    "User-Agent: Nano33IoT-PN532/1.0\r\n" +
    "Content-Type: application/json\r\n" +
    "Content-Length: " + String(payload.length()) + "\r\n" +
    "Connection: close\r\n" +
    "X-Auth: " + hmacHex + "\r\n" +
    "\r\n" +
    payload;

  client.print(request);

  // Wait for response status line
  unsigned long start = millis();
  while (client.connected() && !client.available() && millis() - start < 5000) {
    delay(10);
  }

  if (!client.available()) {
    Serial.println(F("No response from server."));
    client.stop();
    return false;
  }

  // Read first line of response
  String statusLine = client.readStringUntil('\n');
  statusLine.trim();
  Serial.print(F("HTTP status: "));
  Serial.println(statusLine);

  bool ok = statusLine.startsWith("HTTP/1.1 200");

  // Drain and close
  while (client.available()) client.read();
  client.stop();

  return ok;
}

Notes:
– Replace AUTH_UIDS entries with the UIDs of your authorized tags.
– Fill include/secrets.h with your network credentials and a secret HMAC key.
– The server endpoint is assumed to be reachable at http://192.168.1.50:8080/api/access. You can change SERVER_HOST, SERVER_PORT, and SERVER_PATH.

Optional minimal validation server (Node.js):

// server.js - minimal HTTP server for validation
const http = require('http');

const server = http.createServer((req, res) => {
  if (req.method === 'POST' && req.url === '/api/access') {
    let body = '';
    req.on('data', chunk => {
      body += chunk.toString();
      if (body.length > 1e6) req.socket.destroy(); // guard
    });
    req.on('end', () => {
      try {
        const data = JSON.parse(body);
        console.log('Access event:', data);
        // In a real system, recompute HMAC and compare with data.hmac
        res.writeHead(200, { 'Content-Type': 'application/json' });
        res.end(JSON.stringify({ ok: true }));
      } catch (e) {
        res.writeHead(400, { 'Content-Type': 'text/plain' });
        res.end('Bad Request');
      }
    });
  } else {
    res.writeHead(404);
    res.end();
  }
});

server.listen(8080, '0.0.0.0', () => {
  console.log('Validation server listening on http://0.0.0.0:8080');
});

Build/Flash/Run commands

PlatformIO Core install (choose one):

pipx install platformio

# Option B: pip
python3 -m pip install --upgrade platformio

# Verify
pio --version

Project initialization and build:

# Create and enter project directory
mkdir nfc-wifi-access-nano33iot
cd nfc-wifi-access-nano33iot

# Create files:
# - platformio.ini (as provided)
# - include/secrets.h (fill credentials)
# - src/main.cpp

# Install libraries declared in lib_deps (auto on first build)
pio run

# List serial devices to find the Nano 33 IoT port
pio device list
# Examples: Windows -> COM5 ; Linux -> /dev/ttyACM0 ; macOS -> /dev/cu.usbmodem14101

# Upload firmware (replace with your port)
pio run -t upload -e nano_33_iot --upload-port /dev/ttyACM0

# Open serial monitor at 115200 bps
pio device monitor --baud 115200

Run the optional validation server:

# In a separate terminal on the server host (192.168.1.50 in the example)
node server.js

Adjust SERVER_HOST in src/main.cpp if your server host is different.

Step‑by‑step Validation

  1. USB/port check
  2. Connect the Nano 33 IoT via USB.
  3. Run:
    bash
    pio device list
  4. Confirm a device like /dev/ttyACM0 (Linux), /dev/cu.usbmodemXXXX (macOS), or COMx (Windows) appears.

  5. Wire inspection

  6. Verify the connections from the Setup/Connection table.
  7. Re‑confirm PN532 is in I2C mode.

  8. First flash

  9. Build and upload:
    bash
    pio run -t upload -e nano_33_iot --upload-port <your-port>
  10. Open the monitor:
    bash
    pio device monitor --baud 115200
  11. Expected boot logs: PN532 firmware version, WiFiNINA firmware version, and “Scan your NFC”.

  12. OLED sanity check

  13. The OLED should show:
    • “NFC WiFi Access”
    • Then “Scan your NFC”
  14. If blank: recheck VCC/GND/SDA/SCL and I2C address (0x3C default).

  15. PN532 detection

  16. Present a tag near the PN532 antenna.
  17. Serial monitor should print “Tag detected UID: …”.
  18. If nothing happens, swap another tag (ISO14443A), verify IRQ (D2) and RST (D3) wiring.

  19. Authorize at least one tag

  20. Edit AUTH_UIDS in src/main.cpp with an actual UID from your tag (observe the hex reported in Serial).
  21. Rebuild/upload.
  22. Present that tag; you should see:

    • OLED: “Authorized” then “WiFi OK” and “Server OK”.
    • Serial: “Authorized tag.” then “WiFi connected.” then “Server accepted access.”
  23. Server response validation

  24. Start the validation server:
    bash
    node server.js
  25. Present the authorized tag again.
  26. The server terminal should print the JSON payload, e.g.:
    • Access event: { uid: ’04A1B2C3D4E5F6′, hmac: ‘…’ }
  27. Verify Arduino’s serial shows an HTTP 200 OK.

  28. Unauthorized tag test

  29. Present a tag not in AUTH_UIDS.
  30. OLED should display “ACCESS DENIED”; no Wi‑Fi or server call attempted.
  31. Serial should log “Unauthorized tag.”

  32. Wi‑Fi failure path

  33. Temporarily change your SSID in include/secrets.h to a wrong value; rebuild/upload.
  34. Present an authorized tag.
  35. Expected:

    • OLED: “WiFi failed”
    • Serial: “WiFi connection failed.”
  36. Server failure path

    • Stop the validation server or change SERVER_HOST to an unreachable IP.
    • Present authorized tag.
    • Expected:
    • Serial: “HTTP connect failed.” or “No response from server.”
    • OLED: “ACCESS PENDING / Server error”

Troubleshooting

  • PN532 not detected
  • Symptom: “Didn’t find PN532.” in Serial/OLED.
  • Checks:

    • Confirm PN532 set to I2C mode (switch/jumper config).
    • Verify wiring: SDA->A4, SCL->A5, IRQ->D2, RST->D3, VIN->3V3, GND->GND.
    • Ensure 3.3 V power; avoid 5 V power or level shifters that clamp.
    • Ensure only one module uses those IRQ/RST pins.
    • Try power‑cycling after changing interface switches.
  • OLED shows nothing

  • Confirm 3.3 V and GND.
  • Check I2C lines, correct address (0x3C). Some displays are at 0x3D—change OLED_I2C_ADDR accordingly.
  • If using long wires, lower I2C speed or shorten wires.

  • Tags not read

  • Ensure ISO14443A tags (MIFARE Classic/Ultralight). The PN532 example code targets PN532_MIFARE_ISO14443A.
  • Keep the tag within a few centimeters and centered over the PN532 antenna.
  • Avoid metal surfaces under antenna.

  • Wi‑Fi issues

  • Serial shows “Communication with WiFi module failed!”
    • Rare, but indicates module not responding. Try unplug/replug, different USB cable/port.
  • Wrong SSID/PASS: adjust include/secrets.h.
  • Weak Wi‑Fi signal: place closer to AP, ensure 2.4 GHz network.
  • Firmware mismatch: Some WiFiNINA features require recent firmware. Use a separate maintenance step to update NINA‑W102 firmware (can be done with Arduino IDE’s firmware updater if necessary).

  • HTTP server unreachable

  • Confirm server host/IP and port are correct and reachable from the device’s Wi‑Fi network.
  • Open firewall for TCP/8080.
  • Use ping from a PC on the same network and verify the route.

  • HMAC validation fails on backend

  • Ensure the backend computes HMAC‑SHA256 over the same bytes (raw UID) with the exact same shared secret.
  • Check hex case (upper vs lower) and stripping issues.
  • Consider including UID length in the HMAC input if you have mixed 4/7‑byte tags.

  • PlatformIO upload errors (port)

  • Use:
    bash
    pio device list

    and choose the correct port.
  • Close any Serial Monitor before uploading.
  • On Windows, if no COM port appears, try a different cable/port or install Arduino SAMD drivers.

  • Power stability

  • If you see intermittent resets, use a powered USB hub or ensure your PC/laptop can supply sufficient current.

Improvements

  • Transport security (TLS):
  • Replace WiFiClient with WiFiSSLClient and use HTTPS on your server.
  • Validate the server certificate (fingerprint or full chain) to prevent MITM attacks.
  • Note: This increases flash/RAM use; ensure WiFiNINA firmware is up to date.

  • Stronger request semantics:

  • Include a timestamp and nonce in the payload and the HMAC computation.
  • Backend should reject stale or replayed tokens.

  • Access decisions on backend:

  • Send tag UIDs to the backend and let it decide (centralized ACL).
  • Cache allow/deny locally for offline operation with a short TTL.

  • Persistent authorized list:

  • Store authorized UIDs in nonvolatile memory (e.g., emulated EEPROM or flash).
  • Add a serial command to enroll/revoke badges.

  • Non‑blocking architecture:

  • Convert the loop into a state machine to avoid blocking delays.
  • Debounce repeated reads: wait for tag removal before accepting the next read.

  • Visual and audible feedback:

  • Add a status LED or buzzer for distinct grant/deny signals.

  • PN532 interface alternatives:

  • SPI can reduce I2C bus contention and often improves throughput.
  • If you switch to SPI, update wiring and use the SPI constructor for Adafruit_PN532.

  • Backend integration:

  • Replace the validation server with your production access controller (e.g., a REST API that drives a relay/door strike).
  • Implement logging, rate limiting, and alerting for failed attempts.

  • Hardening secrets:

  • Avoid storing secrets in plaintext in firmware. Consider a secure element or at least obfuscation.
  • Rotate secrets periodically.

  • OTA updates:

  • Implement an update mechanism to deploy new firmware without physical access.

  • Monitoring:

  • Expose a local HTTP status endpoint or simple mDNS service with uptime and last access logs.

Final Checklist

  • Hardware
  • Arduino Nano 33 IoT connected via USB.
  • PN532 wired to A4/A5 (I2C), IRQ->D2, RST->D3; powered at 3.3 V.
  • SSD1306 wired to A4/A5 (I2C); powered at 3.3 V.
  • Common ground verified.

  • Software

  • PlatformIO Core installed; pio commands available.
  • platformio.ini created with exact lib versions.
  • include/secrets.h filled with SSID, PASS, and strong SECRET_HMAC_KEY.
  • src/main.cpp compiled without errors.

  • Build/Flash

  • Board port identified via “pio device list”.
  • Firmware uploaded via:
    • pio run -t upload -e nano_33_iot –upload-port
  • Serial monitor open at 115200 baud.

  • Validation

  • OLED displays “Scan your NFC”.
  • PN532 reports firmware in Serial; tags detected produce UID log lines.
  • Authorized tag triggers Wi‑Fi connect and HTTP 200 OK from your server.
  • Unauthorized tag shows “ACCESS DENIED”.

  • Troubleshooting resolved

  • No I2C address conflicts; OLED and PN532 are visible and functional.
  • Wi‑Fi credentials verified; WiFiNINA firmware acceptable.
  • Server host reachable and receiving JSON payloads.

With this build, the Arduino Nano 33 IoT + PN532 NFC + SSD1306 OLED acts as a compact NFC‑driven access control client over Wi‑Fi. You can now evolve it into a production‑grade system with TLS, centralized authorization, and robust device management.

Find this product and/or books on this topic on Amazon

Go to Amazon

As an Amazon Associate, I earn from qualifying purchases. If you buy through this link, you help keep this project running.

Quick Quiz

Question 1: What is the primary function of the PN532 in this project?


Question 2: Which OLED display is used in the project?


Question 3: What is the skill level required for this project?


Question 4: Which software is required to install PlatformIO Core?


Question 5: What is the purpose of the Arduino Nano 33 IoT in this project?


Question 6: What is the minimal version of Node.js required for the optional server?


Question 7: What type of wiring is needed for the project?


Question 8: What command-line interface is used instead of Arduino CLI?


Question 9: For which operating systems is the project compatible?


Question 10: What is the target device for this NFC Wi-Fi access control project?


Carlos Núñez Zorrilla
Electronics & Computer Engineer

Telecommunications Electronics Engineer and Computer Engineer (official degrees in Spain).

Follow me: