Introduction
Have you ever wondered how your smart thermostat knows when to adjust the temperature? A few years ago, I was perplexed by the convenience of my friend’s home automation system. That curiosity led me into the fascinating world of the Internet of Things (IoT). The IoT has revolutionized the way we interact with technology, creating a seamlessly connected environment that enhances our daily lives. From smart homes to industrial applications, IoT is reshaping how we approach tasks, making them more efficient and user-friendly.
The term «Internet of Things» may sound complex, but at its core, it refers to a network of interconnected devices that communicate and exchange data with each other over the internet. This interconnectedness enables devices to work together to improve functionality and provide valuable insights. In this tutorial, we will explore the workings of IoT, its applications, key parameters to consider, and practical projects to help you get started. By the end, you will have a solid understanding of IoT and how you can leverage its capabilities in your own projects.
What it’s used for and how it works
The Internet of Things (IoT) encompasses a vast array of devices and applications that span various sectors, including home automation, healthcare, agriculture, and industrial processes. The beauty of IoT lies in its ability to collect data, analyze it, and provide insights that enhance efficiency, convenience, and productivity.
How IoT Works
At its core, IoT works through a combination of sensors, connectivity, data processing, and user interfaces. Let’s break that down into more detail:
-
Sensors and Devices: IoT devices are equipped with sensors that collect data from their environment. For instance, a smart thermostat measures temperature and humidity, while a smart light bulb detects motion. These sensors can also include cameras, accelerometers, and GPS modules, depending on the application. The data collected can range from environmental conditions to user interactions, providing a comprehensive view of the device’s surroundings. For example, a smart irrigation system may use soil moisture sensors to determine when to water plants, optimizing water usage.
-
Connectivity: Once the data is collected, it needs to be transmitted to the cloud or a local server for processing. This is achieved through various connectivity options, including Wi-Fi, Bluetooth, Zigbee, and cellular networks. The choice of connectivity depends on the range, power consumption, and data transfer requirements of the specific application. For example, Wi-Fi is suitable for home automation, while Zigbee is often used in low-power, short-range applications like smart lighting. Understanding the strengths and limitations of each connectivity option is crucial for designing effective IoT solutions.
-
Data Processing: After the data is transmitted, it is processed and analyzed, often using cloud computing. This processing can involve simple actions, such as turning on a light when motion is detected, or more complex algorithms that predict user behavior. Advanced analytics may utilize machine learning techniques to derive insights from the data, enabling predictive maintenance in industrial settings or personalized recommendations in smart home systems. For instance, a smart home system might learn your daily routine and adjust heating or cooling settings accordingly, optimizing energy usage.
-
User Interface: Finally, users interact with IoT devices through applications or web interfaces. This allows you to monitor and control your devices remotely, receive alerts, and access analytics. User interfaces can range from simple mobile apps to complex dashboards that visualize data trends and device statuses. The design of these interfaces is crucial for user experience, ensuring that information is presented clearly and actions can be performed intuitively. For example, a user-friendly app can allow users to set schedules for their smart lights or receive notifications about their energy consumption.
Applications of IoT
IoT has a wide range of applications across various sectors, including:
-
Smart Homes: Devices such as smart thermostats, security cameras, and smart appliances enhance home automation and security. For example, a smart thermostat can learn your schedule and adjust the temperature accordingly, saving energy and increasing comfort. Additionally, smart locks can provide remote access to your home, allowing you to grant entry to guests or service personnel without being physically present.
-
Wearables: Fitness trackers and smartwatches monitor health metrics, providing you with valuable feedback on your physical activity. These devices can track steps, heart rate, and sleep patterns, helping users make informed decisions about their health. For example, a smartwatch can alert you to irregular heartbeats, prompting timely medical attention.
-
Healthcare: Remote patient monitoring systems allow healthcare providers to track patients’ health metrics in real-time, leading to better patient outcomes. Wearable devices can send vital signs to healthcare professionals, enabling timely interventions when necessary. For instance, a diabetic patient might use a continuous glucose monitor that sends readings to their doctor, facilitating proactive management of their condition.
-
Industrial IoT (IIoT): Sensors in manufacturing and supply chain management enable real-time monitoring of machinery and inventory, thus optimizing operations. Predictive maintenance can reduce downtime by alerting operators to potential equipment failures before they occur. For example, a factory might use vibration sensors to monitor the condition of machinery, allowing for maintenance to be scheduled before a breakdown occurs.
-
Smart Cities: IoT can improve urban infrastructure, including traffic management systems and waste management solutions, thereby enhancing the quality of urban life. Smart traffic lights can adapt to real-time traffic conditions, reducing congestion and improving air quality. Additionally, smart bins can signal when they need to be emptied, optimizing waste collection routes and reducing operational costs.
Benefits of IoT
The benefits of implementing IoT solutions are substantial. Firstly, IoT devices can significantly increase efficiency by automating routine tasks. For instance, smart irrigation systems can adjust water usage based on soil moisture levels, conserving water and reducing costs. Secondly, they provide valuable insights through data analytics, which can help in decision-making. Businesses can analyze customer behavior to tailor their offerings, leading to increased sales.
Additionally, IoT enhances user convenience, allowing you to control devices remotely. Imagine being able to turn off your lights or adjust your thermostat from your smartphone while you’re away from home. This level of control not only improves comfort but also contributes to energy savings. For example, a user can monitor their energy consumption in real-time and make adjustments to reduce their bill.
You might wonder how IoT impacts various industries. For instance, in agriculture, IoT enables precision farming by monitoring soil conditions and crop health, leading to higher yields and reduced waste. In retail, IoT can enhance the shopping experience through smart shelves that track inventory levels in real-time, ensuring that popular items are always in stock. Moreover, logistics companies can use IoT to track shipments in real-time, improving transparency and customer satisfaction.
Challenges of IoT
While IoT offers numerous advantages, it also presents challenges. Security is a major concern, as interconnected devices can be vulnerable to cyberattacks. A single compromised device can serve as an entry point for malicious actors, potentially leading to data breaches or unauthorized access to sensitive information. Therefore, implementing robust security measures, such as encryption and regular software updates, is essential.
Additionally, data privacy issues arise when sensitive information is collected and transmitted. Users must be informed about what data is being collected and how it will be used. Compliance with data protection regulations, such as GDPR, is crucial to avoid legal repercussions. Organizations should establish clear privacy policies and obtain user consent before collecting personal data.
Further, the interoperability between different IoT devices can be problematic, as various manufacturers may use different protocols. This can create challenges in integrating devices from different vendors, leading to a fragmented ecosystem. Standardization efforts, such as the development of open protocols, are essential to address these interoperability issues. For example, the adoption of standards like MQTT (Message Queuing Telemetry Transport) can facilitate communication between diverse IoT devices.
In summary, IoT is a multifaceted technology that can transform the way we live and work. By leveraging the power of interconnected devices, you can achieve greater efficiency, convenience, and insights. However, it is essential to navigate the challenges associated with security, privacy, and interoperability to maximize the benefits of IoT.
Key parameters
Understanding key parameters of IoT can help you make informed decisions when implementing IoT solutions. Below is a table summarizing some typical values:
| Parameter | Typical Value |
|---|---|
| Data Transfer Rate | 1-100 Mbps |
| Range | 10-100 meters (Wi-Fi) |
| Power Consumption | 10-100 mW (low power) |
| Latency | <100 ms |
| Sensor Accuracy | ±1-5% |
Key Takeaways
-
Data Transfer Rate: This indicates how quickly data can be sent from the device to the server. Faster rates improve responsiveness, which is crucial for applications requiring real-time data processing, such as smart home security systems. For example, a security camera streaming video should have a high data transfer rate to ensure smooth playback.
-
Range: The effective distance over which devices can communicate influences the design and deployment of IoT systems. For instance, a smart home system may rely on Wi-Fi, which has a shorter range compared to cellular networks, making it suitable for indoor applications. Understanding the range helps in planning the placement of devices to ensure optimal connectivity.
-
Power Consumption: Low power consumption is crucial for battery-operated devices, prolonging their operational life. Devices like smart sensors in agriculture often need to operate for extended periods without human intervention, making energy efficiency a key consideration. For example, a soil moisture sensor might need to run for months on a single battery charge.
-
Latency: Low latency is essential for applications requiring real-time responses, such as automated industrial machinery. In smart homes, a delay in response from devices can lead to frustration for users. For instance, a smart lock that takes too long to respond could compromise security and user experience.
-
Sensor Accuracy: High accuracy in sensors ensures reliable data collection, which is vital for effective decision-making. In healthcare, for example, accurate readings from wearable devices can significantly impact patient care. Sensors that provide inaccurate data could lead to poor health monitoring outcomes.
Hands-on practical project
To solidify your understanding of IoT, let’s engage in a hands-on practical project: building a simple smart home temperature monitoring system. This project will allow you to apply the concepts discussed so far and gain practical experience in IoT development.
Project Overview
In this project, you will create a temperature monitoring system using a microcontroller, a temperature sensor, and a cloud platform to visualize the data. The system will allow you to monitor the temperature of a room remotely using a web interface.
Components Needed
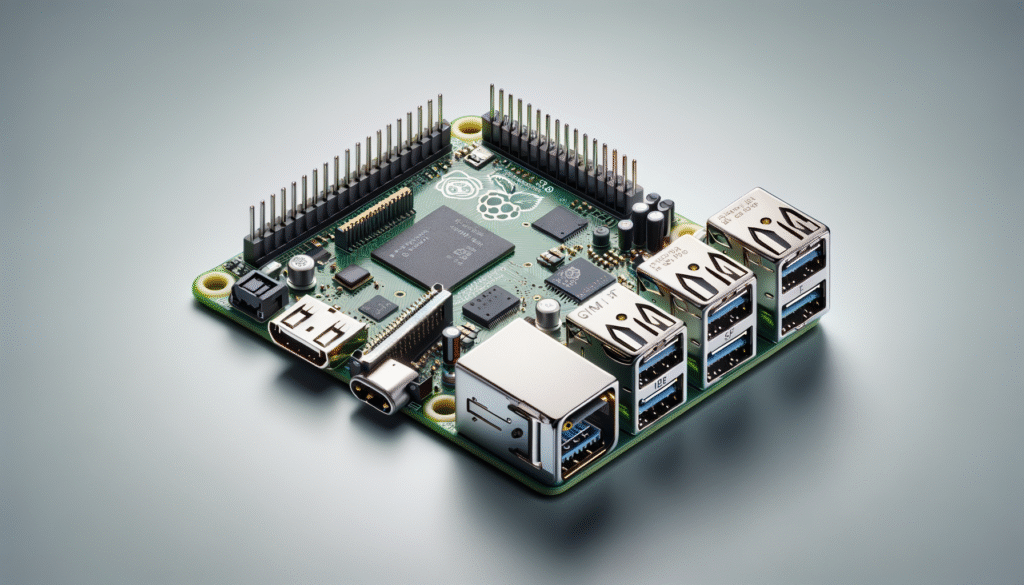
- Microcontroller: An Arduino or Raspberry Pi will work well for this project.
- Temperature Sensor: A DHT11 or DHT22 sensor is suitable for measuring temperature and humidity.
- Wi-Fi Module: If using an Arduino, you may need an ESP8266 or ESP32 module for internet connectivity.
- Cloud Platform: You can use platforms like ThingSpeak or Adafruit IO to visualize your data.
- Jumper Wires and Breadboard: For connecting components.
Step-by-Step Instructions
-
Set Up the Microcontroller: If you are using an Arduino, install the necessary libraries for the DHT sensor and Wi-Fi module. For Raspberry Pi, ensure you have Python and the required libraries installed. Setting up your development environment correctly is crucial for a smooth project experience.
-
Connect the Temperature Sensor: Wire the DHT sensor to the microcontroller. Typically, the sensor has three pins: VCC (power), GND (ground), and DATA (signal). Connect VCC to a 5V pin, GND to ground, and DATA to a digital pin on the microcontroller. Ensure that the connections are secure to avoid intermittent readings.
-
Connect the Wi-Fi Module: If using an Arduino, connect the ESP8266 or ESP32 module to the microcontroller. Follow the manufacturer’s instructions for wiring and configuration. This step is essential for enabling internet connectivity, allowing your device to send data to the cloud.
-
Write the Code: Write a program to read the temperature data from the sensor and send it to the cloud platform. Here’s a simple example for Arduino:
«`cpp
#include
#include
#include
const char ssid = «your(SSID)»;
const char password = «your(PASSWORD)»;
const char* apiKey = «your(API)_KEY»;
DHT dht(DHTPIN, DHT11);
void setup() {
Serial.begin(115200);
dht.begin();
WiFi.begin(ssid, password);
ThingSpeak.begin(client);
}
void loop() {
float h = dht.readHumidity();
float t = dht.readTemperature();
ThingSpeak.setField(1, t);
ThingSpeak.setField(2, h);
ThingSpeak.writeFields(channelID, apiKey);
delay(20000); // Update every 20 seconds
}
«`
-
Upload the Code: Upload the code to your microcontroller and monitor the serial output to ensure it connects to Wi-Fi and sends data to the cloud. Checking the serial output is a good practice to debug any connectivity issues.
-
Visualize the Data: Log in to your cloud platform account and create a new channel. Use the API key provided by the platform to visualize the temperature and humidity data in real-time. This visualization will enable you to monitor the conditions from anywhere with internet access.
-
Access the Web Interface: Most cloud platforms will provide a web interface where you can monitor the temperature and humidity readings from anywhere with an internet connection. This feature enhances the usability of your project, allowing you to check conditions remotely.
Expanding the Project
Once you have the basic system up and running, consider expanding the project by adding features such as:
-
Alerts: Set up alerts to notify you when the temperature exceeds a certain threshold. This can be achieved by integrating notification services like email or SMS through APIs.
-
Data Logging: Store historical data for analysis and trend visualization. Many cloud platforms offer built-in data logging capabilities that can help you track changes over time.
-
Mobile App Integration: Develop a mobile app to provide a user-friendly interface for monitoring your temperature readings. Using frameworks like React Native or Flutter can simplify the development process.
This hands-on project serves as a foundational experience in IoT development, allowing you to explore the integration of hardware, software, and cloud services. Engaging in such projects not only enhances your technical skills but also inspires creativity in developing innovative IoT solutions.
Common mistakes and how to avoid them
When implementing IoT solutions, you should be aware of common pitfalls. Here are some mistakes to avoid:
-
Ignoring Security: Always prioritize security measures in your IoT devices to protect against cyber threats. Use strong passwords, keep firmware updated, and consider using VPNs for remote access. Establishing a security-first mindset is crucial in the design phase of your IoT projects.
-
Neglecting Data Privacy: Be transparent about how you collect and use data, ensuring compliance with data protection regulations. Provide users with clear options to opt-in or opt-out of data collection. This fosters trust and encourages users to engage with your IoT solutions.
-
Overcomplicating Systems: Simplicity is key. Avoid integrating too many devices at once, as it can lead to confusion and management challenges. Start small and gradually expand your IoT ecosystem. A well-designed, simple system is often more effective than a complex one.
-
Failing to Analyze Data: Collecting data is important, but analyzing it is crucial. Ensure you have the tools and processes in place to derive insights from the data. Regularly review the data to identify trends and areas for improvement. This practice can lead to actionable insights that enhance your IoT solutions.
-
Not Considering Scalability: When designing your IoT system, think about future growth and scalability to accommodate more devices and data. Choose platforms and architectures that can easily scale as your needs evolve. Planning for scalability from the outset can save time and resources in the long run.
By being mindful of these common mistakes, you can enhance your IoT implementation and avoid potential issues down the road. Learning from others’ experiences can help you navigate the complexities of IoT more effectively.
Conclusion + call to action
In summary, the Internet of Things (IoT) presents numerous opportunities for enhancing efficiency and convenience across various sectors. By understanding how it works, its applications, and key parameters, you can leverage IoT to achieve significant benefits. The hands-on project provided in this tutorial serves as a practical introduction to IoT development, allowing you to explore the integration of devices and cloud services.
Don’t hesitate to explore how IoT can transform your home, business, or industry. Start your IoT journey today and unlock the potential of connected devices. More information at prometeo.blog
Third-party readings
- Tutorial de Seguridad IoT – MicroAI™
- Tutoriales Micro de Watson IoT Platform
- Construye un Sistema de Alarma Inteligente con micro:bit
Find this product and/or books on this topic on Amazon
As an Amazon Associate, I earn from qualifying purchases. If you buy through this link, you help keep this project running.
Quick Quiz

Telecommunications Electronics Engineer and Computer Engineer (official degrees in Spain).