Micro Tutorial: Motherboard

Micro Tutorial: Placa Base — imagen destacada

Introduction

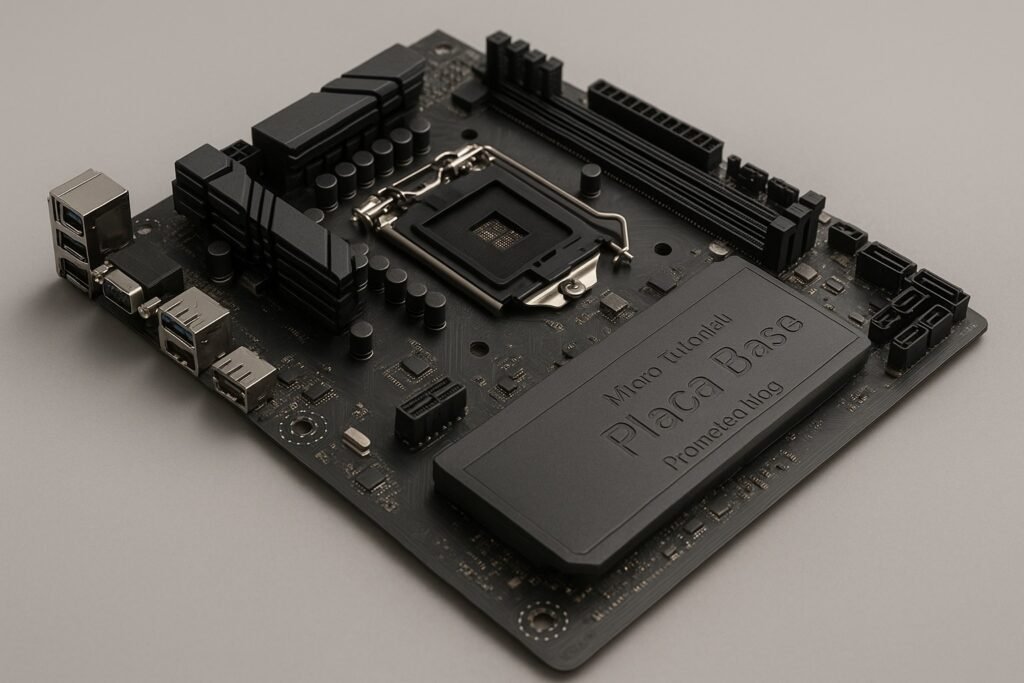
You might remember the first time you opened your computer case, revealing a complex web of circuits and components. Among them, the placa base, or motherboard, stood out as the backbone of your machine. It’s where everything connects, and understanding it can enhance your tech skills significantly. The motherboard is not just a piece of hardware; it is the central nervous system of your computer, coordinating all activities and facilitating communication between various components. Whether you’re a budding electronics enthusiast or a seasoned technician, grasping the intricacies of the placa base is essential for anyone interested in the world of computers.

As technology evolves, so does the complexity of motherboards. New features, improved performance, and enhanced connectivity options are constantly emerging, making it crucial to stay informed. This tutorial aims to provide you with a comprehensive understanding of the placa base, its functions, and how to effectively utilize it in practical scenarios.

What it’s used for and how it works

The placa base serves as the central hub of a computer system. It connects all the essential components, such as the CPU, RAM, storage devices, and peripherals, enabling them to communicate effectively. Essentially, it acts like a traffic conductor, managing data flow and power distribution throughout the system. Without a well-functioning motherboard, your computer would be unable to operate.

Key Functions of the Placa Base

  1. Power Distribution: The placa base distributes power from the power supply to various components. It ensures that every part receives the necessary voltage to function properly. This distribution is crucial; if any part of the motherboard fails to deliver power correctly, it can lead to system instability or hardware failure.

  2. Data Communication: Through buses and slots, the motherboard facilitates data exchange between the CPU, memory, and other devices. This communication is crucial for the overall performance and efficiency of your computer. For instance, when you open a file, the CPU retrieves data from the RAM, and the motherboard manages this data transfer seamlessly.

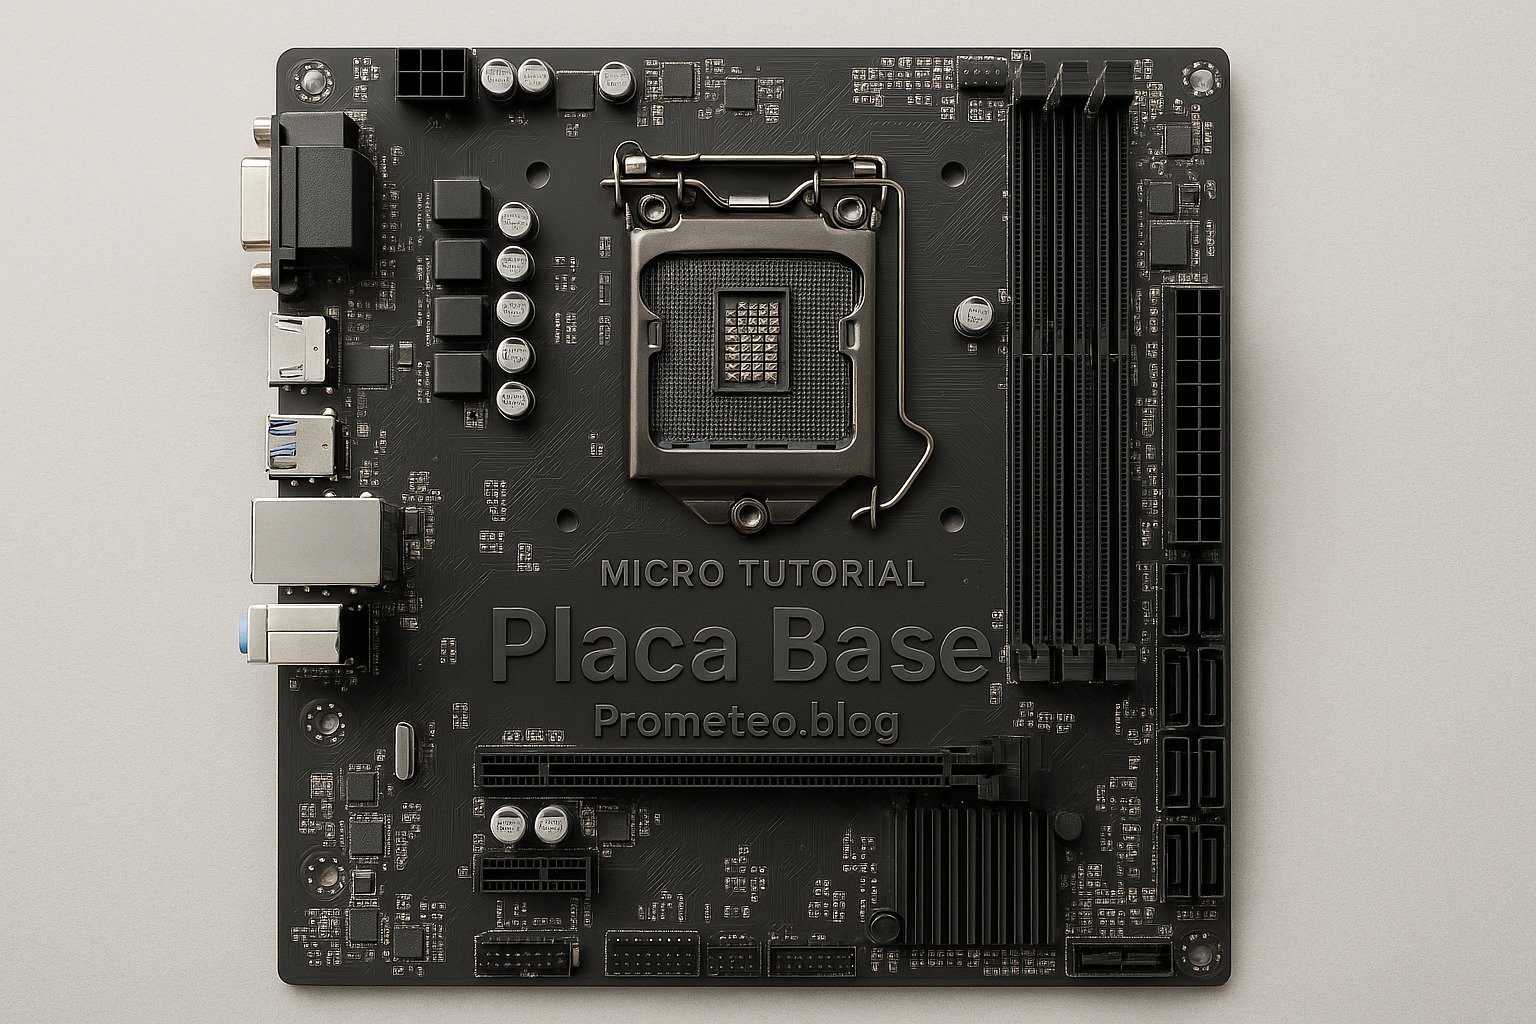
  3. Expansion Slots: Most motherboards come with several expansion slots, allowing you to add additional components like graphics cards, sound cards, and network cards. These slots can be PCIe, PCI, or AGP, depending on the motherboard’s design. Expansion slots are vital for upgrading your system as new technologies emerge.

  4. BIOS/UEFI Firmware: The motherboard houses the BIOS or UEFI firmware, which is essential for booting your computer and managing data flow between the operating system and hardware. This firmware initializes hardware components during startup and provides a user interface for system configuration.

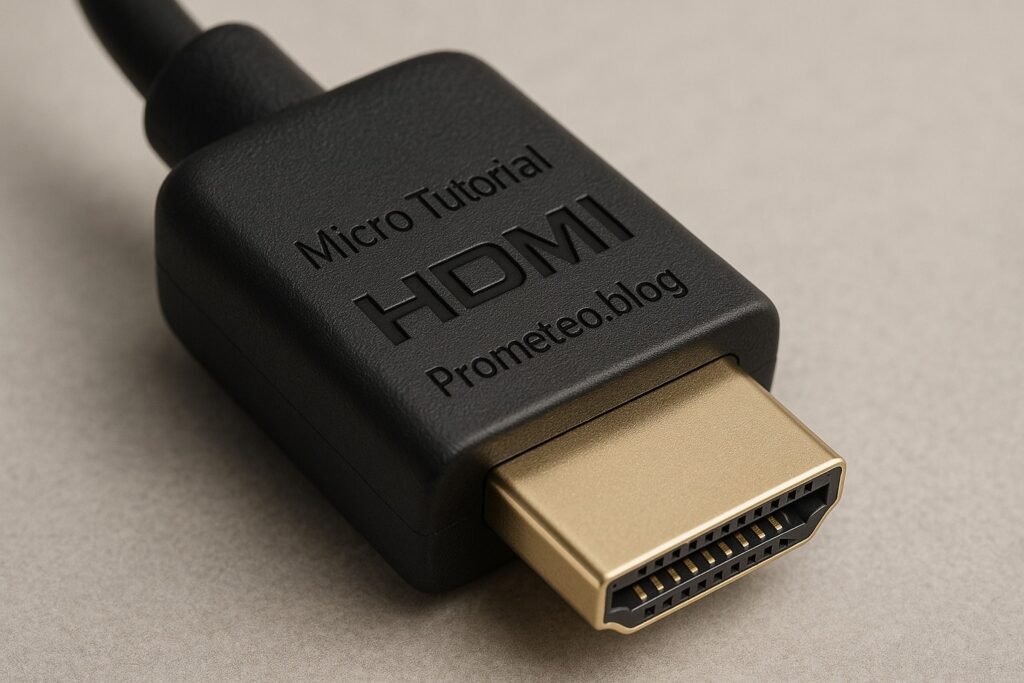
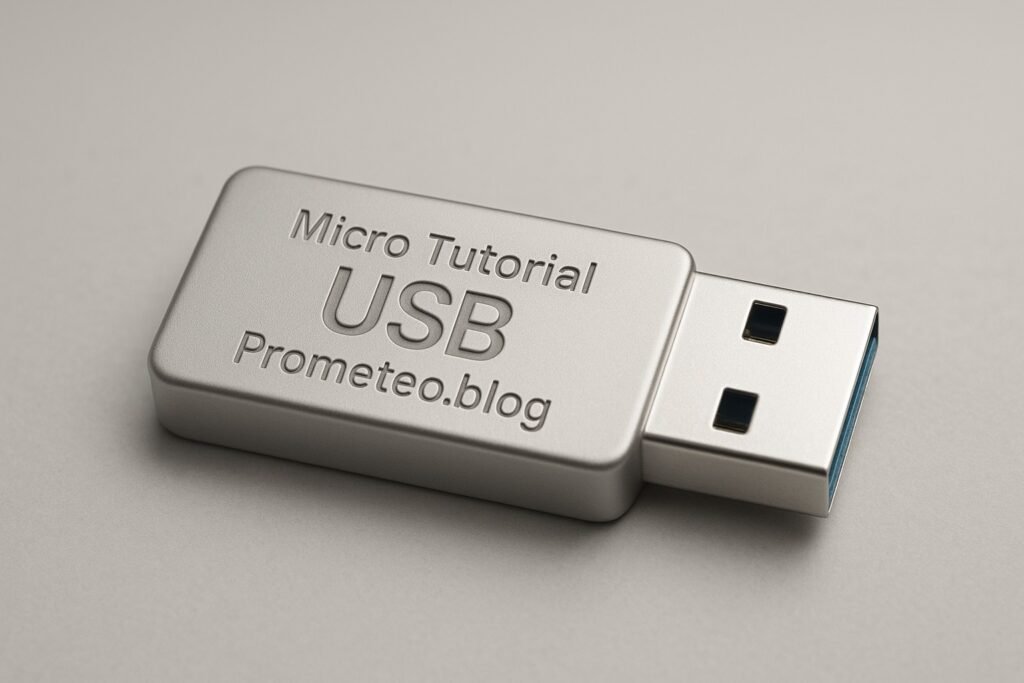
  5. Input/Output Ports: Various ports are present for connecting external devices. These include USB ports, audio jacks, HDMI, and Ethernet ports. The variety and number of ports can significantly affect the usability of your system, allowing you to connect multiple peripherals simultaneously.

How It Works

When you power on your computer, the power supply provides electricity to the placa base. The BIOS/UEFI firmware initializes the hardware and performs a POST (Power-On Self-Test) to check if everything is functioning correctly. After this, the firmware loads the operating system from the storage device.

Once the operating system is running, the placa base continues to facilitate communication between the CPU and RAM. For instance, when you open an application, the CPU sends a request to retrieve data from the RAM, which the motherboard helps manage. The data flows through buses, which are pathways on the motherboard, ensuring that information travels efficiently.

Moreover, various chipsets on the motherboard manage specific tasks. For example, the Northbridge chip connects the CPU to the RAM, while the Southbridge chip manages input/output functions. The Northbridge is responsible for high-speed connections, while the Southbridge handles slower connections, such as USB and audio.

The Importance of Chipsets

Chipsets play a vital role in determining the capabilities of the placa base. They dictate the types of processors and memory that can be used, as well as the number and type of expansion slots available. This means that when you select a motherboard, you must consider the chipset, as it influences your computer’s performance and future upgrade potential. For instance, an Intel Z-series chipset supports overclocking, which is essential for gamers and enthusiasts looking to maximize performance.

Different Form Factors

Motherboards come in various form factors, such as ATX, Micro-ATX, and Mini-ITX. Each has its size and layout, affecting how many components you can install. For instance, ATX boards offer more features and expansion slots, while Mini-ITX boards are compact and suitable for small builds. Understanding the form factor is crucial when selecting a case, as it needs to accommodate the motherboard’s dimensions.

Integrated Components

In recent years, many motherboards include integrated components to reduce the need for additional hardware. For example, integrated graphics can handle basic visual tasks, while built-in audio chips provide sound capabilities. However, for more demanding applications, you might still want dedicated hardware. Integrated components are particularly useful in budget builds where space and cost are considerations.

Connectivity

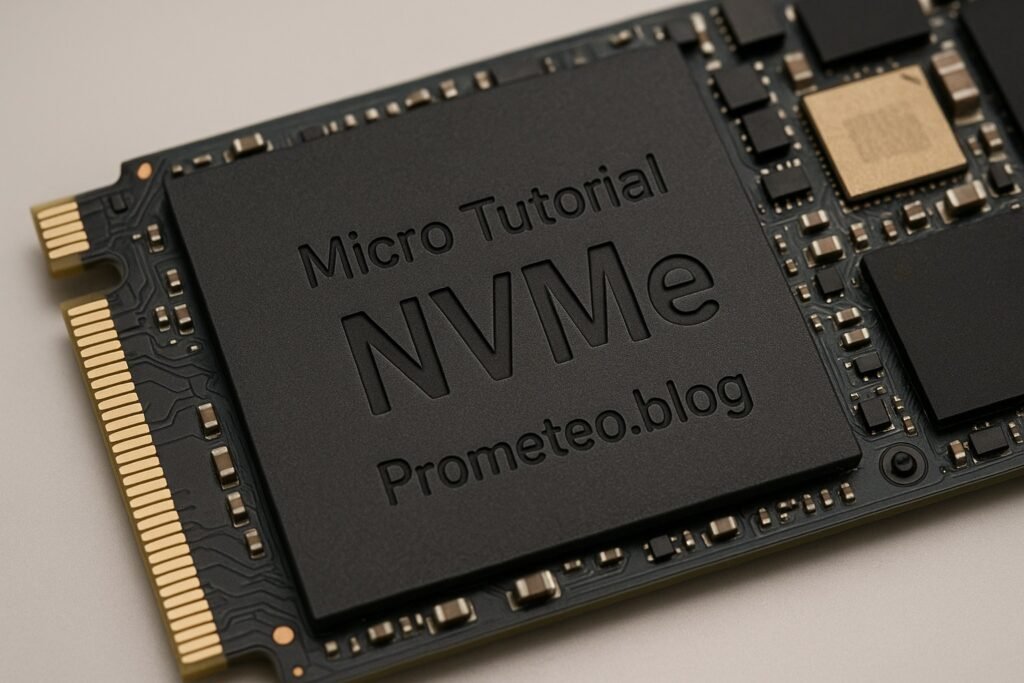
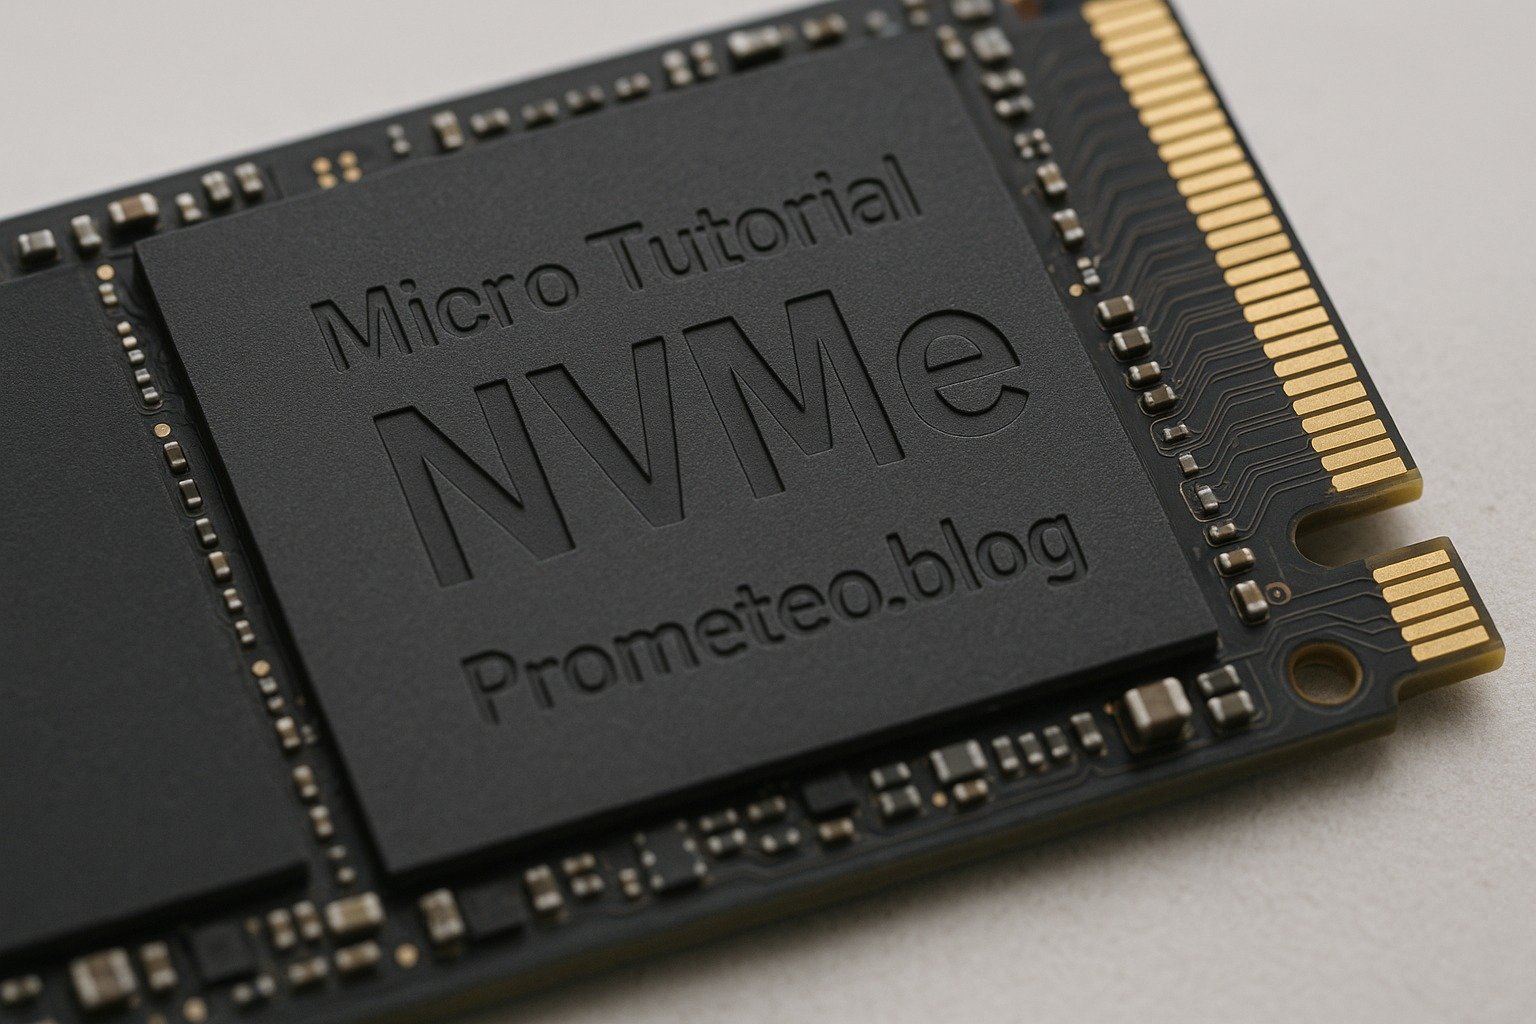
The rise of connectivity standards has also influenced motherboard design. For instance, USB 3.0 and USB-C ports allow for faster data transfer, while Wi-Fi and Bluetooth capabilities enable wireless connections. These features are essential for modern computing, as they enhance usability and performance. Additionally, many motherboards now come equipped with M.2 slots for NVMe SSDs, which provide significantly faster data access speeds compared to traditional SATA connections.

Cooling Solutions

Additionally, as computers become more powerful, managing heat becomes crucial. Many motherboards have built-in fan headers and thermal sensors to help you maintain optimal operating temperatures. If overheating occurs, it can lead to performance drops or even hardware failure. Some high-end motherboards even include heat sinks and dedicated cooling solutions for components like VRMs (Voltage Regulator Modules) to ensure stability during heavy loads.

Future Trends

Looking ahead, motherboards will continue to evolve. Technologies like PCIe 4.0 and DDR5 RAM are already emerging, promising faster speeds and improved performance. It’s essential to keep an eye on these developments, especially if you plan to build a new system or upgrade your existing one. Additionally, as more devices adopt USB-C and Thunderbolt standards, motherboards will likely incorporate these technologies to maintain compatibility with future peripherals.

In summary, understanding the placa base is fundamental for anyone interested in electronics or computer engineering. It not only connects various components but also plays a crucial role in the performance and capabilities of your computer. As you delve deeper into the world of computing, the knowledge of how motherboards function will empower you to make informed decisions about your hardware choices.

Key parameters

Understanding key parameters will help you make informed choices when selecting a motherboard. Here’s a table summarizing some typical values:

Parameter Typical Value
Form Factor ATX, Micro-ATX, Mini-ITX
RAM Slots 2 to 8
Max RAM Capacity 64GB to 128GB
PCIe Slots 1 to 7
USB Ports 4 to 10
SATA Ports 4 to 8
Integrated Graphics Yes/No (depends on model)
Chipset Types Intel, AMD

These parameters are essential when evaluating a motherboard’s suitability for your specific needs. For instance, if you’re planning to run memory-intensive applications, opting for a motherboard with a higher maximum RAM capacity and more RAM slots is advisable. Similarly, if you’re a gamer, the number of PCIe slots and their versions will determine your ability to install high-performance graphics cards and other expansion cards.

Hands-on practical project

Let’s consider a concrete use case: building a gaming PC. The placa base you choose can significantly affect your gaming experience, and here’s how.

Step 1: Define Your Needs

First, determine what kind of games you intend to play. For instance, if you’re into high-definition graphics and fast-paced games, you’ll need a powerful CPU and dedicated graphics card. Consequently, choose a motherboard that supports these components. Additionally, consider whether you will be streaming or multitasking while gaming, as this will influence your RAM and CPU choices.

Step 2: Selecting the Right Motherboard

When selecting a motherboard, look for one with a suitable chipset for your CPU. For gaming, an Intel Z series or AMD B550/X570 chipset is ideal. Ensure it has enough PCIe slots for your graphics card and additional peripherals. Moreover, check for RAM compatibility; gaming often requires at least 16GB of RAM. Look for motherboards that support higher speeds of RAM, as this can impact gaming performance.

Step 3: Building the System

Once you have your motherboard, it’s time to start building. Begin by installing the CPU in the socket and securing it. Next, insert the RAM into the appropriate slots, ensuring they click into place. After that, mount the motherboard in the case, connecting the power supply and ensuring proper airflow. Make sure to use standoffs to prevent the motherboard from shorting against the case.

Step 4: Adding Storage and Peripherals

Next, connect your storage devices. Most gaming setups use SSDs for fast load times, so make sure your motherboard has M.2 slots for NVMe drives. Additionally, connect any peripherals like gaming mice, keyboards, and monitors through the USB and HDMI ports. Consider using USB 3.0 or USB-C ports for faster data transfer rates with external drives or peripherals.

Step 5: Software Setup

After assembling your components, it’s time to install the operating system. You’ll need to boot from a USB drive or DVD containing the OS installation files. The motherboard’s firmware will guide you through the process, enabling you to set up your drives and partitions. Make sure to format your drives correctly during installation to optimize performance.

Step 6: Optimizing Performance

Once everything is installed, consider tweaking your BIOS/UEFI settings for optimal performance. You can enable features like XMP for RAM or adjust fan speeds for better cooling. Monitoring temperatures and system performance is essential, especially during gaming sessions. Using software tools to monitor CPU and GPU temperatures can help you ensure everything is running smoothly.

Step 7: Future Upgrades

As gaming technology advances, you may want to upgrade your components. The placa base you choose should support future upgrades, whether it’s adding more RAM, upgrading the CPU, or installing a new graphics card. Always check the specifications to ensure compatibility. Additionally, consider the power supply’s wattage to ensure it can handle any future upgrades.

In conclusion, the placa base is a fundamental part of your gaming PC, influencing performance and upgradeability. By understanding its functions and selecting the right one, you can build a system that meets your gaming needs. This hands-on project not only provides practical experience but also deepens your understanding of how each component interacts within the system.

Common mistakes and how to avoid them

  • Ignoring Compatibility: Always check if the motherboard supports your CPU, RAM, and other components. Not doing so can lead to mismatches and frustrations. Use online compatibility tools or manufacturer websites to verify compatibility.

  • Overlooking Expansion Options: Think about future upgrades. Choose a motherboard with enough PCIe and RAM slots for your needs. If you plan on adding more graphics cards or storage in the future, ensure that your motherboard can accommodate these changes.

  • Neglecting Cooling Solutions: Ensure that your case has good airflow and that you have adequate cooling solutions for your components. Consider investing in aftermarket cooling solutions if you plan to overclock your CPU or GPU.

  • Skipping BIOS Updates: Sometimes, manufacturers release updates that improve performance or add features. Keep your BIOS up to date for the best experience. Always read the release notes to understand what improvements or fixes are included.

  • Not Considering Form Factor: Make sure your motherboard fits in your case. Measure your space before purchasing. Additionally, ensure that your case has the necessary mounting points and airflow for optimal cooling.

  • Forgetting About Power Supply Needs: Ensure your power supply can handle all the components you plan to install, especially if you’re building a high-performance system. Use a power supply calculator to estimate your needs based on your components.

By being aware of these common pitfalls, you can streamline your building process and avoid potential headaches down the line. Understanding the nuances of the placa base and its role in your system will empower you to make better decisions and ultimately enhance your computing experience.

Conclusion + call to action

In summary, understanding the placa base is crucial for anyone looking to build or upgrade a computer. It connects and manages all essential components, influencing performance and functionality. By learning about its features, you can make informed decisions that will enhance your computing experience. So, whether you’re building a gaming rig or a workstation, take the time to research and choose the right motherboard. Your future self will thank you for it! For more in-depth articles and tutorials, remember to visit us at prometeo.blog.

Third-party readings

Find this product and/or books on this topic on Amazon

Go to Amazon

As an Amazon Associate, I earn from qualifying purchases. If you buy through this link, you help keep this project running.

Quick Quiz

Question 1: What is the primary role of the motherboard in a computer?


Question 2: What does the motherboard manage in a computer system?


Question 3: Which component is NOT typically connected to the motherboard?


Question 4: Why is understanding the motherboard important for tech enthusiasts?


Question 5: What can happen if the motherboard fails to distribute power correctly?


Micro Tutorial: Placa Base

Carlos Núñez Zorrilla
Electronics & Computer Engineer

Telecommunications Electronics Engineer and Computer Engineer (official degrees in Spain).

Follow me:


Micro Tutorial: NVMe

Micro Tutorial: NVMe — imagen destacada

Introduction

Have you ever wondered why your computer sometimes feels faster than others? Well, I remember the day I upgraded my laptop to an NVMe SSD; the boot time dropped drastically, and applications opened almost instantaneously. This experience showcases the power of Non-Volatile Memory Express (NVMe), a technology that has transformed how we interact with storage. NVMe is not just a buzzword; it represents a significant leap in storage technology that has redefined performance benchmarks. As we delve deeper into this micro tutorial, you will gain a comprehensive understanding of what NVMe is, how it works, its applications, and its benefits.

In an age where data is the new oil, the speed at which we can access, write, and manipulate that data is critical. NVMe provides that speed, making it a game-changer for both everyday users and professionals alike. Whether you are a gamer looking for faster load times or a data analyst needing quick access to large datasets, NVMe is designed to meet those demands. This tutorial will guide you through the intricacies of NVMe technology, equipping you with the knowledge to make informed decisions regarding your storage solutions.

What it’s used for and how it works

NVMe is primarily used for connecting solid-state drives (SSDs) to your computer’s motherboard. Unlike traditional hard disk drives (HDDs) or SATA SSDs, NVMe takes full advantage of the capabilities of modern flash memory. It does this by using the PCIe (Peripheral Component Interconnect Express) interface, which allows for data to be transferred at much higher speeds. The PCIe interface is essential because it enables multiple data lanes, allowing for greater bandwidth and efficiency.

How NVMe Works

To understand how NVMe works, let’s break it down into parts. The architecture of NVMe is designed to reduce latency and increase input/output operations per second (IOPS). It achieves this in several ways:

  1. Direct Access: NVMe communicates directly with the CPU, bypassing the traditional storage controllers that can slow down data access. This means that data can be sent and received more quickly. Traditional interfaces like AHCI introduce additional layers that can add latency, making NVMe a more efficient choice.

  2. Parallelism: NVMe supports multiple queues, with each queue capable of handling up to 64,000 commands. In contrast, older protocols like AHCI (Advanced Host Controller Interface) only utilize a single queue with a maximum of 32 commands. This capability allows NVMe drives to perform many tasks simultaneously, resulting in faster read and write speeds. The increased number of queues means that NVMe can handle workloads much more efficiently, making it ideal for multitasking environments.

  3. Lower Latency: NVMe reduces latency by streamlining the command set and optimizing the way data is processed. This improved efficiency means that your applications can access the data they need with minimal delay. Lower latency is particularly beneficial for applications that require real-time data processing, such as gaming or video editing.

  4. Efficient Data Transfer: The PCIe interface offers multiple lanes for data transfer. For instance, a PCIe 3.0 x4 connection can deliver up to 32 Gbps, which is significantly higher than the maximum speeds of SATA connections. This high bandwidth is crucial for tasks that involve large files or require rapid data access, such as 4K video editing or large database transactions.

Applications of NVMe

NVMe is widely used in various applications due to its speed and efficiency. Here are some areas where NVMe shines:

  • Gaming: Gamers benefit from faster load times and smoother gameplay. NVMe drives can drastically reduce the time needed to load game levels or install updates. Imagine being able to jump into a game within seconds instead of waiting minutes. This speed can also enhance the overall gaming experience by reducing stuttering during gameplay.

  • Data Centers: In enterprise environments, NVMe drives are used for high-performance computing tasks, large databases, and cloud services. The speed and efficiency of NVMe help in processing large volumes of data quickly. For instance, data centers that handle big data analytics or machine learning tasks can significantly improve their processing times by adopting NVMe technology.

  • Content Creation: Professionals in video editing, graphic design, and 3D rendering rely on NVMe for quick access to large files. This efficiency allows for a more seamless workflow. For example, video editors can quickly scrub through high-resolution footage without lag, making the editing process more efficient.

  • Artificial Intelligence and Machine Learning: NVMe’s high IOPS and low latency make it preferable for processing large datasets in real-time, thus enhancing the performance of AI applications. Machine learning algorithms often require rapid access to data for training models, and NVMe can provide the performance needed for such tasks.

NVMe Over Fabrics

Moreover, NVMe Over Fabrics (NVMe-oF) extends NVMe’s capabilities beyond local storage. This allows NVMe commands to be sent over various network fabrics, such as Ethernet or Fibre Channel. As a result, data can be accessed over a network with the same efficiency as local storage, which is particularly beneficial for cloud computing and large-scale enterprises. NVMe-oF enables organizations to build high-performance storage networks that can accommodate the increasing data demands of modern applications.

NVMe Devices

You’ll find NVMe in various device formats, including M.2 and U.2. The M.2 form factor is commonly used in laptops and desktops due to its compact size, while U.2 is more prevalent in enterprise solutions, allowing for better thermal management and hot-swapping capabilities. Additionally, NVMe drives are available in both consumer and enterprise-grade options, catering to different performance and endurance requirements. Consumer-grade drives are typically designed for everyday use, while enterprise-grade drives are built for heavy workloads and extended durability.

Future of NVMe

As technology advances, NVMe is expected to evolve further. The introduction of NVMe 2.0 is set to enhance protocol features, supporting a larger range of devices and use cases. This evolution will likely improve efficiency and performance even further, making NVMe a staple in future computing environments. Innovations such as improved power management and support for new types of storage media are on the horizon, ensuring that NVMe remains at the forefront of storage technology.

Key parameters

Understanding the key parameters of NVMe devices can help you make informed decisions. Here’s a table summarizing some typical values you might encounter:

Parameter Typical Value
Sequential Read Speed 3500 MB/s
Sequential Write Speed 3000 MB/s
IOPS (Random Read) 600,000 IOPS
IOPS (Random Write) 550,000 IOPS
Latency ~20 µs

Explanation of Parameters

  • Sequential Read/Write Speed: These values indicate how fast data can be read from or written to the drive in a continuous sequence. High speeds are crucial for tasks like file transfers, where large amounts of data are moved at once. For instance, transferring a large video file from one location to another can be done in seconds rather than minutes with a high-speed NVMe drive.

  • IOPS: This measures how many input/output operations can be completed in one second. High IOPS is essential for applications that require frequent access to smaller files, such as databases or virtual machines. In a server environment, high IOPS can significantly improve the responsiveness of applications.

  • Latency: This is the time it takes for a command to be executed. Lower latency results in quicker responses from the storage device. This is particularly important for real-time applications, where delays can impact performance and user experience.

Hands-on practical project

Now that you have a solid understanding of NVMe technology, let’s put that knowledge into practice with a hands-on project. In this section, we will guide you through the process of upgrading your computer’s storage by installing an NVMe SSD. This project will not only enhance your system’s performance but also give you practical experience in working with hardware.

Materials Needed

  1. NVMe SSD: Choose an NVMe SSD that meets your storage needs. Brands like Samsung, Western Digital, and Crucial offer reliable options.
  2. Computer: A desktop or laptop that supports NVMe drives. Check your motherboard specifications for compatibility.
  3. Screwdriver: A small Phillips screwdriver may be required to open your computer case.
  4. Thermal Paste (optional): If your NVMe SSD comes with a heatsink, thermal paste may be needed for optimal heat dissipation.

Step-by-Step Installation Guide

Step 1: Prepare Your Workspace

Before you begin, ensure that you have a clean and static-free workspace. Ground yourself to avoid static electricity damage to your components. You can do this by wearing an anti-static wrist strap or by touching a grounded metal object.

Step 2: Power Down Your Computer

Shut down your computer completely and unplug it from the power source. If you are working with a laptop, remove the battery if possible.

Step 3: Open the Computer Case

Using your screwdriver, remove the screws that secure the side panel of your desktop case or the back panel of your laptop. Carefully slide the panel off to expose the internal components.

Step 4: Locate the M.2 Slot

Identify the M.2 slot on your motherboard. This is typically a small, horizontal slot that may be labeled. If you are unsure, refer to your motherboard’s manual for guidance.

Step 5: Install the NVMe SSD

  1. Align the notches on the NVMe SSD with the key in the M.2 slot.
  2. Insert the SSD at a 30-degree angle into the slot.
  3. Gently press down on the SSD until it is level with the motherboard.
  4. Secure the SSD in place with the screw provided (if applicable).

Step 6: Reassemble Your Computer

Once the NVMe SSD is installed, carefully reattach the side panel of your desktop or the back panel of your laptop. Ensure that all screws are tightened securely.

Step 7: Boot Up Your Computer

Plug your computer back in and power it on. Enter the BIOS/UEFI setup during boot (usually by pressing a key like DEL or F2) to ensure that the system recognizes the new NVMe SSD. If recognized, you can proceed to install your operating system or format the drive for storage.

Step 8: Format the NVMe SSD

Once your operating system has booted, you may need to format the new NVMe SSD. For Windows, go to Disk Management (right-click on the Start menu and select Disk Management). Locate your new SSD, right-click on it, and choose «Format.» Follow the prompts to complete the formatting process.

Testing Your NVMe SSD

To ensure that your new NVMe SSD is performing as expected, you can run benchmarking software such as CrystalDiskMark or AS SSD Benchmark. These tools will provide you with detailed information about your SSD’s read and write speeds, helping you confirm that your upgrade was successful.

Conclusion of the Project

Congratulations! You have successfully upgraded your computer’s storage with an NVMe SSD. You should now experience significantly faster boot times, quicker application launches, and improved overall system responsiveness. This hands-on project not only enhances your computing experience but also equips you with valuable skills in hardware installation.

Common mistakes and how to avoid them

While upgrading to NVMe can significantly improve your system’s performance, there are common mistakes that users often make during the process. Here are some pitfalls to avoid:

  • Not checking compatibility: Ensure your motherboard supports NVMe drives. Check your manual or specifications. Some motherboards may require a BIOS update to recognize NVMe SSDs.

  • Ignoring heat management: NVMe SSDs can generate heat, especially under heavy load. Make sure your system has adequate cooling to prevent throttling. Consider using an NVMe SSD with a heatsink or installing additional case fans if necessary.

  • Overlooking storage capacity: Choose a capacity that suits your needs; otherwise, you may run out of space quickly. Assess your storage requirements based on your usage patterns, whether it’s gaming, content creation, or general use.

  • Neglecting firmware updates: Regularly update your NVMe drive’s firmware for optimal performance and security. Manufacturers often release updates that can enhance performance or fix bugs.

  • Assuming all NVMe drives are equal: Different models have varying speeds, IOPS, and endurance ratings. Research before purchasing. Look for reviews and benchmarks to find the best NVMe SSD for your specific needs.

Conclusion + call to action

In conclusion, NVMe technology offers significant advantages for storage solutions, especially in high-performance applications such as gaming, data processing, and content creation. With its low latency and high throughput, NVMe is becoming the standard for modern storage devices. Upgrading to NVMe can enhance your computing experience, providing faster load times, improved responsiveness, and overall better performance.

As technology continues to evolve, NVMe will likely play a pivotal role in shaping the future of storage solutions. Whether you’re a casual user or a professional, understanding NVMe can empower you to make informed decisions about your storage needs.

If you’re interested in further exploring the world of NVMe and its applications, I encourage you to dive deeper into the subject. There are numerous resources available that can provide additional insights and technical details. More information at prometeo.blog

Third-party readings

Find this product and/or books on this topic on Amazon

Go to Amazon

As an Amazon Associate, I earn from qualifying purchases. If you buy through this link, you help keep this project running.

Quick Quiz

Question 1: What does NVMe stand for?


Question 2: Which interface does NVMe primarily use for data transfer?


Question 3: What type of storage devices does NVMe connect to the motherboard?


Question 4: What is one of the main benefits of using NVMe technology?


Question 5: Who can benefit from NVMe technology?


Micro Tutorial: NVMe

Carlos Núñez Zorrilla
Electronics & Computer Engineer

Telecommunications Electronics Engineer and Computer Engineer (official degrees in Spain).

Follow me:


Micro Tutorial: Power Supply

Micro Tutorial: Fuente de Alimentación — imagen destacada

Introduction

Have you ever wondered what powers your electronic devices? Picture this: you’re working on an exciting project, and suddenly your circuit stops functioning. You realize that the source of power is crucial to your project’s success. In this tutorial, we will explore the fascinating world of power supplies, or Fuentes de Alimentación, and how they play a pivotal role in the operation of electronic devices.

Power supplies are ubiquitous in our daily lives, found in everything from simple LED circuits to complex computer systems. Understanding how they work and how to select the right one for your project can mean the difference between success and frustration. This tutorial will guide you through the essentials of power supplies, explain their components and functionalities, and provide hands-on experience through a practical project. By the end, you will be equipped with the knowledge needed to make informed decisions about power supplies in your future electronics endeavors.

Power supplies are not just mere accessories; they are the lifeblood of any electronic circuit. They convert electrical energy from a source into a usable form, ensuring that all components operate within their specified parameters. Whether you are powering a small microcontroller or a large industrial machine, the principles of power supply design remain fundamentally the same. With this understanding, you will be better prepared to tackle various projects, troubleshoot issues, and optimize performance.

What it’s used for and how it works

A Fuente de Alimentación, or power supply, is an essential component in any electronic system. Essentially, it converts the electrical power from a source (like your wall outlet) into a usable form for your devices. You might find them in devices ranging from computers to home appliances, making them incredibly versatile.

When we refer to a power supply, we are talking about the device that provides power to your circuits. There are various types, but they all share the same goal: to deliver the right amount of power to the right components. Power supplies can be categorized mainly into two types: linear power supplies and switching power supplies. Let’s delve deeper into how each of these works.

Linear Power Supplies

Linear power supplies work by using a transformer to convert the high voltage AC from the wall outlet into a lower voltage AC. Afterward, it rectifies this AC to DC using diodes. The filtering capacitors smooth the output voltage, providing a cleaner DC signal.

You might be wondering about the pros and cons. Well, linear supplies are known for their simplicity and reliability but can be inefficient and generate heat, especially under heavy loads. For example, if you are powering a high-current device, the linear power supply may waste energy in the form of heat rather than delivering it to the load. This inefficiency can lead to overheating, which is why adequate cooling is often necessary.

Linear power supplies are often preferred in applications where low noise is crucial. For instance, in audio equipment, a linear power supply can provide a cleaner output, which is essential for maintaining sound fidelity. However, they are bulkier and heavier than their switching counterparts, making them less suitable for compact devices.

Switching Power Supplies

On the other hand, switching power supplies operate differently. Instead of using a transformer to step down the voltage, they convert the AC voltage to high-frequency AC. This high-frequency AC is then transformed down to the required voltage level.

Switching power supplies are generally more efficient and compact compared to linear types. They can achieve efficiencies of 80% to 95%, making them ideal for applications where space and energy conservation are critical. However, they can introduce noise into the output, which might affect sensitive applications. For instance, if you are working on audio equipment, the noise generated by a switching power supply could interfere with sound quality.

The operation of a switching power supply involves several stages:
1. Input Stage: The AC voltage is rectified and filtered to provide a smooth DC voltage.
2. Switching Stage: High-frequency switching transistors turn the DC voltage into a high-frequency AC signal.
3. Transformer Stage: This high-frequency AC signal is transformed to the desired voltage level.
4. Output Stage: The voltage is rectified and filtered again to produce a stable DC output.

This multi-stage process allows switching power supplies to be more compact and lightweight, as they do not require large transformers. They are commonly found in laptops, mobile phone chargers, and other portable devices where space is at a premium.

Components of a Power Supply

Now, let’s take a closer look at the components involved in a typical power supply. Many power supplies include a transformer, rectifier, filter, and voltage regulator. Each of these components plays a vital role in ensuring that your devices receive the correct power.

Rectification

Rectification is the process of converting AC to DC. You typically use diodes for this function, which allow current to flow in one direction only. This process results in a pulsating DC signal, which is then smoothed out using capacitors. The rectification can be done using half-wave or full-wave methods, with full-wave rectification providing a smoother output.

Half-wave rectification uses only one half of the AC waveform, leading to a significant ripple in the output. In contrast, full-wave rectification utilizes both halves of the waveform, resulting in a smoother DC output. This is particularly important in applications where voltage stability is critical.

Filtering

The filtering stage reduces the ripple in the DC output. Capacitors are commonly used here to store charge and release it slowly, ensuring a steady voltage. You might have encountered this in audio applications, where a stable power supply is crucial for sound quality. In fact, the quality of the filtering can significantly impact the performance of your entire circuit.

In some applications, additional filtering components, such as inductors or ferrite beads, may be used to further reduce noise and ripple. This is especially important in sensitive electronics, where even minor fluctuations in voltage can lead to performance degradation.

Voltage Regulation

Voltage regulation ensures that the output voltage remains constant, regardless of variations in load current. Voltage regulators can be linear or switching types. They maintain the output voltage within a specified range, ensuring your devices operate correctly without damage. This regulation is particularly important in sensitive applications, where slight fluctuations in voltage can lead to malfunction or even damage.

Linear voltage regulators are simple and effective but can be inefficient, especially when there is a large difference between input and output voltage. Switching regulators, on the other hand, are more complex but offer higher efficiency, making them suitable for battery-powered applications.

In summary, a Fuente de Alimentación is not just a simple component; it is a complex device that ensures your electronic projects function smoothly. Understanding how they work helps you choose the right power supply for your needs.

Key parameters

When selecting a power supply, there are several key parameters to consider. Knowing these will help you make informed decisions based on your project requirements.

Parameter Typical Value
Output Voltage 5V, 12V, 24V
Output Current 1A, 2A, 10A
Efficiency 70% – 95%
Ripple Voltage < 100mV
Load Regulation ±5%
Temperature Range -20°C to 70°C

Here, the output voltage is perhaps the most crucial aspect. It must match the voltage requirements of your components. For example, if you are powering a microcontroller that operates at 5V, using a supply that outputs 12V could damage the component.

Additionally, output current is essential; it indicates how much current the power supply can deliver safely. If your project requires more current than the supply can provide, you may experience voltage drops or even failure of the power supply. It is prudent to choose a power supply with a current rating higher than your calculated needs to accommodate any fluctuations during operation.

Efficiency is another critical factor, as a higher efficiency means less heat generation and lower energy costs. This is particularly important in battery-operated devices, where conserving energy can extend battery life. A power supply with high efficiency will also contribute to the longevity of your components by minimizing heat stress.

Ripple voltage indicates how much AC voltage remains in the DC output. The less ripple, the better your power supply will perform in sensitive applications. For instance, in precision analog circuits, high ripple can introduce errors in signal processing. Therefore, selecting a power supply with low ripple specifications is vital for high-performance applications.

Load regulation refers to how well the output voltage stays constant under varying load conditions. A power supply with good load regulation will maintain its output voltage even when the load changes, which is vital for maintaining consistent performance. This is essential in applications such as robotics, where varying loads can occur frequently.

Lastly, the temperature range indicates the operating environment in which the power supply can function effectively. If your project is intended for outdoor use, for example, you will need a supply that can handle lower temperatures. Conversely, if it will operate in a high-temperature environment, ensure that the power supply can withstand those conditions without failure.

Hands-on practical project

Let’s consider a concrete use case to understand power supplies better. Imagine you’re building a simple LED display project. You have a series of LEDs that require a specific voltage and current to light up effectively. Here’s how you would go about selecting the right Fuente de Alimentación for this project.

Project Overview

Your project consists of 10 LEDs, each requiring 20mA at 12V. Therefore, you’ll need a power supply that can deliver at least 12V and 200mA (10 LEDs x 20mA). However, to ensure that you have enough current available for fluctuations, you might want to choose a power supply rated for 500mA.

Choosing the Right Power Supply

When selecting a power supply, you first check the output voltage. Since your LEDs operate at 12V, you should look for a power supply that outputs 12V. You might find several options, like a linear power supply or a switching power supply.

If you choose a linear power supply, you must ensure that it can handle the required current without overheating. For example, a linear supply rated for 500mA would be suitable, but make sure it has adequate heat sinking to manage the heat generated. Linear supplies are often more straightforward to implement, as they typically have fewer components and are easier to understand.

On the other hand, a switching power supply would likely be more compact and efficient, making it a more suitable choice for a smaller project. These supplies often come in small packages and can provide the necessary power without taking up too much space. Additionally, their higher efficiency means less heat generation, which can be a significant advantage in compact designs.

Connecting the Power Supply

Once you have selected your power supply, the next step is to connect it to your LED circuit. Start by ensuring that your circuit is turned off before making any connections. Connect the positive terminal of the power supply to the anodes (positive side) of the LEDs and the negative terminal to the cathodes (negative side).

It’s also a good practice to include a current-limiting resistor in series with the LEDs to prevent them from drawing too much current. For example, if you are using a 12V supply and your LEDs have a forward voltage drop of 2V, you can calculate the resistor value needed to limit the current to 20mA using Ohm’s Law.

Using Ohm’s Law, V = I × R , you can rearrange it to find the resistor value R :
– The voltage across the resistor V(R) = V(supply) – V(LED)
– In this case, V(R) = 12V – 2V = 10V
– To find R , use R = V(R) / I = 10V / 0.02A = 500Ω

A standard resistor value of 470Ω or 560Ω can be used, ensuring that the current stays within safe limits while keeping the LEDs adequately lit.

Testing the Circuit

After connecting everything, it’s time to test your circuit. Turn on the power supply and observe whether the LEDs light up as expected. If they do, congratulations! Your power supply works well with your project. In case some LEDs do not light up, check the connections and ensure that the power supply is functioning correctly.

If the LEDs do not light up, it may be due to several factors, such as incorrect wiring, a faulty LED, or an inadequate power supply. Always troubleshoot systematically, starting from the power supply and moving through each connection to ensure everything is functioning correctly.

This project demonstrates the importance of selecting the right power supply. Using an appropriate Fuente de Alimentación ensures that your LEDs operate efficiently and safely, highlighting the role it plays in any electronic design. Additionally, you can expand this project by adding more LEDs or integrating other components, which will further reinforce the need for a reliable power supply.

Common mistakes and how to avoid them

When working with power supplies, it’s easy to make mistakes that could lead to project failures. Here’s a list of common pitfalls and tips to avoid them:

  • Choosing the wrong voltage: Always double-check the voltage requirements of your components before selecting a power supply. If unsure, consult the datasheets or specifications for your components. Using a supply with a voltage too high can damage sensitive components, while a voltage too low may prevent them from functioning altogether.

  • Underestimating current needs: Ensure that the power supply can deliver enough current for your application, especially if multiple components are involved. It’s better to choose a power supply with a higher current rating than you think you need. This ensures that your circuit operates reliably, even under peak loads.

  • Ignoring ripple voltage: For sensitive electronics, keep ripple voltage in mind; it can affect performance. If your application is sensitive to noise, consider using a power supply with low ripple specifications. This is particularly important in precision applications like audio processing or data acquisition.

  • Poor thermal management: Make sure your power supply has adequate cooling; overheating can lead to failure. If you are using a linear power supply, ensure proper heat dissipation through heat sinks. For switching supplies, ensure that the airflow around the unit is sufficient to keep temperatures within safe limits.

  • Neglecting safety features: Opt for power supplies with built-in protection features like overcurrent and short-circuit protection. These features can save your project from catastrophic failures. In the event of a fault, these protections can cut off power and prevent damage to your components.

  • Improper connections: Double-check all connections before powering up to avoid short circuits or damage to components. It’s also advisable to use proper connectors to prevent accidental disconnections. A well-organized and secure connection setup can significantly reduce the risk of errors.

By being aware of these common mistakes, you can significantly improve your project’s success rate. Remember, a little diligence in the planning and setup phase can save you a lot of time and resources later on.

Conclusion + call to action

In conclusion, a Fuente de Alimentación is a vital component that ensures your electronic projects function as intended. Understanding its operation, key parameters, and common pitfalls will empower you in your design processes. As you embark on your next project, remember the importance of selecting the right power supply to match your components’ requirements. You can enhance reliability and performance with the right knowledge.

So, don’t hesitate to explore various options and dive deeper into the world of power supplies. Happy building!

More information at prometeo.blog

Third-party readings

Find this product and/or books on this topic on Amazon

Go to Amazon

As an Amazon Associate, I earn from qualifying purchases. If you buy through this link, you help keep this project running.

Quick Quiz

Question 1: What is the primary function of a power supply?


Question 2: Where can power supplies be commonly found?


Question 3: What is a key benefit of understanding power supplies?


Question 4: What does a power supply ensure for electronic components?


Question 5: What is another term for power supplies in Spanish?


Micro Tutorial: Fuente de Alimentación

Carlos Núñez Zorrilla
Electronics & Computer Engineer

Telecommunications Electronics Engineer and Computer Engineer (official degrees in Spain).

Follow me:


Micro Tutorial: HDMI

Micro Tutorial: HDMI — imagen destacada

Introduction

Have you ever struggled with tangled cables behind your TV or computer? I remember a time when I spent hours trying to connect my laptop to a projector for a presentation. It was then that I discovered the simplicity and efficiency of HDMI. The High-Definition Multimedia Interface (HDMI) has transformed the way we connect and enjoy multimedia content, making it easier than ever to enjoy high-quality audio and video. This tutorial will guide you through HDMI, its uses, how it works, and practical applications that can enhance your multimedia experience.

As technology evolves, understanding HDMI’s capabilities becomes increasingly important. Whether you are setting up a home theater, connecting devices for a presentation, or simply enjoying your favorite movies on a big screen, HDMI is likely at the center of it all. By the end of this tutorial, you will have a solid grasp of HDMI technology, its features, and how to make the most of it in your daily life.

What it’s used for and how it works

HDMI, or High-Definition Multimedia Interface, is a standard for transmitting high-definition video and audio from an HDMI-compliant device to a compatible display. You might find it in various devices, such as TVs, projectors, computers, gaming consoles, and even some smartphones. Essentially, HDMI allows you to enjoy high-quality content without the hassle of multiple cables.

How HDMI Works

To understand how HDMI works, you need to know that it transmits digital data. Unlike older analog systems, HDMI sends a digital signal that carries both audio and video on a single cable. This is beneficial because it simplifies connections and reduces cable clutter, making setups more user-friendly.

When you connect an HDMI cable from your device to a display, the source device sends a series of digital signals through the cable. These signals are encoded in a specific format that the receiving device (like your TV) can decode and display. The beauty of HDMI lies in its ability to support various resolutions, including 720p, 1080p, and even 4K and 8K, providing you with stunning visuals.

HDMI Versions

HDMI has evolved over the years, with several versions being released, each offering enhanced features. Here’s a brief overview of the major versions:
HDMI 1.0: The original version, supporting 1080p video and six-channel audio.
HDMI 1.4: Added support for 4K resolution and 3D video, making it a significant step forward for high-definition content.
HDMI 2.0: Increased bandwidth, enabling 4K at 60Hz, and support for up to 32 audio channels, enhancing the audio experience.
HDMI 2.1: Introduced features like Dynamic HDR, enhanced refresh rates, and support for 8K video, making it the most advanced version to date.

These advancements mean that newer HDMI cables and devices can handle more data and deliver better quality, making them suitable for modern high-definition content. Understanding these versions is crucial when purchasing new devices or cables, as compatibility can significantly impact your viewing experience.

Features of HDMI

HDMI comes with a range of features that enhance your viewing experience:
Audio Return Channel (ARC): This feature allows audio to be sent back from the TV to an audio receiver or soundbar through the same HDMI cable, simplifying connections and reducing the number of cables needed.
Consumer Electronics Control (CEC): With CEC, you can control multiple HDMI-connected devices with one remote, making your entertainment system more user-friendly. For instance, turning on your TV can also turn on your Blu-ray player and soundbar.
Deep Color: This feature supports a wider color spectrum, providing more vibrant and lifelike images. It enhances the viewing experience, particularly for films and games that utilize rich colors.
3D Support: HDMI can transmit 3D video signals, enhancing your viewing experience for compatible content. This feature is particularly popular among gamers and movie enthusiasts who enjoy immersive experiences.

HDMI Cable Types

When choosing HDMI cables, you’ll notice several types, each designed for specific applications:
Standard HDMI: Suitable for most devices, supporting resolutions up to 1080p. This type is best for basic connections where high-definition quality is not a priority.
High-Speed HDMI: Ideal for 4K and 3D content, supporting higher bandwidth. This type is essential for streaming high-definition content without lag or interruptions.
Premium High-Speed HDMI: Certified for higher performance, suitable for 4K at 60Hz. This cable type ensures that you can enjoy the latest video formats without compromising quality.
Ultra High-Speed HDMI: Supports 8K video and provides the best performance for the latest devices, including gaming consoles and high-end televisions. This type is recommended for future-proofing your setup.

Benefits of Using HDMI

You might wonder why HDMI has become the standard choice for connecting devices. Here are some advantages:
Single Cable Solution: HDMI combines audio and video signals into one cable, significantly reducing clutter and simplifying setups. This is particularly beneficial in home theater systems where multiple devices are connected.
Digital Quality: Since HDMI transmits a digital signal, you receive better quality without the noise and distortion common with analog signals. This results in clearer images and richer sound.
Future-Proofing: As technology progresses, HDMI continues to adapt, meaning your devices can remain compatible longer. Newer HDMI versions and features ensure that your system can handle the latest content formats.
Wide Compatibility: HDMI is ubiquitous in consumer electronics, making it easy to connect various devices. Whether you’re connecting a laptop to a projector or a gaming console to a TV, HDMI is likely to be supported.

In conclusion, HDMI serves as a vital component in modern multimedia systems, delivering high-quality audio and video seamlessly. Understanding its workings and features will help you appreciate why it’s the preferred choice for consumers and professionals alike.

Key parameters

Here’s a table summarizing some of the key parameters related to HDMI:

Parameter Typical Value
Maximum Resolution 8K (7680×4320)
Maximum Bandwidth 48 Gbps
Audio Channels Up to 32
Supported Video Formats 4K, 8K, 3D
CEC Support Yes
ARC Support Yes

Hands-on practical project

Imagine you’re setting up a home theater system. You want the best viewing experience possible, so you decide to integrate various devices: a 4K Blu-ray player, a streaming device, and a soundbar. Here’s how HDMI plays a crucial role in your setup.

Device Connection

First, you’ll need to connect your 4K Blu-ray player to your 4K TV. Using a High-Speed HDMI cable, you plug one end into the Blu-ray player and the other into an HDMI port on your TV. This connection not only transmits high-definition video but also supports multi-channel audio, giving you an immersive experience.

Next, you want to include a soundbar for enhanced audio. Using the Audio Return Channel (ARC) feature, you connect the soundbar to the TV with another HDMI cable. The ARC allows audio from the TV (like shows and movies) to be sent back to the soundbar without needing a separate audio cable, simplifying your setup.

Streaming Device Integration

Now, let’s add your streaming device. You connect it to another HDMI port on your TV using a standard HDMI cable. With CEC support, you can control all your devices using a single remote, simplifying the user experience. For example, you can pause a movie on your streaming device and then switch to your Blu-ray player without needing to grab multiple remotes.

Setting Up for 3D Viewing

If you enjoy 3D movies, you’ll appreciate HDMI’s support for 3D content. Ensure your Blu-ray player and TV support 3D, and you can enjoy a more immersive viewing experience. Just insert a 3D Blu-ray disc, and you’ll be ready to dive into a different dimension. Remember to wear the appropriate 3D glasses to fully appreciate the effect.

Troubleshooting Common Issues

While setting up, you might encounter some challenges. If your TV doesn’t recognize the Blu-ray player, check the following:
– Ensure the HDMI cable is firmly connected at both ends. A loose connection can prevent the signal from being transmitted properly.
– Use a different HDMI cable to rule out cable issues. Sometimes, cables can be faulty, leading to connectivity problems.
– Check if the TV is set to the correct HDMI input. Many TVs have multiple HDMI ports, and you need to select the right one using your remote.

If audio isn’t working, make sure ARC is enabled in your TV settings, and confirm that the soundbar is powered on. Additionally, check the audio settings on your Blu-ray player to ensure it is configured to output audio through HDMI. By following these steps, you can ensure a smooth setup and enjoy your home theater experience.

Conclusion of Use Case

Ultimately, HDMI makes your home theater setup convenient and efficient. You can connect multiple devices, enjoy high-quality video and audio, and simplify control with just one remote. As technology continues to evolve, HDMI will remain integral to how we experience multimedia content. By mastering HDMI connections, you can enhance your home entertainment and ensure that you get the most out of your devices.

Common mistakes and how to avoid them

While working with HDMI, you may encounter some common pitfalls. Here’s a list to help you avoid them:
Using the wrong HDMI cable: Ensure you select the right type of HDMI cable for your needs. For instance, using a Standard HDMI cable for 4K content might result in poor performance.
Neglecting to check version compatibility: Always check that your devices support the HDMI version you plan to use. If a device only supports HDMI 1.4, using a 2.1 cable won’t provide benefits beyond what 1.4 can handle.
Forgetting to switch HDMI inputs: Remember to select the correct HDMI input on your TV for the device you want to use. This is a common oversight that can lead to frustration.
Overlooking firmware updates: Regularly update your devices’ firmware to ensure optimal performance and compatibility. Manufacturers often release updates that improve functionality and fix bugs.
Ignoring cable quality: Low-quality cables can lead to signal degradation. Invest in reliable HDMI cables, especially for high-resolution setups, to avoid issues like flickering or loss of audio.

By being aware of these common mistakes, you can streamline your setup process and enjoy a hassle-free experience when using HDMI technology.

Conclusion + call to action

In summary, HDMI is a versatile and essential technology for modern audio-visual systems. By understanding its functions, features, and common pitfalls, you can enhance your multimedia experience and make informed decisions when setting up devices. The convenience of HDMI cannot be overstated; it simplifies connections and ensures high-quality audio and video transmission. So, the next time you connect your TV or projector, remember the power and convenience of HDMI. Dive deeper into this topic to refine your knowledge and skills. More information at prometeo.blog

Third-party readings

Find this product and/or books on this topic on Amazon

Go to Amazon

As an Amazon Associate, I earn from qualifying purchases. If you buy through this link, you help keep this project running.

Quick Quiz

Question 1: What does HDMI stand for?


Question 2: What type of signal does HDMI transmit?


Question 3: Which of the following devices commonly uses HDMI?


Question 4: What is one of the main benefits of using HDMI?


Question 5: In what scenarios might HDMI be particularly useful?


Micro Tutorial: HDMI

Carlos Núñez Zorrilla
Electronics & Computer Engineer

Telecommunications Electronics Engineer and Computer Engineer (official degrees in Spain).

Follow me:


Micro Tutorial: USB

Micro Tutorial: USB — imagen destacada

Introduction

Have you ever struggled with connecting devices, only to realize the cable was wrong? I recall a time when I had to hunt for the right USB cable in a sea of cords. Fortunately, USB has simplified the process of connecting various devices, and in this tutorial, you’ll learn all about it. The Universal Serial Bus (USB) has become a ubiquitous standard in the world of electronics, enabling us to connect a plethora of devices with ease. From smartphones to printers, USB has revolutionized the way we interact with technology.

In this expanded micro-tutorial, we will explore the history, functionality, and applications of USB technology. We will also delve into the technical specifications that define USB standards, provide a hands-on practical project to illustrate its use, discuss common mistakes, and conclude with insights on the future of USB technology. By the end of this tutorial, you will have a comprehensive understanding of USB and its significance in our digital lives.

What it’s used for and how it works

USB, or Universal Serial Bus, is a standard protocol used for connecting devices to computers, power sources, and other peripherals. It serves multiple purposes, such as data transfer, power supply, and even video transmission. Initially introduced in 1996, USB was designed to simplify the connection process between devices, replacing a variety of ports and connectors. The beauty of USB lies in its versatility; it can handle both data and power through the same cable, making it an efficient solution for modern technology.

When you connect a device via USB, you’re utilizing a standardized interface that allows for both data exchange and electrical power. The USB standard has evolved through several versions, each improving speed and functionality. Currently, USB 4 is the latest version, offering remarkable data transfer speeds and versatility.

Basic USB Architecture

The USB architecture consists of three main components: the host, devices, and the cable. The host is typically a computer or a hub that manages communication between devices. Devices can range from keyboards and mice to external hard drives and smartphones. The cable is the physical link that enables data transfer and power delivery between the host and the device.

How Data Transfer Works

When you plug in a USB device, the host recognizes it and initiates a communication protocol. This process typically involves the following steps:
1. Device Detection: The host checks if a device is connected. This is done through a process called polling, where the host continuously checks the state of the USB ports.
2. Enumeration: The host gathers information about the device, such as its type and capabilities. This includes identifying the device class (e.g., storage, audio, video) and the maximum data rate it supports.
3. Data Transfer: Once the device is recognized, data can be transferred back and forth. This can happen in both directions: the host can send data to the device, and the device can send data back to the host.
4. Power Delivery: If required, power can also be supplied through the same cable. This is particularly useful for charging devices like smartphones and tablets.

Types of USB Connectors

Over the years, various USB connector types have emerged, each designed for specific applications:
USB Type-A: The most common rectangular connector found on computers and chargers. It is often used for connecting peripherals like keyboards and mice.
USB Type-B: Typically used for printers and larger devices. Its square shape makes it easily identifiable and prevents incorrect connections.
Mini USB: Smaller connector used in older devices, such as digital cameras. While less common today, it played a significant role in the early days of portable devices.
Micro USB: A smaller connector that became standard in smartphones and tablets. It is designed to be compact while still providing robust functionality.
USB Type-C: The latest reversible connector that supports higher data rates and power delivery. Its versatility allows it to be used across a wide range of devices, from laptops to smartphones.

USB Protocols

USB supports multiple protocols for data transfer, which include:
Bulk Transfer: Used for large data transfers with guaranteed delivery. This is ideal for applications like file transfers where speed is less critical than reliability.
Isochronous Transfer: Used for time-sensitive data like audio and video. This protocol ensures that data is delivered at consistent intervals, making it suitable for streaming applications.
Interrupt Transfer: Used for devices that require immediate attention, such as keyboards and mice. This protocol allows for quick responses to user input.
Control Transfer: Used for device configuration and command execution. This is essential for setting up devices and managing their operations.

Power Delivery Specifications

USB isn’t just about data; it also provides power. The USB Power Delivery (USB PD) standard allows for higher power levels than previous versions. For instance, USB PD can deliver up to 100 watts of power, making it suitable for charging laptops and other high-demand devices. This capability has led to the development of devices that can charge quickly and efficiently, helping to streamline our daily tech interactions.

The Evolution of USB

As technology advanced, so did USB. Here’s a brief overview of its evolution:
USB 1.0 (1996): Offered data rates of 1.5 Mbps and 12 Mbps, laying the groundwork for a unified connection standard.
USB 2.0 (2000): Introduced a significant leap in speed with 480 Mbps, still widely used today. This version allowed for faster data transfers, making it more suitable for a variety of applications.
USB 3.0 (2008): Brought SuperSpeed at 5 Gbps, dramatically improving transfer rates and efficiency. This version also introduced new power management features.
USB 3.1 (2013): Increased speeds to 10 Gbps, enhancing the capabilities of USB connections even further. It also introduced the Type-C connector, which is reversible and supports higher power delivery.
USB 3.2 (2017): Introduced multi-lane operation for up to 20 Gbps, allowing for even faster data transfer rates. This version further optimized the performance of USB connections.
USB4 (2019): Consolidated USB standards with Thunderbolt 3 compatibility, offering speeds up to 40 Gbps. This version represents the culmination of years of development and aims to unify various USB and Thunderbolt technologies.

In conclusion, USB has come a long way from its humble beginnings, offering a versatile and user-friendly means of connecting devices across various platforms. Its evolution reflects the changing landscape of technology and the increasing demand for faster, more efficient connections.

Key parameters

To understand USB better, it’s essential to be familiar with its key parameters. Here’s a table summarizing typical values for various USB versions:

USB Version Data Rate Power Output Connector Type
USB 1.0 1.5 / 12 Mbps 2.5 W Type-A, Type-B
USB 2.0 480 Mbps 2.5 W Type-A, Type-B
USB 3.0 5 Gbps 4.5 W Type-A, Type-B
USB 3.1 10 Gbps 100 W Type-A, Type-C
USB 3.2 20 Gbps 100 W Type-A, Type-C
USB4 40 Gbps 100 W Type-C

Note: The data rates and power outputs may vary based on the specific implementation and device compatibility.

Understanding these parameters is crucial for selecting the right USB version for your needs, whether you’re transferring data, charging devices, or connecting peripherals.

Hands-on practical project

Let’s delve into a concrete use case of USB in action: using a USB flash drive to transfer files. Imagine you need to move important documents from your home computer to your work computer. Using a USB flash drive is a simple and effective solution.

Step 1: Preparing the USB Flash Drive

First, you’ll need a USB flash drive. Plug it into your home computer’s USB port. If the drive is new, you may need to format it to ensure compatibility. Most operating systems will prompt you to format it upon first use. You can usually select a file system such as FAT32 or exFAT, which are compatible with most devices. Formatting is essential as it prepares the drive for storing files and ensures that it functions correctly with your operating system.

Step 2: Transferring Files

Once the flash drive is recognized by your computer, it will appear as a removable storage device. Open the file explorer and locate the files you wish to transfer. You can either drag and drop files or copy and paste them directly onto the flash drive.

Tips for File Organization

  • Create Folders: Organize files by creating folders for different categories, such as work documents, personal files, or media. This will help you find files easily when you need them.
  • Naming Conventions: Use clear and consistent naming for your files. This makes it easier to locate them later and helps avoid confusion.

Step 3: Safely Ejecting the USB Drive

After transferring the files, it’s crucial to safely eject the USB drive to avoid data corruption. Windows users can right-click on the drive in the file explorer and select “Eject.” Mac users can drag the drive to the trash or click the eject button next to the drive name. Safely ejecting the drive ensures that all data has been written and that the drive can be removed without issues.

Step 4: Using the Flash Drive at Work

Now that you have the files on your USB flash drive, the next step is to transfer them to your work computer. Plug the flash drive into an available USB port. Once recognized, you can access the files just as you did on your home computer. Simply copy the files from the USB drive to your work computer’s storage. This process is straightforward and allows for quick file sharing between different systems.

Step 5: Backing Up Important Data

Using a USB flash drive is also an excellent way to back up important data. You can regularly copy essential files to the flash drive, ensuring you have a backup in case of data loss on your primary device. To enhance security, consider encrypting sensitive files before transferring them to the USB drive. Many operating systems offer built-in encryption tools that can help protect your data.

Benefits of Using USB Flash Drives

  1. Portability: USB flash drives are small and lightweight, making them easy to carry. This portability allows you to have your important files with you wherever you go.
  2. Compatibility: They work with most computers, laptops, and devices that have USB ports. This universal compatibility makes USB flash drives a versatile tool for file transfer.
  3. Data Security: You can easily encrypt data for added security. This is especially important for sensitive information that you may not want to be accessed by unauthorized users.
  4. Cost-Effectiveness: USB flash drives are relatively inexpensive, providing a cost-effective solution for data storage and transfer. Their affordability makes them accessible to a wide range of users.

In summary, USB flash drives are a practical tool for file transfer and data backup. By following the steps outlined above, you can seamlessly move files between devices while ensuring their safety and organization. This hands-on project illustrates the power and simplicity of USB technology in everyday scenarios.

Common mistakes and how to avoid them

When working with USB connections and devices, it’s easy to make some common mistakes. Here’s a bullet list of what to watch out for and how to avoid these pitfalls:
Not safely ejecting devices: Always eject your USB drive before physically removing it to prevent data corruption. This simple step can save you from losing important files.
Using incompatible cables: Ensure that you use the right cable for your device and USB version to avoid connection issues. Check the specifications of your devices to ensure compatibility.
Overloading power: Don’t connect too many devices to a single USB port, as this can lead to power overload and device malfunction. Be mindful of the power requirements of each device.
Ignoring updates: Regularly update your USB device drivers to ensure optimal performance and compatibility. Keeping your drivers up to date can prevent connectivity issues.
Neglecting data backup: Don’t rely solely on USB for data storage. Always have backups on cloud storage or external hard drives. This redundancy protects against data loss.
Forgetting about formatting: If you’re using a new USB drive, remember to format it to ensure it works with your operating system. Formatting prepares the drive for use and ensures compatibility.

By being aware of these common mistakes and taking proactive steps to avoid them, you can enhance your experience with USB technology and ensure smooth operation in your daily tasks.

Conclusion + call to action

In conclusion, USB technology has become an integral part of our daily lives, facilitating seamless connections between devices. Whether you’re transferring files, charging devices, or expanding storage, USB offers a reliable and efficient solution. By understanding its workings, key parameters, and common mistakes, you can make the most of this technology. So, the next time you plug in a USB device, remember the journey it has taken to simplify your life. For further exploration of USB technology and its applications, I encourage you to delve deeper. More information at prometeo.blog

Third-party readings

Find this product and/or books on this topic on Amazon

Go to Amazon

As an Amazon Associate, I earn from qualifying purchases. If you buy through this link, you help keep this project running.

Quick Quiz

Question 1: What does USB stand for?


Question 2: In what year was USB initially introduced?


Question 3: What are the primary functions of USB technology?


Question 4: What is one of the main benefits of using USB?


Question 5: How has USB technology evolved over time?


Micro Tutorial: USB

Carlos Núñez Zorrilla
Electronics & Computer Engineer

Telecommunications Electronics Engineer and Computer Engineer (official degrees in Spain).

Follow me:


Micro Tutorial: SSD Hard Drive

Micro Tutorial: Disco Duro SSD — imagen destacada

Introduction

Have you ever wondered why your friend’s laptop boots up in seconds while yours takes an eternity? This often boils down to the type of storage used. In this tutorial, we will dive into the world of Solid State Drives (SSD), exploring their workings, applications, and what makes them tick. As technology continues to evolve, understanding SSDs becomes increasingly important for anyone looking to optimize their computing experience.

What it’s used for and how it works

Solid State Drives, or SSDs, are primarily used for storing data in computers and other devices. Unlike traditional hard drives (HDDs) that use spinning disks to read/write data, SSDs employ flash memory technology, which allows for much faster data access and transfer speeds. Now, let’s break down how SSDs work.

How SSDs Work

At the heart of an SSD is NAND flash memory, which consists of memory cells that store bits of data. These memory cells are organized into pages, and pages are grouped into blocks. When you write data, it is stored in these memory cells. The absence of moving parts in SSDs is a key factor in their speed and reliability. Unlike HDDs, where the read/write head moves across the platters, SSDs can access data almost instantaneously.

Moreover, SSDs operate using a controller that manages data storage and retrieval. This controller is responsible for tasks such as wear leveling, garbage collection, and error correction.

  • Wear Leveling: This process ensures that all memory cells are used evenly, which helps to prolong the lifespan of the SSD. By distributing write and erase cycles across the memory cells, wear leveling prevents any single cell from wearing out prematurely.

  • Garbage Collection: Over time, SSDs accumulate data that is no longer in use. Garbage collection helps to manage this unused data by consolidating it, freeing up space and improving performance. This process can occur in the background without user intervention, ensuring the SSD remains efficient.

  • Error Correction: SSDs are equipped with error correction codes (ECC) that help detect and correct data corruption. This feature ensures data integrity and reliability, making SSDs a safe choice for critical data storage.

Types of SSDs

There are several types of SSDs available, each designed for various applications. The most common ones include:

  1. SATA SSDs: These use the SATA interface, similar to traditional HDDs, making them compatible with most computers. However, they are not as fast as other types. SATA SSDs are a great choice for those looking to upgrade from an HDD without needing the highest performance.

  2. NVMe SSDs: Utilizing the PCIe interface, NVMe drives offer significantly faster data transfer rates than SATA SSDs. They are ideal for high-performance applications, such as gaming, video editing, and data-intensive tasks. NVMe SSDs can achieve read speeds exceeding 3000 MB/s, making them a preferred choice for power users.

  3. M.2 and U.2 SSDs: These are form factors that provide a compact design. M.2 drives are often seen in laptops and desktops due to their small size, while U.2 drives are used in enterprise solutions. M.2 SSDs can be either SATA or NVMe, so it’s essential to check the specifications before purchasing.

Applications of SSDs

SSDs are widely used in various applications, including:

  • Personal Computers: Most modern laptops and desktops come equipped with SSDs to enhance performance. Users experience faster boot times and application loading, making everyday tasks smoother.

  • Gaming Consoles: Gamers benefit from SSDs due to their quick load times, which significantly improve gaming experiences. With an SSD, games load faster, and players can jump into action without lengthy waiting periods.

  • Data Centers: Businesses use SSDs in servers for faster data access and improved efficiency. In environments where speed and reliability are critical, SSDs help reduce latency and enhance performance.

  • Mobile Devices: Smartphones and tablets utilize SSD technology to provide faster access to apps and files. The lightweight nature of SSDs also contributes to longer battery life in mobile devices.

In essence, SSDs have transformed the way we store and access data, contributing to faster and more efficient computing experiences.

Advantages of SSDs

You may be wondering about the benefits of using SSDs. Here are some key advantages:

  • Speed: SSDs provide much quicker boot times and file access. Users can experience boot times of just a few seconds, compared to the minute or more often required by HDDs.

  • Durability: With no moving parts, SSDs are less prone to mechanical failure. This makes them more reliable in portable devices, where shocks and vibrations can damage traditional hard drives.

  • Energy Efficiency: They consume less power, which is beneficial for laptops and mobile devices. This energy efficiency translates into longer battery life, allowing users to work or play for extended periods without needing to recharge.

  • Noise: SSDs operate silently, unlike HDDs that can produce mechanical noise. This makes them ideal for quiet environments, such as libraries or offices.

In summary, SSDs are a crucial component of modern computing, providing speed, reliability, and efficiency.

Key parameters

When evaluating SSDs, several key parameters come into play. Understanding these can help you make informed decisions when choosing an SSD for your needs. Here are some important parameters to consider:

  • Read Speed: This indicates how fast data can be read from the SSD. Higher read speeds mean faster boot times and quicker application launches.

  • Write Speed: This parameter reflects how quickly data can be written to the SSD. Faster write speeds are essential for tasks such as file transfers and video rendering.

  • Capacity: SSDs come in various sizes, ranging from 120 GB to several terabytes. Choosing the right capacity depends on your storage needs, whether for everyday use, gaming, or professional applications.

  • Endurance (TBW): This stands for Terabytes Written and indicates the lifespan of the SSD. Higher TBW ratings mean the drive can handle more data writing before it begins to wear out.

  • Form Factor: SSDs come in different physical shapes, such as 2.5”, M.2, and U.2. Ensure compatibility with your device when selecting an SSD.

Understanding these parameters enables you to select the right SSD that meets your performance requirements and budget.

Concrete use case

Let’s consider a concrete use case to illustrate the impact of SSDs in real life. Imagine you are a video editor working with high-resolution footage. You often deal with large files that require quick access for editing.

Scenario

In this scenario, you are using a traditional HDD to store your video files. When you import footage into your editing software, the loading times are frustratingly long, often leading to interruptions in your workflow. You decide it’s time to upgrade to an SSD.

Implementation

After researching various options, you choose an NVMe SSD due to its superior read/write speeds. Upon installation, you notice an immediate difference. Importing the same video files is now almost instantaneous. Your editing software opens quickly, and you can scrub through footage without any lag.

Performance Improvements

Moreover, rendering videos is significantly faster. With the SSD, you can export high-resolution projects in a fraction of the time it took with the HDD. This enhancement not only boosts your productivity but also allows you to take on more projects, ultimately increasing your revenue.

Additional Benefits

Furthermore, the SSD’s durability means you have less worry about data loss due to mechanical failures. You can also work on the go, as SSDs are lighter and consume less power, extending your laptop’s battery life.

Thus, switching to an SSD not only improves your editing experience but also enhances your overall workflow and efficiency. This real-world example highlights the tangible benefits of SSD technology, showcasing how it can transform the way professionals approach their work.

Common mistakes and how to avoid them

While using SSDs, you might encounter some common pitfalls. Here’s a list of mistakes to avoid:

  • Not Updating Firmware: Always check for firmware updates to keep your SSD running optimally. Manufacturers often release updates that improve performance and fix bugs.

  • Overfilling the SSD: Avoid filling your SSD to its maximum capacity. Leaving some free space allows for better performance and extends the lifespan of the drive.

  • Ignoring TRIM Command: Ensure that TRIM is enabled to maintain your SSD’s performance over time. TRIM helps the SSD manage unused data efficiently, preventing slowdowns.

  • Neglecting Backup: Even though SSDs are reliable, always keep a backup of your important data. Data loss can occur due to unforeseen circumstances, so having a backup is essential.

  • Choosing the Wrong Type: Ensure you select the right type of SSD (SATA, NVMe) based on your needs and compatibility with your device. Research the specifications of your computer to make an informed choice.

By being aware of these common mistakes, you can enhance your experience with SSDs and ensure they serve you well.

Good Practices and Limitations

While SSDs offer numerous advantages, it is also essential to be aware of good practices and limitations associated with their use.

Good Practices

  1. Regular Monitoring: Use monitoring software to keep track of your SSD’s health, including temperature, read/write cycles, and available space. This can help you identify potential issues before they become critical.

  2. Defragmentation: Unlike HDDs, SSDs do not require defragmentation. In fact, performing this task can be counterproductive, as it can wear out the memory cells. Instead, allow the SSD’s built-in garbage collection process to manage data effectively.

  3. Avoiding Heavy Write Operations: Since SSDs have a limited number of write cycles, try to minimize heavy write operations. For example, avoid using an SSD for tasks that involve constant writing, such as heavy database operations or large file transfers.

  4. Use SSDs for Operating System and Applications: To get the most out of your SSD, install your operating system and frequently used applications on it. This will significantly improve boot times and application launch speeds.

  5. Implementing Backups: Regularly back up your data to an external drive or cloud storage. This ensures that even if your SSD fails, your important data remains safe.

Limitations

  1. Cost: SSDs tend to be more expensive per gigabyte than HDDs. This can be a limiting factor for users who require large amounts of storage at a lower cost.

  2. Write Endurance: Although SSDs have improved significantly in terms of endurance, they still have a limited number of write cycles compared to HDDs. This means that for applications requiring heavy write operations, traditional HDDs may still be preferable.

  3. Data Recovery: In the event of a failure, data recovery from SSDs can be more challenging compared to HDDs. The way data is stored and erased on SSDs makes it difficult to recover lost data, emphasizing the importance of regular backups.

  4. Performance Degradation: Over time, as SSDs fill up and data is written and erased, performance can degrade. This is why maintaining free space and enabling TRIM is crucial for long-term performance.

  5. Limited Compatibility: Not all devices support all types of SSDs. Before purchasing, ensure that your device can accommodate the SSD type and form factor you intend to use.

By adhering to good practices and being mindful of limitations, you can maximize the benefits of SSD technology while minimizing potential drawbacks.

Conclusion

In conclusion, Solid State Drives (SSDs) are an essential component in modern computing, offering speed, reliability, and efficiency. Whether you are a gamer, a content creator, or a business professional, upgrading to an SSD can significantly improve your productivity and overall experience. The advantages of SSDs over traditional HDDs are clear, and their applications span across various fields, making them a versatile choice for anyone looking to enhance their computing capabilities.

So, if you haven’t already, consider making the switch or upgrading your existing storage solutions. With the right SSD, you can unlock the full potential of your device and enjoy a faster, more efficient computing experience.

For more information and in-depth tutorials on electronics and computer engineering, visit electronicsengineering.blog.

Third-party readings

Find this product and/or books on this topic on Amazon

Go to Amazon

As an Amazon Associate, I earn from qualifying purchases. If you buy through this link, you help keep this project running.

Quick Quiz

Question 1: What technology do SSDs use for data storage?


Question 2: What is the primary function of the controller in an SSD?


Question 3: What is the purpose of wear leveling in SSDs?


Question 4: How do SSDs access data compared to HDDs?


Question 5: What does garbage collection do in an SSD?


Micro Tutorial: Disco Duro SSD

Carlos Núñez Zorrilla
Electronics & Computer Engineer

Telecommunications Electronics Engineer and Computer Engineer (official degrees in Spain).

Follow me: YouTube · Instagram · TikTok · X