Micro Tutorial: CPU

Micro Tutorial: CPU — imagen destacada

Introduction

Have you ever wondered what makes your computer tick? I remember the first time I opened up my laptop and saw the intricate components inside. It was then that I truly appreciated the role of the CPU, or Central Processing Unit, which is often called the brain of the computer. The CPU is not just a piece of hardware; it is the heart of your device, orchestrating every operation and ensuring that your programs run smoothly. In this tutorial, we will delve into the fundamentals of the CPU, how it functions, its applications, and best practices for optimizing its performance.

Fundamentals

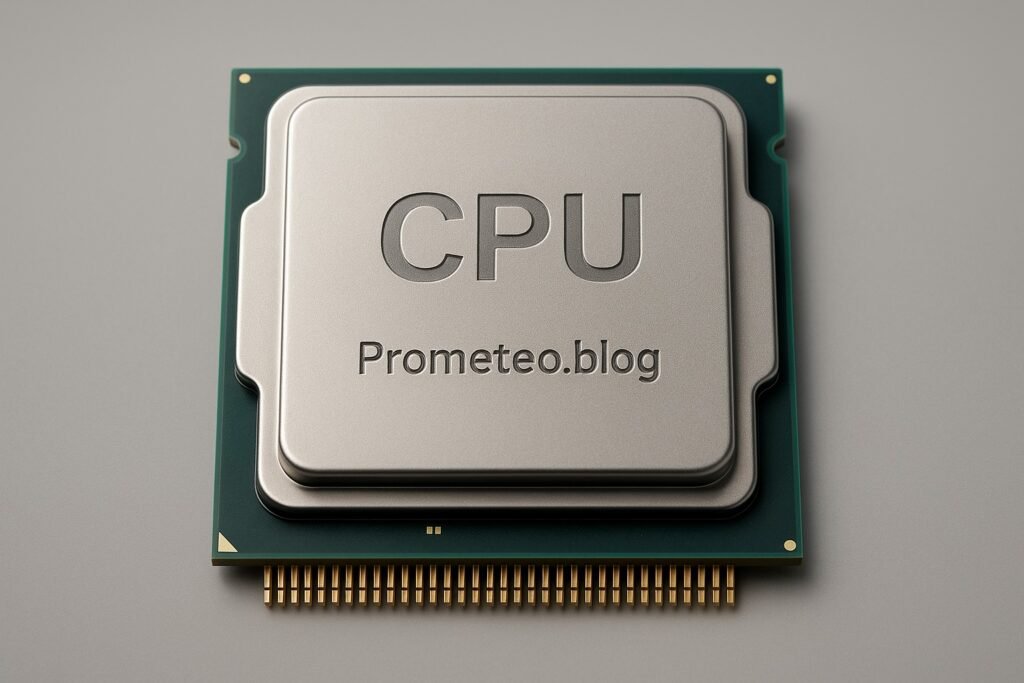
The CPU, or Central Processing Unit, is the core component of any computer system. It is responsible for executing instructions from programs, performing calculations, and managing data flow to and from other components. Without a CPU, your device would be like a car without an engine—completely non-functional.

To understand the CPU’s importance, it’s essential to recognize its primary functions: fetching, decoding, and executing instructions. These processes are fundamental to how computers operate, and they form the basis of the fetch-decode-execute cycle, which is the core of CPU operation.

Fetch-Decode-Execute Cycle

  1. Fetch: The CPU retrieves an instruction from memory. This is the first step in executing a command.
  2. Decode: After fetching, the CPU decodes the instruction to understand what action is required. This step translates the instruction into machine language that the CPU can understand.
  3. Execute: Finally, the CPU performs the operation. This could involve performing a calculation, moving data, or interacting with input/output devices.

This cycle repeats continuously as long as the CPU receives instructions to execute. You can think of it as a very fast assembly line where each instruction is a product that needs to be processed.

Components of the CPU

Modern CPUs are intricate pieces of technology that consist of several key components, each playing a crucial role in the overall functionality of the CPU:

  • ALU (Arithmetic Logic Unit): This part performs mathematical operations and logical comparisons. When you perform a calculation, the ALU is the one doing the heavy lifting.
  • Control Unit: This unit directs the operation of the processor. It tells the ALU what operations to perform and manages the flow of data to and from memory.
  • Registers: These are small high-speed storage locations within the CPU. They hold temporary data and instructions that the CPU is currently processing. Using registers allows faster access to frequently used data.

Communication with Other Components

The CPU communicates with other components of the computer through buses. Buses are pathways that carry data between the CPU, memory, and other peripherals. The size and speed of the bus can impact the performance of the CPU, as more data can be transferred simultaneously with a wider bus.

Clock Speed and Cores

Another important aspect of CPU function is clock speed, measured in gigahertz (GHz). This indicates how many cycles per second the CPU can execute. Generally, a higher clock speed means better performance, although other factors also contribute.

In addition to clock speed, CPUs also have multiple cores. A dual-core CPU has two cores, allowing it to handle two tasks simultaneously. This multi-core architecture is essential for modern computing, as it allows for multitasking and efficient processing of complex applications.

Overall, the CPU is a complex and highly optimized component that manages all operations within a computer. The efficiency of a CPU determines how quickly and accurately your computer can perform tasks, making it a vital aspect of any electronic device.

How It Works

The operation of a CPU is not only defined by its architecture but also by how it processes data. Understanding how these components interact can provide deeper insight into the CPU’s performance.

Instruction Set Architecture (ISA)

The instruction set architecture (ISA) is a critical aspect of CPU functionality. It defines the set of instructions that the CPU can execute. Different CPUs have different ISAs, which dictate how software communicates with hardware. The ISA includes instructions for arithmetic operations, data movement, control flow, and more.

Pipelining

Modern CPUs utilize a technique called pipelining to enhance performance. Pipelining allows the CPU to work on multiple instructions simultaneously by dividing the fetch-decode-execute cycle into separate stages. While one instruction is being executed, another can be decoded, and a third can be fetched. This overlapping of operations significantly increases the throughput of the CPU.

Cache Memory

Cache memory is another crucial component that affects CPU performance. It is a small amount of fast memory located close to the CPU that stores frequently accessed data and instructions. When the CPU needs to access data, it first checks the cache. If the data is not found there (a situation known as a cache miss), it will then retrieve it from the main memory, which is slower. The use of cache memory reduces latency and speeds up data access, thus improving overall performance.

Multi-threading

Multi-threading is a technology that allows a single CPU core to handle multiple threads of execution simultaneously. This is achieved through techniques such as hyper-threading, which enables each core to act as two logical cores. This can significantly improve performance in multi-threaded applications, allowing for better resource utilization.

Applications

The CPU’s role extends to a wide variety of applications across different fields. Its ability to process data efficiently makes it indispensable in numerous scenarios:

Personal Computing

In personal computers, the CPU handles everyday tasks such as web browsing, document editing, and media playback. A powerful CPU ensures smooth multitasking and responsiveness, enhancing the user experience.

Gaming

In gaming, the CPU plays a critical role in processing game logic, AI behaviors, and physics calculations. A high-performance CPU can deliver a smoother gaming experience, particularly in resource-intensive titles.

Data Analysis

In fields such as data science and machine learning, CPUs are used to process large datasets and perform complex calculations. A robust CPU can significantly reduce the time required for data processing and analysis.

Server Applications

In server environments, CPUs are essential for handling multiple requests simultaneously. Multi-core processors are commonly used to improve performance in web servers, databases, and cloud computing services.

Embedded Systems

CPUs are also found in embedded systems, such as those in automotive applications, home appliances, and industrial machinery. These CPUs are designed to perform specific tasks efficiently and reliably.

Good Practices and Limitations

While understanding the CPU is crucial, it is equally important to recognize best practices for optimizing its performance and the limitations that come with it.

Good Practices

  1. Cooling Solutions: Ensure adequate cooling for your CPU to prevent overheating. High temperatures can lead to throttling, where the CPU reduces its performance to cool down.
  2. Regular Maintenance: Keep your system clean and free of dust. Dust accumulation can hinder airflow and lead to overheating.
  3. Power Supply: Use a power supply that meets the wattage requirements of your CPU and other components. Insufficient power can lead to instability and performance issues.
  4. Driver Updates: Regularly update your CPU drivers and firmware to ensure optimal performance and compatibility with the latest software.
  5. RAM Compatibility: Ensure that your RAM is compatible with your CPU. Insufficient RAM can bottleneck CPU performance, particularly in memory-intensive applications.

Limitations

  1. Performance Bottlenecks: The CPU is just one component of a computer system. If other components, such as the GPU or storage, are underperforming, they can limit the overall system performance.
  2. Power Consumption: High-performance CPUs can consume significant power, leading to increased energy costs and heat generation.
  3. Diminishing Returns: As CPU technology advances, the performance gains from upgrading may diminish. It is essential to evaluate whether an upgrade is necessary based on your specific use case.
  4. Compatibility Issues: Not all CPUs are compatible with every motherboard. Always verify compatibility before making a purchase.
  5. Thermal Throttling: If a CPU overheats, it may throttle its performance to prevent damage. This can occur if the cooling system is inadequate or if the CPU is overclocked without proper cooling.

Concrete Use Case

Let’s explore a practical use case: a video editing workstation. Video editing is a resource-intensive task that requires significant computational power, making it a perfect example to illustrate CPU performance.

When editing videos, multiple processes are happening simultaneously. You might be importing footage, rendering in real-time, applying effects, and exporting the final product—all at the same time. This is where a powerful CPU becomes essential.

Example Scenario

Imagine you’re working on a 4K video project. A CPU with a higher clock speed, multiple cores, and ample cache will drastically improve your editing experience. For instance, if you have an 8-core CPU with hyper-threading, it can handle 16 threads simultaneously. This means while one thread is rendering an effect on your footage, another can be loading additional clips into the timeline.

When you apply effects, the CPU uses the ALU to perform complex calculations, manipulating each frame of the video. The control unit coordinates these tasks, ensuring that data flows smoothly between the CPU, RAM, and storage. If the CPU has a larger cache size, it can store more temporary data, reducing the time it takes to access frequently used files.

As you edit, you might notice that rendering previews can take a long time. However, with a powerful CPU, the rendering process becomes significantly faster, allowing you to work more efficiently. You can also export your finished video much quicker, saving you valuable time.

Conclusion of Use Case

In conclusion, choosing the right CPU for video editing can impact your workflow dramatically. If you select a CPU with the right specifications tailored for your tasks, you’ll notice improved performance, reduced wait times, and an overall smoother editing experience.

Common Mistakes and How to Avoid Them

When dealing with CPUs, several common mistakes can hinder performance or lead to system instability. Here are some pitfalls to avoid:

  • Ignoring Compatibility: Always ensure the CPU is compatible with your motherboard. Check the socket type and chipset compatibility before purchasing.
  • Overlooking Cooling Solutions: Failing to manage heat can lead to CPU throttling or damage. Invest in a good cooling solution, whether air or liquid cooling, especially for high-performance CPUs.
  • Neglecting Power Supply Needs: Ensure your power supply can handle the CPU’s wattage requirements. A power supply that is too weak can lead to system crashes or instability.
  • Underestimating the Importance of RAM: A powerful CPU needs sufficient RAM to perform effectively. Ensure that your system has enough RAM to support your workload.
  • Skipping Updates: Regularly update your CPU drivers and firmware for optimal performance. Manufacturers often release updates that can improve stability and performance.

Conclusion

In summary, the CPU is a fundamental component of any computer system, responsible for executing instructions and managing data. Understanding its functions and specifications helps you make informed decisions, whether you’re building a new machine or upgrading an existing one. You should now have a clearer understanding of what a CPU does and how it can impact your computing experience. If you’re interested in delving deeper into the world of CPUs or electronics engineering, I encourage you to continue learning and exploring. More information at electronicsengineering.blog

Third-party readings

Find this product and/or books on this topic on Amazon

Go to Amazon

As an Amazon Associate, I earn from qualifying purchases. If you buy through this link, you help keep this project running.

Quick Quiz

Question 1: What is the primary role of the CPU in a computer system?


Question 2: Which step comes first in the fetch-decode-execute cycle?


Question 3: What happens during the decode step of the CPU operation?


Question 4: What would happen if a computer had no CPU?


Question 5: Which of the following is NOT a function of the CPU?


Micro Tutorial: CPU

Carlos Núñez Zorrilla
Electronics & Computer Engineer

Telecommunications Electronics Engineer and Computer Engineer (official degrees in Spain).

Follow me: YouTube · Instagram · TikTok · X


Micro Tutorial: GPU

Micro Tutorial: GPU — imagen destacada

Introduction

Have you ever watched a video game or a movie and marveled at the stunning graphics? It’s fascinating to think that a device called a Graphics Processing Unit (GPU) is behind those visuals. This tutorial will help you understand what GPUs are, how they function, and why they are essential in modern technology. As we delve deeper, we will explore the fundamentals of GPUs, their various applications, and best practices for utilizing them effectively.

Fundamentals

A Graphics Processing Unit (GPU) is specialized hardware designed to accelerate the rendering of images and video. Unlike a Central Processing Unit (CPU), which is optimized for serial processing, a GPU excels at parallel processing. This ability makes it particularly well-suited for tasks that require handling vast amounts of data simultaneously, such as graphics rendering, machine learning, and scientific simulations.

The Evolution of GPUs

The development of GPUs has come a long way since their inception. Initially, GPUs were merely dedicated graphics cards that could offload some graphical tasks from the CPU. However, as technology advanced, GPUs evolved into highly sophisticated processors capable of performing complex computations. Modern GPUs contain thousands of small cores that can execute multiple instructions simultaneously, making them indispensable in various fields beyond just graphics rendering.

Architecture of GPUs

At a fundamental level, GPUs consist of many smaller cores designed to perform the same operation simultaneously. This architecture allows them to handle multiple tasks at once. The most common type of GPU architecture is based on the concept of SIMD (Single Instruction, Multiple Data), where the same instruction is applied to multiple data points at the same time.

In addition to the cores, GPUs also have their own memory, known as VRAM (Video RAM). This memory is used to store texture data, frame buffers, and other information needed for rendering. When the GPU processes a scene, it retrieves data from VRAM, performs calculations, and sends the results to the display.

How It Works

The primary function of a GPU is to render graphics. When you play a video game or watch a movie, the GPU takes care of generating the images you see on the screen. It does this by processing geometric data, applying textures, and calculating lighting effects. The GPU handles thousands of pixels at once, ensuring smooth and fast image generation.

Rendering Graphics

To understand how this rendering process works, let’s break it down into several steps:

  1. Vertex Processing: During this phase, the GPU processes the 3D coordinates of objects. It transforms these coordinates from object space to screen space, using matrices for calculations. This step determines where the object will be placed on the screen.

  2. Rasterization: After the vertex processing, the GPU converts the 3D objects into 2D pixels. This process involves determining which pixels on the screen will be affected by the object’s geometry.

  3. Pixel Processing: The GPU then applies textures, colors, and lighting effects to each pixel. This is where the stunning visuals come to life, as the GPU calculates how light interacts with different surfaces.

  4. Output to Display: Finally, the processed pixels are sent to the display, allowing you to view the rendered graphics.

GPU Memory and Bandwidth

The amount of VRAM and the memory bandwidth are crucial factors affecting GPU performance. A higher amount of VRAM allows the GPU to handle more complex scenes and larger textures without slowing down. Meanwhile, greater memory bandwidth permits faster data transfer between the GPU and VRAM, enhancing overall performance.

Applications

While GPUs were initially developed for rendering graphics in games, their parallel processing power has made them a valuable asset in various fields, including:

Machine Learning

Training deep learning models requires significant computational power. GPUs can process multiple operations simultaneously, speeding up training times. In machine learning, the ability to perform large-scale matrix calculations quickly is essential. As a result, many researchers and developers rely on GPUs to train their models more efficiently.

Scientific Computing

Researchers use GPUs to run complex simulations and solve large mathematical problems, such as modeling weather patterns or simulating molecular interactions. The parallel processing capabilities of GPUs allow scientists to conduct experiments and analyze data at unprecedented speeds.

Video Editing and Rendering

Video editors rely on GPUs to accelerate rendering times, allowing for smoother playback and faster exports. In video production, rendering high-resolution content can be time-consuming when done solely on a CPU. By utilizing a GPU, editors can significantly reduce the time required to produce high-quality videos.

Cryptocurrency Mining

The parallel processing capabilities of GPUs make them ideal for mining cryptocurrencies, as they can perform the necessary computations much faster than CPUs. Miners utilize GPUs to solve complex mathematical problems that validate transactions on blockchain networks, earning rewards in the process.

Good Practices and Limitations

When working with GPUs, it is essential to understand best practices and limitations to maximize their potential.

Keeping Drivers Updated

Regularly updating your GPU drivers is vital for ensuring optimal performance. Manufacturers frequently release updates to improve compatibility, fix bugs, and enhance performance. Neglecting driver updates can lead to subpar performance in applications and games.

Understanding VRAM Requirements

Ensure that your GPU has enough VRAM to handle the tasks you intend to perform. Insufficient VRAM can lead to performance bottlenecks, especially when working with high-resolution textures and complex models.

Cooling Solutions

High-performance GPUs generate a lot of heat. Make sure your system is adequately cooled to prevent thermal throttling, which can negatively impact performance. Investing in a good cooling solution can prolong the lifespan of your GPU and maintain consistent performance.

Power Supply Considerations

Verify that your power supply unit (PSU) can handle the power requirements of your GPU. A PSU that cannot provide sufficient power may lead to system instability or crashes.

Utilizing Frameworks

Don’t shy away from using machine learning frameworks that support GPU acceleration; they can save you time and effort. Frameworks such as TensorFlow and PyTorch are designed to leverage GPU capabilities, making it easier to implement complex algorithms without needing to write low-level code.

Choosing the Right GPU

Evaluate your specific requirements before purchasing a GPU, as different tasks may require different specifications. Consider factors such as memory size, core count, and intended applications to ensure you select the right GPU for your needs.

Concrete Use Case

Let’s consider a concrete use case of GPUs in the field of machine learning, specifically in training deep learning models. This example will illustrate how GPUs have transformed the process and improved efficiency.

Background on Machine Learning

Machine learning involves training algorithms to recognize patterns and make decisions based on data. Deep learning, a subset of machine learning, utilizes neural networks with multiple layers to analyze data. Training these models often requires processing large datasets, which can be time-consuming and resource-intensive if done solely on a CPU.

Role of GPUs in Machine Learning

Here’s where GPUs come into play. Due to their architecture, GPUs can process vast amounts of data simultaneously, making them well-suited for training deep learning models. When training a model, the algorithm adjusts the weights of the neural network based on the data it receives. This process involves numerous matrix multiplications, which are computationally intensive.

Speeding Up Training Times

For instance, consider a neural network designed to recognize images. Without a GPU, training this model could take several days or even weeks. However, by utilizing a GPU, the same training task can often be completed in a matter of hours. This drastic reduction in time allows researchers and developers to iterate on their models more quickly, experimenting with different architectures and parameters.

Frameworks Utilizing GPUs

Several popular machine learning frameworks, such as TensorFlow and PyTorch, have been optimized to take advantage of GPU capabilities. These frameworks provide easy-to-use APIs that allow you to leverage the power of GPUs without needing to write low-level code. When you use these frameworks, you can specify that computations should be performed on a GPU instead of a CPU, enabling you to tap into its full potential.

Practical Example

Let’s look at a practical example: suppose you are developing an image classification model using a dataset with thousands of images. By utilizing a GPU, you can train your model more efficiently. You would load your dataset into the machine learning framework of your choice and specify that the computations should be run on the GPU. As the model trains, you can monitor its performance metrics, such as accuracy and loss, and make adjustments as needed.

Scalability and Deployment

Moreover, once your model is trained, you can deploy it for real-time predictions. With a GPU, inference (making predictions based on new data) can also be performed quickly. This scalability is crucial for applications like autonomous vehicles, where rapid decision-making is essential.

Conclusion of Use Case

In summary, GPUs have become indispensable in the field of machine learning. Their parallel processing capabilities significantly reduce training times, allowing for faster iteration and deployment of models. As machine learning continues to grow, the role of GPUs will only become more important, making them a critical component in the future of technology.

Common Mistakes and How to Avoid Them

When working with GPUs, there are common pitfalls that you should be aware of. Here’s a list of mistakes to avoid:

  • Neglecting Driver Updates: Always keep your GPU drivers up to date to ensure optimal performance.
  • Overlooking VRAM Requirements: Ensure that your GPU has enough VRAM to handle the tasks you intend to perform.
  • Ignoring Cooling Solutions: High-performance GPUs generate a lot of heat. Make sure your system is adequately cooled to prevent thermal throttling.
  • Underestimating Power Supply Needs: Verify that your power supply unit (PSU) can handle the power requirements of your GPU.
  • Not Utilizing Frameworks: Don’t shy away from using machine learning frameworks that support GPU acceleration; they can save you time and effort.
  • Choosing the Wrong GPU for Your Needs: Evaluate your specific requirements before purchasing a GPU, as different tasks may require different specifications.

Conclusion

In conclusion, understanding GPUs is essential in today’s technology landscape. They play a critical role in rendering graphics, accelerating machine learning, and enhancing video processing. By recognizing the key parameters and avoiding common mistakes, you can make informed decisions when working with GPUs. So, dive into the world of GPUs, explore their capabilities, and take your projects to the next level!

For more information, visit electronicsengineering.blog.

Third-party readings

Find this product and/or books on this topic on Amazon

Go to Amazon

As an Amazon Associate, I earn from qualifying purchases. If you buy through this link, you help keep this project running.

Quick Quiz

Question 1: What does GPU stand for?


Question 2: What is a primary advantage of a GPU over a CPU?


Question 3: What does SIMD stand for in GPU architecture?


Question 4: What was the initial purpose of GPUs?


Question 5: How are modern GPUs characterized?


Micro Tutorial: GPU

Carlos Núñez Zorrilla
Electronics & Computer Engineer

Telecommunications Electronics Engineer and Computer Engineer (official degrees in Spain).

Follow me: YouTube · Instagram · TikTok · X


Micro Tutorial: VRAM Memory

Micro Tutorial: Memoria VRAM — imagen destacada

Introduction

You may remember the first time you played a video game that truly captivated you. Perhaps it was the graphics that drew you in, or the seamless animations that made everything feel so real. Behind those stunning visuals lies a crucial component known as VRAM, or Video RAM. This tutorial aims to demystify VRAM and its vital role in electronics and computer engineering. By the end of this guide, you will have a comprehensive understanding of VRAM, its working principles, applications, and best practices, enabling you to make informed decisions regarding your hardware needs.

Fundamentals

VRAM, short for Video Random Access Memory, is a specialized type of memory designed explicitly for storing image data that a computer displays. You will primarily find it in graphics cards, where it plays a pivotal role in rendering images, animations, and videos. Unlike standard RAM, optimized for general-purpose data storage, VRAM is tailored for high-speed image processing. To grasp its importance, it’s essential to understand its architecture, functionality, and the differences that set it apart from other memory types.

The Architecture of VRAM

VRAM’s architecture is specifically designed to handle the unique demands of graphics rendering. It typically employs a dual-ported structure, allowing simultaneous reading and writing of data. This means that while the GPU accesses data to render images, it can also update or modify that data without delay. This architecture is crucial for maintaining high frame rates and minimizing lag during complex graphics processing tasks.

Types of VRAM

VRAM comes in various types, each optimized for different performance characteristics. The most common types include:

  • SGRAM (Synchronous Graphics RAM): Optimized for texture mapping, allowing for efficient handling of graphical data.
  • GDDR (Graphics Double Data Rate): Designed for high-speed data transfer, making it suitable for modern graphics applications. GDDR has evolved through several generations, with GDDR6 being the latest, providing significant improvements in bandwidth and speed.
  • HBM (High Bandwidth Memory): A newer type that offers higher performance and lower power consumption by stacking memory chips vertically, allowing for faster data transfer rates.

Understanding these types and their specific applications is crucial for selecting the right graphics card for your needs.

How It Works

VRAM is fundamentally a type of dynamic RAM (DRAM), but it is modified to optimize it for video data. The architecture allows for rapid access to data, which is essential when dealing with large files and complex textures. In practice, VRAM is designed to maintain a high bandwidth, meaning it can transfer more data per second than standard RAM.

Data Handling in VRAM

When you run a game or a graphics-intensive application, textures, models, and other graphical elements are loaded into VRAM. Each texture or graphical element consists of a multitude of pixels, each requiring color information. VRAM stores this pixel data, allowing the GPU to access and manipulate it quickly and efficiently. If the VRAM capacity is exceeded, the system will have to swap data in and out of the slower system RAM, leading to performance issues such as frame rate drops and stuttering.

Bandwidth and Speed

The performance of VRAM is heavily influenced by its bandwidth and speed. Bandwidth refers to the amount of data that can be transferred per second, while speed refers to the rate at which data can be accessed. Higher bandwidth and speed allow for smoother graphics rendering, especially in high-resolution settings or when using advanced graphical features like ray tracing.

The Impact of VRAM on Performance

In gaming, the amount of VRAM can significantly affect performance. For instance, when playing graphically demanding games, having sufficient VRAM allows for seamless loading of textures and models, resulting in smoother gameplay and better visual quality. Conversely, insufficient VRAM can lead to lag and decreased graphical fidelity, particularly at higher resolutions.

Applications

VRAM is not just limited to gaming; it has a wide range of applications across various fields. Here are some key areas where VRAM plays a crucial role:

Gaming

In the gaming industry, VRAM is essential for rendering high-quality graphics. Games with intricate graphics, realistic environments, and fast-paced action require a substantial amount of VRAM to function optimally. As mentioned earlier, titles like “Cyberpunk 2077” showcase the importance of VRAM when it comes to delivering an immersive gaming experience.

Video Editing

For video editing professionals, VRAM is critical when working with high-resolution footage. Editing software requires significant graphical resources to render effects and transitions in real-time. A powerful graphics card with ample VRAM allows for efficient manipulation of high-resolution video files, ensuring a smoother editing process.

3D Rendering and Animation

Content creators often utilize VRAM for tasks such as 3D rendering and animation. Software like Blender or Maya relies on VRAM to store the textures and geometry of 3D models. A higher VRAM capacity allows for more complex models and richer details in scenes, ultimately improving the quality of the final output.

Machine Learning

In the realm of machine learning, VRAM plays a significant role in processing large datasets. High-performance models often require substantial VRAM to store weights and parameters, which directly impacts training speed. This is particularly relevant for deep learning applications, where the amount of data being processed can be immense.

Good Practices and Limitations

While VRAM is an essential component for high-performance graphics processing, there are several good practices and limitations to keep in mind when selecting and utilizing VRAM in your systems.

Good Practices

  1. Assess Your Needs: Before purchasing a graphics card, consider the applications you will be using. Gaming, video editing, and 3D rendering have different VRAM requirements.
  2. Balance Your System: Ensure that your CPU and other components can keep up with your graphics card to avoid bottlenecks. A powerful GPU with insufficient support from other components may not deliver the expected performance.
  3. Monitor VRAM Usage: Use monitoring tools to keep track of VRAM usage during intensive tasks. This can help you identify potential issues and make adjustments as needed.
  4. Regularly Update Drivers: Keeping your graphics card drivers up to date can optimize performance and compatibility with new applications.
  5. Consider Future-Proofing: If you plan to use your graphics card for several years, consider investing in a model with more VRAM than you currently need to accommodate future applications and games.

Limitations

  1. Cost: Graphics cards with higher VRAM capacities tend to be more expensive. Balancing budget and requirements is crucial.
  2. Diminishing Returns: Beyond a certain point, increasing VRAM may not yield significant performance improvements, especially if the rest of your system cannot support it.
  3. Thermal Management: High-performance graphics cards can generate considerable heat. Ensure your system has adequate cooling to maintain optimal performance during intensive tasks.

Concrete Use Case

Let’s delve into a concrete use case for VRAM in the context of gaming. Imagine you are an avid gamer who enjoys playing visually demanding games, such as first-person shooters or open-world adventures. These types of games often feature intricate graphics, realistic environments, and fast-paced action. Therefore, your gaming experience heavily relies on the capabilities of your graphics card, particularly the amount of VRAM it possesses.

Example: Gaming Performance

Consider a popular game like “Cyberpunk 2077.” This game is known for its stunning graphics and detailed environments. When you play this game, VRAM is employed to store high-resolution textures, character models, and environmental details. If your graphics card has only 4 GB of VRAM, you may encounter performance issues, such as lagging frames or reduced graphical fidelity, especially when playing at higher resolutions like 1440p or 4K.

On the other hand, if you have a graphics card equipped with 8 GB or more of VRAM, you can experience the game at its full potential. The increased VRAM capacity allows for seamless loading of textures and models, resulting in smoother gameplay and better visual quality. Moreover, with more VRAM, you can enable advanced graphical features such as ray tracing, which further enhances the realism of the game.

Streaming and VRAM

Furthermore, let’s say you decide to stream your gameplay on platforms like Twitch. In this scenario, VRAM becomes even more critical. Streaming requires additional resources, as you are not only running the game but also encoding the video stream in real-time. A graphics card with sufficient VRAM ensures that both the game and the streaming software can operate smoothly without sacrificing performance.

Video Editing Example

In addition to gaming, let’s explore the use of VRAM in video editing. Imagine you are working on a project that involves editing 4K video footage. Your editing software requires significant graphical resources to render effects and transitions in real-time. If your workstation has a powerful graphics card with 16 GB of VRAM, you can effortlessly manipulate high-resolution video files, apply color corrections, and export your project without encountering delays. Conversely, if your VRAM is limited, you may experience slow rendering times, making the editing process tedious and frustrating.

3D Rendering Example

Moreover, consider how content creators often use VRAM for tasks such as 3D rendering and animation. For instance, if you are using software like Blender to create a 3D model, your computer will utilize VRAM to store the textures and geometry of your model. A higher VRAM capacity allows for more complex models and richer details in your scenes, ultimately improving the quality of your final output.

To summarize, the use of VRAM in gaming and professional applications like video editing and 3D rendering is paramount for achieving high performance and visual fidelity. By understanding how VRAM functions within your hardware, you can make informed decisions when selecting graphics cards that meet your needs. As you can see, VRAM is not merely a specification; it significantly influences your overall experience, whether in gaming or creative work.

Common Mistakes and How to Avoid Them

When dealing with VRAM, it’s easy to make some common mistakes. Here’s a list to help you avoid these pitfalls:

  • Underestimating VRAM Requirements: Always check the VRAM recommendations for the applications you plan to use. Failing to do so may lead to performance issues.
  • Choosing a Graphics Card Based Solely on Clock Speed: While clock speed matters, the amount of VRAM is equally important, especially for high-resolution textures.
  • Ignoring VRAM Type: Different types of VRAM have varying performance characteristics; ensure you choose the right one for your needs.
  • Neglecting System Balance: Ensure that your CPU and other components are capable of keeping up with your graphics card to avoid bottlenecks.
  • Failing to Update Drivers: Regularly update your graphics card drivers to optimize performance and compatibility with new applications.
  • Overlooking Thermal Management: Ensure that your graphics card is adequately cooled to maintain optimal performance during intense tasks.

By keeping these common mistakes in mind, you can ensure a smoother experience when working with VRAM and graphics-related tasks.

Conclusion

In conclusion, VRAM is an essential component in the world of graphics processing, playing a significant role in gaming, video editing, and other graphics-intensive applications. Understanding how VRAM works and its importance can help you make informed decisions when selecting hardware for your needs. Always consider the amount of VRAM required for your applications and ensure that your system is balanced to prevent performance bottlenecks. If you want to dive deeper into the world of electronics and computer engineering, don’t hesitate to explore more resources.

More information at electronicsengineering.blog

Third-party readings

Find this product and/or books on this topic on Amazon

Go to Amazon

As an Amazon Associate, I earn from qualifying purchases. If you buy through this link, you help keep this project running.

Quick Quiz

Question 1: What does VRAM stand for?


Question 2: Where is VRAM primarily found?


Question 3: What is a key feature of VRAM's architecture?


Question 4: What is the main purpose of VRAM?


Question 5: Which type of VRAM is optimized for high-speed image processing?


Micro Tutorial: Memoria VRAM

Carlos Núñez Zorrilla
Electronics & Computer Engineer

Telecommunications Electronics Engineer and Computer Engineer (official degrees in Spain).

Follow me: YouTube · Instagram · TikTok · X


Micro Tutorial: EEPROM Memory

Micro Tutorial: Memoria EEPROM — imagen destacada

Introduction

Have you ever wondered how your favorite gadgets remember settings and preferences after being powered off? Well, let me tell you about my first encounter with EEPROM. I was working on a simple microcontroller project when I discovered that EEPROM could store my data even without power. This little memory chip left a lasting impression on me, and today, it’s your turn to explore it!

In this tutorial, we will delve into the world of EEPROM, examining its fundamental principles, how it operates, its various applications, and best practices for usage. Furthermore, we will explore a concrete practical case to illustrate its functionality and effectiveness. By the end of this guide, you will have a comprehensive understanding of EEPROM and how to leverage it in your projects.

Fundamentals

EEPROM, which stands for Electrically Erasable Programmable Read-Only Memory, is a non-volatile memory technology that retains information even when power is lost. This characteristic is what sets it apart from volatile memory types like RAM, which lose their data when the power is turned off.

Structure and Characteristics

EEPROM is composed of an array of memory cells, each of which can store a bit of data. These cells are typically made from floating-gate transistors, which can trap electrons, allowing the memory to maintain its state without a continuous power supply. The key characteristics of EEPROM include:

  • Non-volatility: Data is preserved even when the device is powered down.
  • Reusability: EEPROM can be erased and reprogrammed electrically, making it flexible for various applications.
  • Byte-level access: Unlike some other memory types, EEPROM allows data to be read and written on a byte-by-byte basis, which can be advantageous for specific applications.

Types of EEPROM

There are several types of EEPROM, including:

  • Serial EEPROM: This type communicates using a serial protocol, typically I2C or SPI. It is popular in applications where space is limited.
  • Parallel EEPROM: This type allows for faster data transfer rates as it can read and write multiple bits simultaneously. However, it requires more pins and space on the circuit board.
  • Flash Memory: Although technically not EEPROM, flash memory shares many characteristics with it. Flash memory is often used in larger storage applications, such as USB drives and SSDs.

How it Works

EEPROM operates by using a process known as tunneling to write and erase data. Here’s a simplified breakdown of how this process works:

  1. Writing Data: To write data to an EEPROM cell, a higher voltage is applied to the control gate of the floating-gate transistor. This voltage causes electrons to tunnel through a thin insulating layer and become trapped in the floating gate. The presence or absence of these trapped electrons represents the binary states of 1 or 0.

  2. Reading Data: To read the stored data, a lower voltage is applied to the control gate. If the floating gate has trapped electrons, it will influence the current flow through the transistor, indicating a binary 0. Conversely, if no electrons are trapped, the transistor will allow current to flow, indicating a binary 1.

  3. Erasing Data: The erasure process involves applying a negative voltage to the control gate, which causes the trapped electrons to tunnel back out of the floating gate, resetting the cell to its original state.

Advantages of EEPROM

  • Durability: EEPROM can endure a significant number of write and erase cycles, typically in the range of 1 million to 10 million cycles.
  • Data Retention: Data can be retained for many years, often exceeding 10 years without power.
  • Flexibility: The ability to write and erase data at the byte level allows for efficient memory management.

Disadvantages of EEPROM

  • Speed: Writing data to EEPROM is slower compared to RAM and other types of memory.
  • Limited Write Cycles: While it can handle millions of cycles, EEPROM will eventually wear out after extensive use, necessitating careful management of write operations.

Applications

EEPROM has a wide range of applications across various fields due to its unique characteristics. Here are some common uses:

Consumer Electronics

In devices such as remote controls, cameras, and microwaves, EEPROM is used to store user settings and preferences, ensuring that they remain intact even when the device is powered off.

Automotive

Modern vehicles utilize EEPROM to store critical information such as configuration settings, calibration data, and even diagnostic trouble codes. This ensures that the vehicle’s systems can be restored to their previous states after a power loss.

Industrial Equipment

In industrial applications, EEPROM is often used for storing parameters and settings for machinery and equipment. This allows for easy reconfiguration and maintenance, as settings can be stored and retrieved as needed.

Medical Devices

Medical devices often rely on EEPROM to store patient data, calibration settings, and operational parameters. The non-volatile nature of EEPROM ensures that vital information is preserved even in the event of power failure.

Smart Cards

EEPROM is a key component in smart cards, where it is used to store sensitive information securely. This includes personal identification data, financial information, and access credentials.

Best Practices and Limitations

While EEPROM is a versatile and reliable memory option, there are several best practices and limitations to consider when integrating it into your projects.

Best Practices

  • Limit Write Operations: To extend the lifespan of EEPROM, minimize the number of write operations. Consider strategies such as wear leveling, where data is distributed evenly across the memory cells to avoid excessive wear on specific areas.
  • Use Proper Voltage Levels: Ensure that the voltage levels used for writing and erasing data are within the specifications provided by the manufacturer to prevent damage to the memory cells.
  • Implement Error Checking: Incorporate error-checking mechanisms, such as checksums or CRCs (Cyclic Redundancy Checks), to ensure data integrity when reading from or writing to EEPROM.

Limitations

  • Speed Constraints: Be aware that EEPROM is slower than volatile memory types like RAM. If your application requires rapid data access, consider using a combination of EEPROM and RAM.
  • Endurance Limitations: While EEPROM can handle millions of write cycles, it is not infinite. Monitor usage and implement wear leveling strategies to prolong its life.
  • Capacity Constraints: EEPROM typically offers less storage capacity compared to other non-volatile memory types, such as flash memory. Evaluate your storage needs carefully when selecting a memory type for your application.

Concrete Practical Case

To illustrate the functionality of EEPROM, let’s consider a practical example involving a simple temperature monitoring system using a microcontroller.

Project Overview

In this project, we will create a temperature monitoring system that records the temperature readings every hour and stores them in an EEPROM. The system will also allow users to retrieve the last 10 readings even after the device is powered off.

Components Required

  • Microcontroller (e.g., Arduino or similar)
  • Temperature sensor (e.g., LM35 or DHT11)
  • EEPROM (e.g., AT24C32)
  • Breadboard and jumper wires
  • Power supply

Implementation Steps

  1. Wiring the Components: Connect the temperature sensor to the microcontroller, ensuring to follow the correct pin configurations. Connect the EEPROM to the microcontroller using the appropriate communication protocol (I2C or SPI).

  2. Programming the Microcontroller: Write a program that:

  3. Initializes the temperature sensor and EEPROM.
  4. Reads the temperature data from the sensor every hour.
  5. Stores the latest 10 readings in the EEPROM, overwriting the oldest reading when the limit is reached.

Here’s a simplified version of the code:

cpp\n #include <Wire.h>\n #include <EEPROM.h>\n\n const int sensorPin = A0; // Assuming the temperature sensor is connected to analog pin A0\n const int maxReadings = 10;\n int readings[maxReadings];\n int currentIndex = 0;\n\n void setup() {\n Serial.begin(9600);\n Wire.begin();\n // Load previous readings from EEPROM\n for (int i = 0; i < maxReadings; i++) {\n readings[i] = EEPROM.read(i);\n }\n }\n\n void loop() {\n // Read temperature\n int temperature = analogRead(sensorPin);\n readings[currentIndex] = temperature;\n\n // Store in EEPROM\n EEPROM.write(currentIndex, temperature);\n currentIndex = (currentIndex + 1) % maxReadings;\n\n // Wait for an hour before the next reading\n delay(3600000); // 1 hour in milliseconds\n }\n

  1. Testing the System: After uploading the code to the microcontroller, monitor the temperature readings via the Serial Monitor. Power off the device and turn it back on to verify that the last 10 readings are retained in the EEPROM.

  2. Data Retrieval: To enhance the project, you can implement a function that retrieves and displays the last 10 temperature readings stored in the EEPROM when requested by the user.

Conclusion

EEPROM is a powerful and versatile memory technology that plays a crucial role in various applications, from consumer electronics to industrial systems. Its non-volatile nature, durability, and flexibility make it an ideal choice for situations where data retention is vital.

By understanding its fundamentals, operation, and best practices, you can effectively incorporate EEPROM into your projects, ensuring that your devices remember critical information even when powered off. The practical case presented demonstrates how easy it is to use EEPROM in a temperature monitoring system, showcasing its real-world applicability.

As you embark on your journey with EEPROM, remember to consider its limitations and implement best practices to maximize its lifespan and performance. Happy tinkering!

Third-party readings

Find this product and/or books on this topic on Amazon

Go to Amazon

As an Amazon Associate, I earn from qualifying purchases. If you buy through this link, you help keep this project running.

Quick Quiz

Question 1: What does EEPROM stand for?


Question 2: What is a key characteristic of EEPROM?


Question 3: What type of memory technology is EEPROM classified as?


Question 4: What type of transistors are typically used in EEPROM cells?


Question 5: What advantage does EEPROM have over some other memory types?


Micro Tutorial: Memoria EEPROM

Carlos Núñez Zorrilla
Electronics & Computer Engineer

Telecommunications Electronics Engineer and Computer Engineer (official degrees in Spain).

Follow me: YouTube · Instagram · TikTok · X


Micro Tutorial: EPROM Memory

Micro Tutorial: Memoria EPROM — imagen destacada

Introduction

Back in the early days of computing, I had my first encounter with EPROMs while tinkering with an old arcade machine. The thrill of erasing and reprogramming the chip was unlike anything I’d experienced. Today, let’s delve into the fascinating world of EPROM memory, exploring its structure, how it operates, its various applications, and its limitations. By the end of this tutorial, you’ll have a comprehensive understanding of EPROMs and their practical uses in electronics.

What it’s used for and how it works

EPROM, or Erasable Programmable Read-Only Memory, serves as a vital component in various electronic devices, such as computers, embedded systems, and even some appliances. To fully appreciate its significance, it’s essential to understand how it functions and the role it plays in these applications.

Structure and Operation

First, let’s look at the structure of an EPROM chip. Typically, an EPROM consists of a grid of memory cells, each of which can store a bit of data. These cells use floating-gate transistors to hold an electrical charge, representing binary data (0s and 1s).

When you program an EPROM, you expose it to a high-voltage signal, allowing electrons to tunnel through the oxide layer and into the floating gate. This process alters the state of the transistor, thus storing information. Conversely, to erase the data, you expose the chip to ultraviolet (UV) light, which causes the electrons to leave the floating gate, resetting the memory cells.

Common Applications

Now, let’s explore some specific applications of EPROMs:

  1. Firmware Storage: EPROMs are often used to store firmware in devices like printers and routers. Firmware is essential for the device’s basic functions, and EPROMs allow for updates when needed.

  2. Embedded Systems: In embedded systems, an EPROM can store critical programs that control hardware operations. Because it can be erased and rewritten, it offers flexibility in design.

  3. Prototyping: Engineers frequently use EPROMs when prototyping new hardware designs. They can easily reprogram the chip to test different versions of software without needing physical replacements.

  4. Data Retention: EPROMs can retain data for many years, making them suitable for applications that require long-term storage without frequent updates.

Limitations

Despite their advantages, EPROMs do have limitations. For instance, they can be erased only by exposure to UV light, which can be cumbersome in certain scenarios. Additionally, the programming process requires special equipment, adding to the complexity of working with EPROMs. Moreover, they can endure only a finite number of write-erase cycles—typically around 10,000. This limitation means that while EPROMs are useful for many applications, they may not be the best choice for situations requiring frequent updates or changes.

Key parameters

When working with EPROMs, several key parameters determine their performance and suitability for specific applications. Understanding these parameters is crucial for selecting the right EPROM for your project.

  • Capacity: EPROMs come in various capacities, typically ranging from 512 KB to 8 MB. The choice of capacity depends on the amount of data you need to store.

  • Access Time: The access time for EPROMs usually ranges from 45 to 120 nanoseconds. This parameter indicates how quickly the EPROM can read data, which is essential for applications requiring fast response times.

  • Programming Voltage: EPROMs require a programming voltage typically between 12.5 and 21 volts. It’s crucial to ensure that your programming equipment matches the specifications of the EPROM to avoid damage.

  • Erase Time: Erasing an EPROM typically takes between 20 and 30 minutes. This time frame can be a limiting factor in applications where quick updates are necessary.

  • Write/Erase Cycles: Most EPROMs can endure around 10,000 write-erase cycles. This limit means that while you can reuse the chip multiple times, you should monitor the number of cycles to prevent failure.

Concrete use case

Let’s consider a concrete use case of an EPROM in an embedded system, specifically in a simple home automation project. In this project, you’ll create a basic system to control lights remotely using an EPROM to store the control program.

Project Overview

The goal of this project is to control the lighting in a room via a microcontroller, such as an Arduino. The EPROM will store the firmware that interprets signals from a remote control, allowing the user to switch lights on and off from a distance.

Components Needed

  1. Microcontroller (Arduino): This will act as the brain of the operation.

  2. EPROM (e.g., 27C256): This will store the control firmware.

  3. Remote Control Module: To send signals to the microcontroller.

  4. Relay Module: To control the high voltage of the light.

  5. Power Supply: To power the entire system.

  6. LEDs: For testing purposes, simulating the lights.

Step-by-Step Implementation

  1. Setting Up the Microcontroller: Begin by programming your Arduino with the necessary code. You’ll need to set up an interrupt to listen for signals from the remote control. The code should interpret the signals and activate the relay module accordingly.

  2. Programming the EPROM: Use an EPROM programmer to write the firmware to the EPROM chip. The firmware will handle the logic of turning lights on and off based on the received signals. Ensure you follow the specifications of your EPROM, such as voltage and timing, during this process.

  3. Connecting the Relay Module: Wire the relay module to the microcontroller. The relay will act as a switch to control the actual power to the lights. Be cautious with the wiring since you’re working with high voltage.

  4. Testing the System: Once everything is connected, power up the system and test it with the remote control. Ensure that pressing the buttons correctly turns the LED lights on and off.

  5. Debugging: If the system doesn’t work as intended, check the connections, and reprogram the EPROM if necessary. Ensure that the firmware is correctly written and that you have followed all the programming steps.

Advantages of Using EPROM

Using an EPROM in this project provides several benefits:

  • Updatability: You can easily reprogram the EPROM if you want to change the firmware or add new features.

  • Reliability: EPROMs are stable and retain data for a long time, which is crucial for firmware that may not need frequent updates.

  • Cost-Effectiveness: They are relatively inexpensive, especially for small-scale projects.

  • Flexibility: The ability to erase and reprogram allows for iterative design processes, enabling quick adjustments during development.

  • Non-Volatility: Unlike RAM, EPROM retains data even when the power is turned off, making it suitable for applications requiring persistent storage.

Common mistakes and how to avoid them

When working with EPROMs, it’s important to avoid common pitfalls. Here are some mistakes to watch out for:

  • Incorrect Programming Voltage: Ensure you use the correct voltage when programming the EPROM to avoid damaging it. Always consult the datasheet for the specific EPROM model you are using.

  • Neglecting UV Exposure for Erasing: Remember that EPROMs need UV light for erasing. Failing to do this properly can result in data corruption. Consider using a UV eraser specifically designed for EPROMs.

  • Writing Incorrect Firmware: Double-check your firmware code to ensure it’s correct before programming the EPROM. Utilize simulation tools to test your code thoroughly.

  • Ignoring Access Time Requirements: Be mindful of the access time specifications to avoid timing issues in your application. This is particularly important in applications requiring fast data retrieval.

  • Overusing Write Cycles: Keep track of how many times you write to the EPROM to avoid exceeding its write cycle limit. Consider using a logging mechanism to monitor write cycles.

Conclusion

In conclusion, EPROMs are an essential component in various electronic applications. Their ability to be erased and reprogrammed makes them versatile and valuable. As you explore electronics, consider incorporating EPROM technology into your projects to enhance functionality and flexibility. Don’t hesitate to dive deeper into the topic and experiment with your own designs.

By understanding the structure, operation, and applications of EPROMs, you can leverage their unique capabilities to create innovative electronic solutions. The knowledge gained from this tutorial can serve as a foundation for further exploration into more advanced memory technologies, such as EEPROM and Flash memory, which offer similar functionalities with added benefits.

As you continue your journey in electronics, remember that the world of memory technology is ever-evolving. Newer types of non-volatile memory are being developed, each with unique features and advantages. Keeping abreast of these developments will not only enhance your projects but also deepen your understanding of how memory plays a crucial role in modern computing and electronic design.

More information at electronicsengineering.blog

Third-party readings

Find this product and/or books on this topic on Amazon

Go to Amazon

As an Amazon Associate, I earn from qualifying purchases. If you buy through this link, you help keep this project running.

Quick Quiz

Question 1: What does EPROM stand for?


Question 2: What component is used in EPROMs to store data?


Question 3: How is data erased from an EPROM chip?


Question 4: Which of the following is a common application of EPROMs?


Question 5: What happens to the electrons in the floating gate when programming an EPROM?


Micro Tutorial: Memoria EPROM

Carlos Núñez Zorrilla
Electronics & Computer Engineer

Telecommunications Electronics Engineer and Computer Engineer (official degrees in Spain).

Follow me: YouTube · Instagram · TikTok · X


Micro Tutorial: PROM Memory

Micro Tutorial: Memoria PROM — imagen destacada

Introduction

Have you ever wondered how electronic devices remember crucial settings even after being powered off? I still remember my first experience with programmable read-only memory (PROM) during a lab session, where I discovered how this technology could store data permanently. PROM is a fascinating component in the world of electronics, serving as a reliable means of data storage in various applications. In this tutorial, we will explore the fundamentals of PROM, how it functions, its applications, best practices and limitations, a concrete use case, and a conclusion that ties everything together.

Fundamentals

Programmable Read-Only Memory (PROM) is a type of non-volatile memory that retains data even when power is removed. Unlike volatile memory types, such as Random Access Memory (RAM), which lose their stored information when powered off, PROM maintains its data integrity indefinitely. This characteristic makes it ideal for applications where data retention is critical.

Characteristics of PROM

  1. Non-Volatile: PROM does not require power to maintain its data. This feature is essential for devices that need to store settings or firmware that should not change over time.
  2. Programmable: PROM can be programmed after manufacturing, allowing users to customize the data stored within. However, this programming is permanent, meaning once the data is written, it cannot be altered or erased.
  3. Data Representation: The data in PROM is represented using fuse links. When programming, specific fuses are blown to represent binary ‘0’s or ‘1’s, creating a unique memory map for the stored data.

Types of PROM

Although PROM itself is a single type of memory, it has evolved into several variations:
Masked ROM: This is a type of ROM that is programmed during the manufacturing process and cannot be changed afterward. It is not considered PROM since it cannot be programmed by the user.
PROM: As described, it is user-programmable but cannot be modified once programmed.
EPROM (Erasable Programmable Read-Only Memory): This type can be erased using ultraviolet light and reprogrammed, providing more flexibility than standard PROM.
EEPROM (Electrically Erasable Programmable Read-Only Memory): This version can be erased and reprogrammed electrically, allowing for easier updates compared to both PROM and EPROM.

Understanding these variations can help you choose the right type of memory for your specific needs, depending on whether you require permanence or flexibility in your data storage.

How it Works

The programming of PROM is a critical aspect of its functionality. The process involves using a PROM programmer, which applies a higher voltage to specific pins on the chip. This voltage causes certain fuse links within the chip to blow, effectively encoding your data as a series of binary values.

Programming Process

  1. Preparation: Before programming, ensure that the data you intend to write is accurate. This step is crucial, as any errors can lead to malfunctioning devices.
  2. Connection: The PROM chip is connected to a PROM programmer. This device is designed to apply the necessary voltage levels to the chip’s pins.
  3. Data Input: The desired data is input into the PROM programmer. This data will dictate which fuses are blown and which remain intact.
  4. Programming: The programmer applies the appropriate voltage to the specified pins. Fuses that receive this voltage will blow, representing a binary ‘0’, while those that do not blown represent a binary ‘1’.
  5. Verification: After programming, it is essential to verify that the data has been written correctly. This step helps prevent future issues related to incorrect data storage.

Access Speed and Performance

While PROM is reliable and stable, it generally has slower access speeds compared to other memory types, such as RAM or Flash memory. Access times can range from 100 nanoseconds to 1 microsecond, depending on the specific chip and its design. However, for applications where data retention is more critical than speed, the slower access time is often an acceptable trade-off.

Applications

PROM finds its utility in various fields, primarily due to its non-volatile nature. Here are some common applications:

Firmware Storage

PROM is frequently used to store firmware in devices. Firmware is the software that provides low-level control for a device’s specific hardware. Since firmware often does not require frequent updates, PROM is an ideal choice for this purpose.

Embedded Systems

In embedded systems, PROM can store the necessary data and instructions required for the device to function correctly. This includes calibration data, configuration settings, and other critical information that must remain intact even when the device is powered off.

Consumer Electronics

Many consumer electronics, such as washing machines, microwaves, and televisions, utilize PROM to store user settings and operational parameters. This ensures that the device retains its settings even after being unplugged.

Automotive Applications

As mentioned previously, the automotive industry relies heavily on PROM for electronic control units (ECUs). PROM is used to store essential calibration data, firmware, and other critical information that must remain intact throughout the vehicle’s lifespan.

Aerospace and Industrial Automation

In the aerospace sector, PROM is used to store critical flight data and system settings that must be preserved across various operational conditions. Similarly, in industrial automation, PROM can store configuration settings for machinery, ensuring consistent performance.

Best Practices and Limitations

While using PROM can be advantageous, it is essential to be aware of certain best practices and limitations to avoid potential pitfalls.

Best Practices

  1. Data Verification: Always verify the data before programming the PROM to avoid errors that could lead to device malfunction.
  2. Voltage Management: Ensure that the voltage levels applied during programming are within the specified range to prevent damage to the chip.
  3. Temperature Awareness: Be mindful of the operating temperature range for PROM. Exceeding these limits can lead to data corruption or failure.
  4. Documentation: Keep thorough documentation of the programming process, including the data written and any specific settings used during programming.
  5. Replacement Planning: If future updates are anticipated, consider alternative memory types, such as EEPROM, which allows for reprogramming.

Limitations

  1. Irreversible Programming: Once programmed, PROM cannot be changed or erased. This limitation necessitates careful planning during the programming phase.
  2. Access Speed: PROM generally has slower access times compared to other memory types, which may not be suitable for applications requiring rapid data retrieval.
  3. Cost Considerations: Depending on the application, the use of PROM may be more costly than other memory solutions, particularly when considering the need for replacement chips in case of errors.

Concrete Use Case

Let’s delve into a concrete use case where PROM is employed effectively. Consider the automotive industry, where electronic control units (ECUs) are critical for managing various vehicle functions, from engine control to safety systems.

Automotive Firmware and Calibration

In modern vehicles, ECUs often rely on PROM to store firmware and calibration data. For example, when a car is manufactured, the ECU must be programmed with specific information about the engine parameters, fuel mapping, and other critical settings tailored to that particular vehicle model. Using PROM ensures that this data remains intact and unaltered throughout the vehicle’s lifespan.

Programming Process in Automotive

The process begins when the vehicle manufacturer receives a batch of PROM chips. Initially, these chips come blank, and a PROM programmer is used to write the necessary data onto them. The manufacturer must ensure that the data is accurate because any mistakes could lead to poor vehicle performance or even safety issues. Once the programming is complete, the PROM chips are securely soldered to the ECU.

Reliability in Automotive Environment

PROM provides reliability in the automotive environment. Since it is non-volatile, even if the car’s battery is disconnected, the calibration data remains stored in the PROM. This characteristic is essential because the vehicle needs to maintain its settings without relying on constant power. Additionally, PROM can withstand the harsh temperatures and vibrations often encountered in automotive applications. Hence, it’s not uncommon for PROM to be specified for use in ECUs designed for high-performance or extreme conditions.

Challenges in Automotive Applications

However, the use of PROM in automotive applications is not without its challenges. For instance, if the manufacturer needs to update the firmware due to safety recalls or improvements, they cannot simply overwrite the existing data on the PROM. Instead, they must replace the entire PROM chip with a new one containing the updated information. This limitation can lead to additional costs and logistical challenges, especially if a large number of vehicles are affected.

Despite these challenges, manufacturers continue to rely on PROM for its durability and reliability. The automotive sector is just one example of how PROM can be effectively utilized, but similar principles apply to other industries, such as aerospace and industrial automation.

Common Mistakes and How to Avoid Them

While working with PROM, you might encounter several common pitfalls. To ensure success in your projects, keep the following points in mind:
Neglecting Data Verification: Always double-check the data before programming the PROM. A single error can lead to malfunction.
Inadequate Voltage Levels: Ensure that the correct voltage is applied during programming to avoid damaging the chip or failing to program it correctly.
Ignoring Temperature Specifications: Be mindful of the operating temperature range for PROM. Exceeding these limits can lead to data corruption or failure.
Overlooking Replacement Needs: If you anticipate needing to update data frequently, consider using a different memory type, as PROM is not reprogrammable.
Failing to Follow Guidelines: Always refer to the manufacturer’s datasheet for specific programming procedures and limitations to avoid errors.

By being aware of these mistakes and taking proactive measures to avoid them, you can achieve more reliable results when using PROM in your projects.

Conclusion

In summary, PROM is a valuable technology for storing permanent data in various applications, particularly where reliability is essential. Understanding its characteristics, parameters, and potential use cases will help you make informed decisions when incorporating PROM into your designs. As you explore the possibilities of PROM, remember to consider its limitations and plan accordingly.

So, why not dive deeper into the world of electronics? Start experimenting with PROM in your projects today!

More information at electronicsengineering.blog

Third-party readings

Find this product and/or books on this topic on Amazon

Go to Amazon

As an Amazon Associate, I earn from qualifying purchases. If you buy through this link, you help keep this project running.

Quick Quiz

Question 1: What type of memory is PROM classified as?


Question 2: Can the data in PROM be altered after it has been programmed?


Question 3: How is data represented in PROM?


Question 4: What is a key characteristic of PROM compared to RAM?


Question 5: What happens to the fuse links in PROM when programming data?


Micro Tutorial: Memoria PROM

Carlos Núñez Zorrilla
Electronics & Computer Engineer

Telecommunications Electronics Engineer and Computer Engineer (official degrees in Spain).

Follow me: YouTube · Instagram · TikTok · X