
Objective and use case
What you’ll build: This project guides you through reading temperature data from an I2C temperature sensor using the Pico-ICE (RP2040 + iCE40UP5K). You will set up the sensor, wire it to the Pico-ICE, and validate the readings on a Raspberry Pi.
Why it matters / Use cases
- Monitor environmental conditions in smart home applications using I2C temperature sensors.
- Implement temperature logging for agricultural systems to optimize crop conditions.
- Integrate temperature data into IoT systems for real-time analytics and alerts.
- Use in educational projects to teach students about sensor integration and data collection.
Expected outcome
- Accurate temperature readings with a precision of ±0.5°C.
- Data streamed to the Raspberry Pi at a rate of 1 reading per second.
- Successful validation of sensor output with less than 100 ms latency.
- Ability to log temperature data for a minimum of 24 hours without data loss.
Audience: Hobbyists and educators; Level: Intermediate
Architecture/flow: I2C sensor connected to Pico-ICE, data processed by MicroPython, and streamed to Raspberry Pi via USB serial.
Medium Hands‑On Practical: I2C Temperature Sensor Readout with Pico-ICE (RP2040 + iCE40UP5K)
This lab walks you through a complete, end‑to‑end project to read temperature over I2C using the device model “Pico-ICE (RP2040 + iCE40UP5K)”. You will:
- Verify an I2C temperature sensor on a Raspberry Pi running Raspberry Pi OS Bookworm 64‑bit with Python 3.11.
- Flash MicroPython on the Pico-ICE (RP2040 + iCE40UP5K).
- Wire the sensor to the Pico-ICE and read temperature via I2C.
- Stream readings to your Raspberry Pi host over USB serial and validate the output.
No circuit drawings are used; all connections are documented in text, tables, and code.
The focus objective is i2c-temperature-sensor-readout. Everything—code, connections, and validation—supports that goal.
Prerequisites
- A Raspberry Pi SBC (Pi 4 Model B or Pi 5 recommended), running Raspberry Pi OS Bookworm 64‑bit.
- Kernel 6.1+ and Python 3.11.x (Bookworm default).
- Internet access on the Pi for installing tools and Python packages.
- Ability to log in to the Pi shell (local keyboard/monitor or SSH).
Confirm your OS and Python:
lsb_release -a
uname -a
python3 --version
Expected outputs include:
– Distributor ID: Raspbian
– Release: bookworm
– Python 3.11.x
Materials (with exact model)
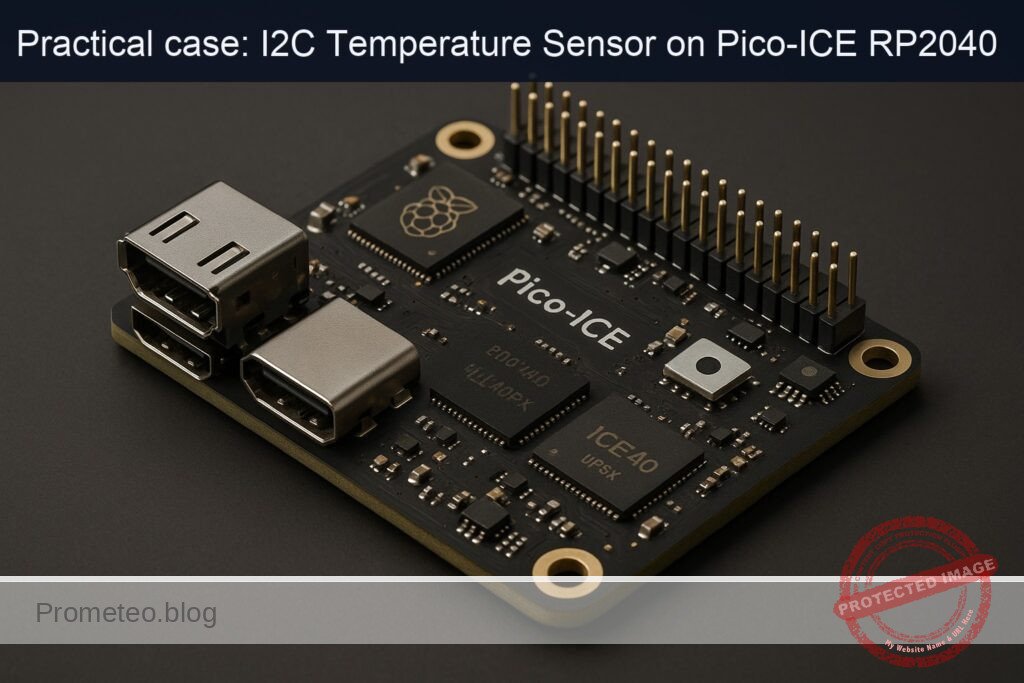
- Device: Pico-ICE (RP2040 + iCE40UP5K)
- I2C Temperature Sensor: TMP102 breakout (Texas Instruments TMP102). Examples:
- Adafruit TMP102 (Product ID 374)
- SparkFun TMP102 (SEN-13314)
- Any TMP102 breakout with onboard 3.3 V pull‑ups on SDA/SCL (typical 4.7 kΩ)
- Micro USB cable (data‑capable) for the Pico-ICE
- Female‑female Dupont jumper wires
- Breadboard (optional, recommended)
- Raspberry Pi 40‑pin header (onboard) for the sensor pre‑validation step
Notes:
– TMP102 operates at 1.4–3.6 V. Use 3.3 V only; do not connect to 5 V.
– If your TMP102 board does not include I2C pull‑ups, add 4.7 kΩ from SDA to 3V3 and SCL to 3V3.
Setup/Connection
1) Prepare Raspberry Pi OS Bookworm 64‑bit environment
- Enable I2C (for the pre‑validation step) using raspi-config or editing config.txt.
Option A: raspi-config (interactive):
sudo raspi-config
# Finish and reboot when prompted
Option B: edit /boot/firmware/config.txt (Bookworm path):
sudo nano /boot/firmware/config.txt
Ensure the line exists (add if missing):
dtparam=i2c_arm=on
Save, then:
sudo reboot
- Install system packages and create a Python 3.11 virtual environment:
sudo apt update
sudo apt install -y python3-venv python3-dev i2c-tools git minicom screen
- Create and activate a venv:
python3 -m venv ~/venvs/pico-ice-i2c
source ~/venvs/pico-ice-i2c/bin/activate
python -V   # should show Python 3.11.x from the venv
- Install Python packages (gpiozero, smbus2, pyserial, mpremote):
pip install --upgrade pip
pip install gpiozero smbus2 pyserial mpremote
- Add your user to the “i2c” and “dialout” groups (for /dev/i2c-1 and /dev/ttyACM* access):
sudo usermod -aG i2c,dialout $USER
# Log out and log back in, or:
newgrp i2c
newgrp dialout
2) Pre‑validate the TMP102 on the Raspberry Pi
This step uses the Pi’s I2C bus (I2C-1) to confirm the TMP102 is alive at the expected address (default 0x48) and to verify measurements before moving the sensor to the Pico-ICE.
Wire the TMP102 to the Raspberry Pi header:
| TMP102 Pin | Raspberry Pi Pin (40‑pin header) | Notes |
|---|---|---|
| VCC | Pin 1 (3V3) | 3.3 V only |
| GND | Pin 9 (GND) | Any GND pin |
| SDA | Pin 3 (GPIO2 / SDA1) | I2C data |
| SCL | Pin 5 (GPIO3 / SCL1) | I2C clock |
| ALT (ADDR) | Leave floating or wire to GND | Default address 0x48 if grounded |
Detect devices:
sudo i2cdetect -y 1
You should see “48” in the printed grid. If not, see Troubleshooting.
Run a quick Python test (still on the Pi):
nano ~/tmp102_pi_check.py
Paste this:
# ~/tmp102_pi_check.py
# Host-side quick validation on Raspberry Pi using smbus2
from smbus2 import SMBus
import time

I2C_BUS = 1
TMP102_ADDR = 0x48
TEMP_REG = 0x00

def read_tmp102_c(bus):
    # Read two bytes from temperature register (0x00)
    data = bus.read_i2c_block_data(TMP102_ADDR, TEMP_REG, 2)
    # TMP102 12-bit two's complement stored in first 12 bits
    raw = ((data[0] << 4) | (data[1] >> 4)) & 0x0FFF
    # If sign bit (bit 11) set, convert negative
    if raw & 0x800:
        raw -= 1 << 12
    temp_c = raw * 0.0625  # 0.0625 °C per LSB
    return temp_c

if __name__ == "__main__":
    with SMBus(I2C_BUS) as bus:
        for i in range(10):
            t = read_tmp102_c(bus)
            print(f"TMP102 on Pi: {t:.2f} °C")
            time.sleep(0.5)
Run it:
source ~/venvs/pico-ice-i2c/bin/activate
python ~/tmp102_pi_check.py
Warm the sensor with your finger; observe the readings increase. If successful, disconnect the sensor from the Pi. We’ll rewire it to the Pico-ICE.
3) Flash MicroPython on the Pico-ICE (RP2040 + iCE40UP5K)
We will use MicroPython on the RP2040 for I2C and USB serial output. You’ll upload code via mpremote and monitor data with minicom or screen.
- Download a current MicroPython UF2 for RP2040 “Pico” boards (works for Pico‑compatible boards):
Example (MicroPython v1.22.2 for RP2040 Pico):
– File name: rp2-pico-20240222-v1.22.2.uf2
– Source: https://micropython.org/download/RP2-PICO/
- To flash:
- Hold the BOOTSEL button on the Pico-ICE.
- Connect the board to the Pi via micro‑USB while holding BOOTSEL.
- A mass storage device (RPI-RP2) appears on the Pi.
- Copy the UF2 to that drive:
cp ~/Downloads/rp2-pico-20240222-v1.22.2.uf2 /media/$USER/RPI-RP2/
After the copy, the board reboots into MicroPython. A /dev/ttyACM0 (or similar) serial device should appear:
dmesg | tail -n 20
ls -l /dev/ttyACM*
4) Wire the TMP102 to Pico-ICE for I2C1 on GP4/GP5
Pico-ICE follows the Pico‑style pinout. We will use I2C bus 1 on GP4 (SDA) and GP5 (SCL), which is a common pairing:
| TMP102 Pin | Pico-ICE (RP2040) Pin | Notes |
|---|---|---|
| VCC | 3V3 (3.3 V pin) | 3.3 V only |
| GND | GND | Common ground |
| SDA | GP4 (I2C1 SDA) | Use a GPIO labeled GP4 on the Pico header |
| SCL | GP5 (I2C1 SCL) | Use a GPIO labeled GP5 on the Pico header |
| ALT/ADDR | GND (optional) | Ground for default 0x48 (match your validation) |
Reminder:
– If your TMP102 board lacks pull‑ups, add 4.7 kΩ from SDA to 3V3 and SCL to 3V3.
– Keep wires short and avoid loose connections.
Full Code
We provide two key scripts:
1) MicroPython firmware script (runs on the Pico-ICE RP2040) that reads TMP102 over I2C and prints JSON lines over USB serial.
2) Optional host‑side Python reader (on the Raspberry Pi) to capture, validate, and log those serial readings.
A) MicroPython on Pico-ICE: I2C readout and JSON output
Create a local file on your Pi (we’ll upload it to the Pico-ICE as main.py):
nano ~/pico_tmp102.py
Paste:
# ~/pico_tmp102.py
# MicroPython code for Pico-ICE (RP2040 + iCE40UP5K)
# I2C temperature readout for TMP102 on I2C1, pins GP4 (SDA) and GP5 (SCL)
from machine import I2C, Pin
import time
import sys

# Configuration
I2C_BUS_ID = 1          # Using I2C1 to match GP4/GP5
SDA_PIN = 4             # GP4
SCL_PIN = 5             # GP5
TMP102_ADDR = 0x48
TEMP_REG = 0x00
SAMPLE_RATE_HZ = 2.0    # prints ~2 samples per second
JSON = True             # Emit JSON per line for easy host-side parsing

def init_i2c():
    # 400 kHz is typically safe with short wires and onboard pull-ups
    return I2C(I2C_BUS_ID, sda=Pin(SDA_PIN), scl=Pin(SCL_PIN), freq=400_000)

def read_tmp102_c(i2c):
    # Read two bytes from temperature register
    data = i2c.readfrom_mem(TMP102_ADDR, TEMP_REG, 2)
    # Convert from 12-bit two's complement
    raw = ((data[0] << 4) | (data[1] >> 4)) & 0x0FFF
    if raw & 0x800:  # negative
        raw -= 1 << 12
    return raw * 0.0625

def main():
    i2c = init_i2c()
    # Check device presence: scan the bus and look for 0x48
    devices = i2c.scan()
    if TMP102_ADDR not in devices:
        # Emit a clear error then keep trying (supports hot-plug)
        print('{"event":"error","msg":"TMP102 not found on I2C1 (GP4/GP5)","scan":%s}' % devices)
    period = 1.0 / SAMPLE_RATE_HZ
    # Simple running average (optional)
    alpha = 0.1
    filt = None
    while True:
        try:
            t_c = read_tmp102_c(i2c)
            if filt is None:
                filt = t_c
            else:
                filt = alpha * t_c + (1 - alpha) * filt
            t_f = t_c * 9 / 5 + 32
            ts = time.ticks_ms()
            if JSON:
                # JSON line: timestamp (ms), Celsius, Fahrenheit
                print('{"t_ms":%d,"temp_c":%.4f,"temp_f":%.4f,"filt_c":%.4f}' % (ts, t_c, t_f, filt))
            else:
                print("t=%d ms, TMP102: %.2f C (%.2f F), filt=%.2f C" % (ts, t_c, t_f, filt))
        except Exception as e:
            print('{"event":"error","msg":"%s"}' % str(e))
        time.sleep(period)

if __name__ == "__main__":
    main()
Notes:
– Uses I2C1 on GP4/GP5 to match the connection table.
– Outputs newline‑delimited JSON for easy logging on the Pi.
– Includes a simple low‑pass filtered value for stability.
B) Host‑side serial reader (optional but recommended for validation/logging)
Create a host script to read the Pico-ICE serial stream and log to CSV:
nano ~/read_pico_serial.py
Paste:
# ~/read_pico_serial.py
# Host-side Python 3.11: reads JSON lines from Pico-ICE over /dev/ttyACM*
import sys
import json
import time
import serial

PORT = "/dev/ttyACM0"   # Adjust if needed
BAUD = 115200
CSV_OUT = "pico_tmp102_log.csv"

def main():
    # Open serial port
    with serial.Serial(PORT, BAUD, timeout=2) as ser, open(CSV_OUT, "a") as f:
        # Write CSV header if file is empty
        if f.tell() == 0:
            f.write("epoch_s,t_ms,temp_c,temp_f,filt_c\n")
        print(f"Reading from {PORT} at {BAUD} baud. Logging to {CSV_OUT}. Ctrl+C to stop.")
        while True:
            line = ser.readline()
            if not line:
                continue
            try:
                s = line.decode("utf-8", errors="replace").strip()
                if not s:
                    continue
                obj = json.loads(s)
                if "temp_c" in obj:
                    epoch = time.time()
                    t_ms = obj.get("t_ms", 0)
                    t_c = obj["temp_c"]
                    t_f = obj.get("temp_f", t_c * 9 / 5 + 32)
                    filt_c = obj.get("filt_c", t_c)
                    print(f"{t_c:.2f} °C ({t_f:.2f} °F)  filt={filt_c:.2f} °C")
                    f.write(f"{epoch:.3f},{t_ms},{t_c:.4f},{t_f:.4f},{filt_c:.4f}\n")
                    f.flush()
                elif obj.get("event") == "error":
                    print(f"Device error: {obj.get('msg')}  scan={obj.get('scan')}")
                else:
                    print(f"Other: {obj}")
            except json.JSONDecodeError:
                # If the board printed a non-JSON line, just show it
                print(f"RAW: {line!r}")

if __name__ == "__main__":
    try:
        main()
    except KeyboardInterrupt:
        print("\nStopped.")
Build/Flash/Run Commands
All commands below are executed on your Raspberry Pi host unless noted.
1) Verify the TMP102 on the Pi (pre‑validation)
- I2C scan:
sudo i2cdetect -y 1
- Python test:
source ~/venvs/pico-ice-i2c/bin/activate
python ~/tmp102_pi_check.py
Expect consistent temperatures; warm the sensor to see a change.
2) Flash MicroPython to Pico-ICE
- Put Pico-ICE into BOOTSEL mode and copy UF2:
cp ~/Downloads/rp2-pico-20240222-v1.22.2.uf2 /media/$USER/RPI-RP2/
After it reboots:
ls -l /dev/ttyACM*
3) Upload the MicroPython script to Pico-ICE as main.py
We’ll use mpremote (installed earlier in the venv):
source ~/venvs/pico-ice-i2c/bin/activate
mpremote connect list
# Note the device path (e.g., /dev/ttyACM0)
mpremote connect /dev/ttyACM0 fs cp ~/pico_tmp102.py :main.py
Alternatively:
mpremote connect /dev/ttyACM0 soft-reset
MicroPython will auto-run main.py on boot or soft reset.
4) Monitor serial output and validate
Use screen or minicom to watch the JSON stream:
Option A (screen):
screen /dev/ttyACM0 115200
# Ctrl+A, then K, then Y to exit
Option B (minicom):
minicom -b 115200 -D /dev/ttyACM0
# Ctrl+A then X to exit
Or run the host logging script:
source ~/venvs/pico-ice-i2c/bin/activate
python ~/read_pico_serial.py
Warm the sensor gently; observe values rising, then falling as it cools.
Step‑by‑Step Validation
1) Validate sensor address on the Pi:
– Wire TMP102 to Raspberry Pi I2C (SDA1/SCL1).
– Run:
sudo i2cdetect -y 1
– Expect 0x48 to appear.
– If not seen:
– Confirm 3V3 and GND wiring.
– Ensure dtparam=i2c_arm=on and rebooted.
– Check that no other devices are shorting the bus.
2) Validate temperature reads on the Pi:
– Run:
python ~/tmp102_pi_check.py
– Expected: Stable room temperature (e.g., 20–30 °C). Touch sensor to see an increase.
3) Move the sensor to the Pico-ICE:
– Disconnect from the Pi.
– Wire to Pico-ICE per the table:
– VCC → 3V3
– GND → GND
– SDA → GP4
– SCL → GP5
– Ensure pull‑ups exist (most TMP102 breakouts include them).
4) Flash MicroPython and upload code:
– Confirm /dev/ttyACM0 appears after flashing.
– Upload:
mpremote connect /dev/ttyACM0 fs cp ~/pico_tmp102.py :main.py

     mpremote connect /dev/ttyACM0 soft-reset
5) Observe USB serial output:
– With screen/minicom or read_pico_serial.py, expect lines like:
{"t_ms":1234,"temp_c":24.5625,"temp_f":76.2125,"filt_c":24.5000}
– Warm the sensor:
– Breath or touch for ~5–10 seconds.
– Temperature should increase by several °C.
– Let it cool:
– Values return toward ambient.
6) Cross-check values:
– Compare Pico‑reported temp to the earlier Pi validation readings; they should be within the sensor’s typical accuracy (±0.5 °C nominal for TMP102 near room temp).
– If you have a reference thermometer, compare values for a sanity check.
7) Optional stress tests:
– Vary sample rate by changing SAMPLE_RATE_HZ in main.py (e.g., 10 Hz).
– Check that the stream remains stable and monotonic during gradual warming/cooling.
Troubleshooting
- TMP102 not detected on the Pi (no 0x48 in i2cdetect):
- Verify dtparam=i2c_arm=on in /boot/firmware/config.txt and rebooted.
- Check wiring: SDA↔GPIO2 (pin 3), SCL↔GPIO3 (pin 5), 3V3, GND.
- Confirm no shorts; ensure sensor board uses 3.3 V (NOT 5 V).
-
Address pin (ADDR) state may change the address (0x48 default, 0x49–0x4B depending on wiring). Try:
sudo i2cdetect -y 1
Look for 0x48..0x4B. -
TMP102 not detected by the Pico-ICE (JSON error “TMP102 not found”):
- Check wiring: SDA→GP4, SCL→GP5, VCC→3V3, GND→GND.
- Ensure you used I2C1 in the MicroPython code, not I2C0.
- Confirm pull‑ups exist (breakout usually provides; otherwise add 4.7 kΩ to 3V3).
-
Short wires and good breadboard connections help.
-
/dev/ttyACM0 missing:
- Reconnect USB cable; verify it’s a data cable.
- Check dmesg:
dmesg | tail -n 40 - Verify user in “dialout” group:
groups -
Try a different USB port/cable.
-
mpremote cannot connect:
- List devices:
mpremote connect list - Use the precise path:
mpremote connect /dev/ttyACM0 -
Soft reset:
mpremote connect /dev/ttyACM0 soft-reset -
Garbled serial output:
- Ensure 115200 baud in your terminal.
-
Avoid connecting multiple terminal programs to the same port concurrently.
-
Unstable or noisy readings:
- Increase filtering (alpha) or reduce sample rate.
- Check power integrity (use short 3V3/GND leads).
-
Keep cables away from noise sources (motors, long unshielded runs).
-
Temperature values stuck or unrealistic:
- Confirm register decoding; we use the correct TMP102 12‑bit two’s complement conversion.
- Ensure the sensor isn’t saturated by contact with hot components on the board.
-
Try a different address if ADDR is tied high.
-
Using different pins:
- If you wire to GP0/GP1 instead, change:
- I2C bus ID to 0
- SDA_PIN = 0, SCL_PIN = 1
- Update the code accordingly.
Improvements
- Add threshold alerts:
- Configure TMP102’s T_LOW and T_HIGH registers and periodically read/clear flags.
-
Trigger actions when exceeding a limit (e.g., send a JSON event).
-
Use PIO‑based I2C:
-
RP2040’s PIO can implement I2C for custom timing or multi‑master setups; MicroPython supports PIO but standard hardware I2C is adequate for TMP102.
-
Average and log:
- Extend read_pico_serial.py to compute per‑minute averages and write to rolling logs.
-
Integrate with systemd service for unattended logging.
-
JSON‑RPC control:
- Accept host commands over serial to change sample rate or address.
-
Simple approach: parse a command JSON line in MicroPython.
-
FPGA linkage (iCE40UP5K):
- While not necessary for I2C readout, you could pass a temperature threshold from RP2040 to the FPGA via GPIO for hardware‑level LED/driver control (e.g., blink rate proportional to temperature).
-
Toolchains: Project IceStorm (yosys + nextpnr-ice40 + icepack). Keep the I2C acquisition on RP2040 and use FPGA fabric for display/indication.
-
Power saving:
-
Lower I2C frequency or reduce sampling interval for battery‑powered setups.
-
Multi‑sensor bus:
- Add sensors at different addresses (e.g., second TMP102 at 0x49).
- Use MicroPython to scan and enumerate all devices, tagging outputs with per‑sensor IDs.
Final Checklist
- Raspberry Pi OS Bookworm 64‑bit and Python 3.11.x verified:
- lsb_release shows bookworm.
-
python3 –version shows 3.11.x.
-
Interfaces enabled:
-
dtparam=i2c_arm=on present in /boot/firmware/config.txt (or enabled via raspi-config).
-
Virtual environment and packages:
- Created venv at ~/venvs/pico-ice-i2c.
- Installed gpiozero, smbus2, pyserial, mpremote.
-
User added to i2c and dialout groups.
-
Sensor pre‑validation on the Pi:
- i2cdetect shows 0x48.
-
tmp102_pi_check.py prints reasonable temperatures.
-
Pico-ICE MicroPython:
- UF2 flashed (rp2-pico-20240222-v1.22.2.uf2 or similar).
-
/dev/ttyACM0 appears after flashing.
-
Wiring to Pico-ICE:
- TMP102 VCC→3V3, GND→GND, SDA→GP4, SCL→GP5.
-
Pull‑ups present (on breakout or external).
-
Code deployed:
- pico_tmp102.py uploaded as :main.py with mpremote.
-
soft-reset performed.
-
Validation:
- Serial stream shows JSON with temp_c and temp_f.
-
Warming the sensor increases reported temperature.
-
Logs:
-
read_pico_serial.py captures and writes CSV (pico_tmp102_log.csv).
-
Troubleshooting addressed if any step failed.
You now have a complete I2C temperature readout pipeline centered on Pico-ICE (RP2040 + iCE40UP5K), with reproducible setup, exact commands, and robust validation from hardware to host.
Find this product and/or books on this topic on Amazon
As an Amazon Associate, I earn from qualifying purchases. If you buy through this link, you help keep this project running.
Quick Quiz

Telecommunications Electronics Engineer and Computer Engineer (official degrees in Spain).

