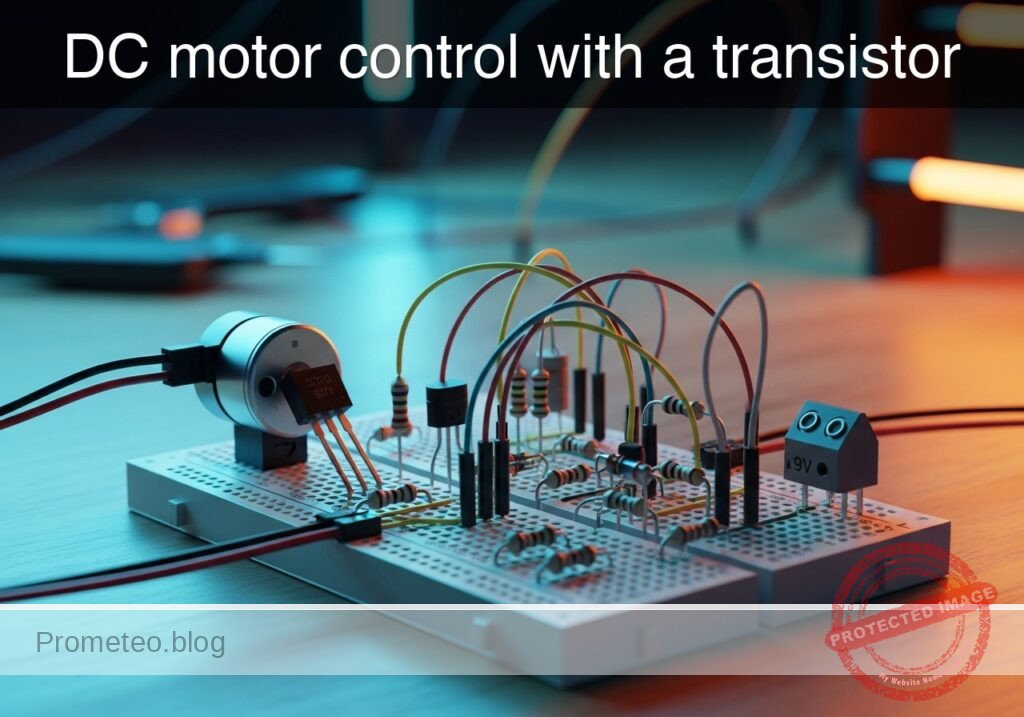
Level: Basic – Learn to use an NPN transistor as a switch to drive a DC motor, including the use of a flyback diode.
Objective and use case
In this practical case, you will build a low-side switch circuit using an NPN transistor to safely control a high-current DC motor from a low-power control signal.
This topology is highly useful in the real world for several reasons:
* Interfacing low-voltage microcontrollers (like an Arduino or Raspberry Pi) with higher power loads that require external power supplies.
* Automating small cooling fans in temperature-controlled systems.
* Building basic drive systems for small hobbyist robotics.
* Protecting delicate control logic from the damaging voltage spikes generated by inductive loads.
Expected outcome:
* Applying a 5 V control signal to the base circuit will saturate the transistor.
* The DC motor will spin as the transistor bridges its connection to ground.
* The flyback diode will safely dissipate the motor’s inductive kickback when the control signal is turned off.
* Measurable base voltage (VBE) around 0.7 V, near-zero collector-emitter voltage (VCE) indicating saturation, and clearly observable base current (IB) and collector current (IC).
Target audience and level: Beginners in electronics and hobbyists looking to control mechanical loads safely.
Materials
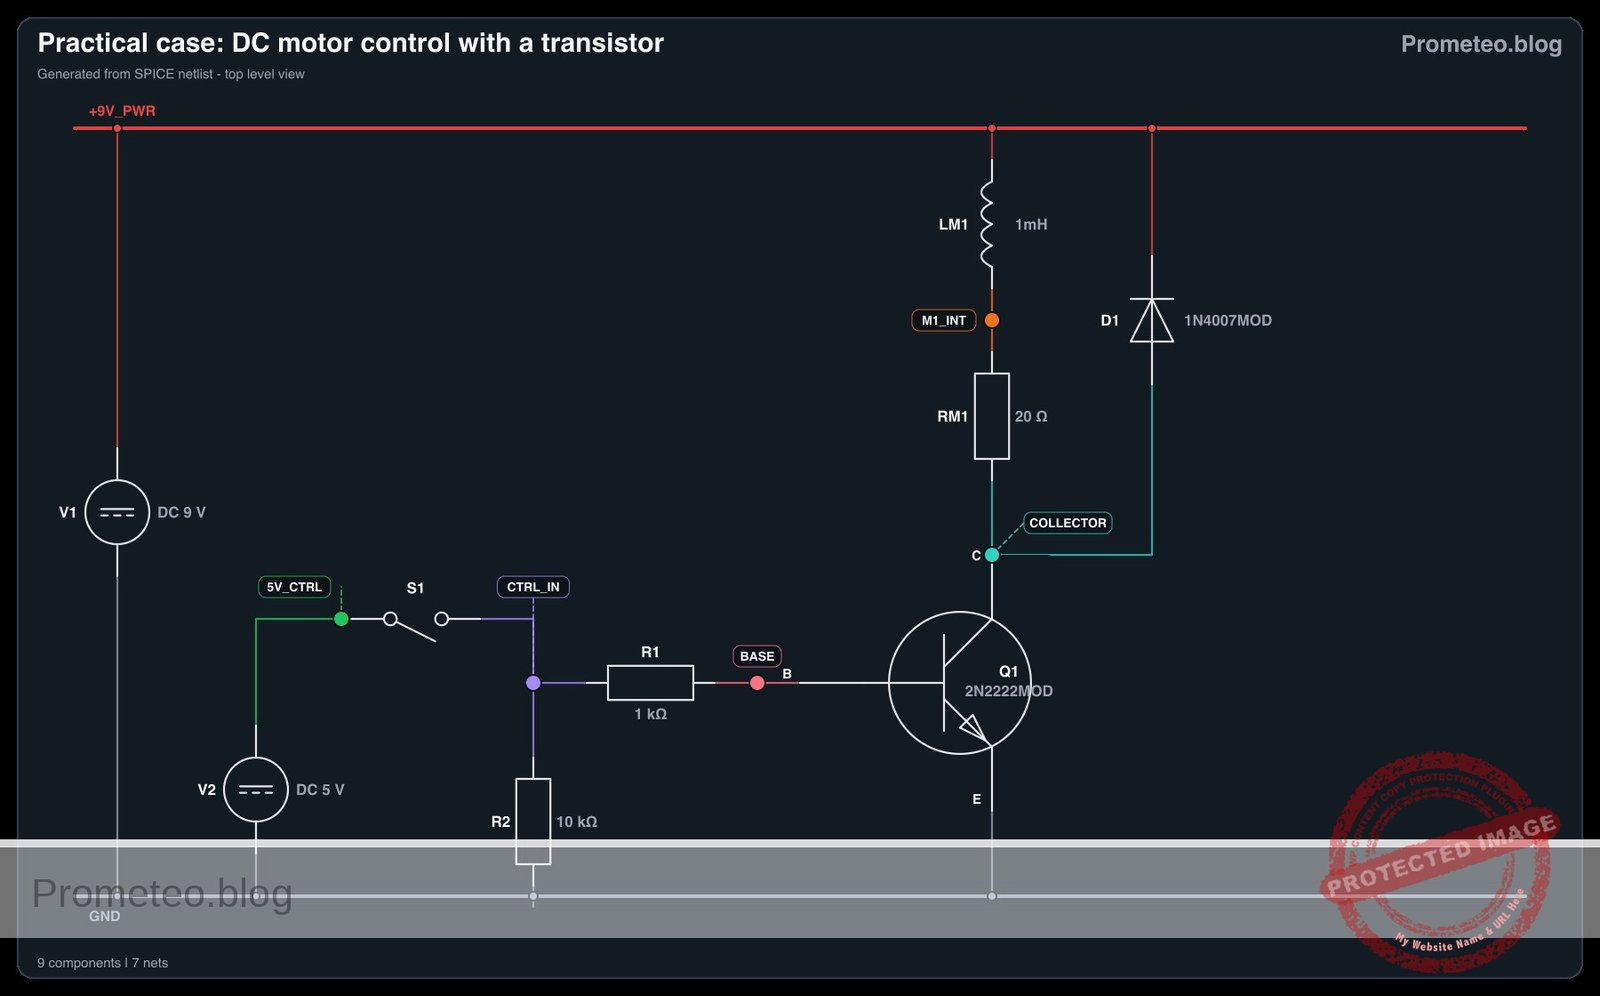
V1: 9 V DC supply, function: main power source for the DC motorV2: 5 V DC supply, function: simulated control signal sourceSW1: SPST switch, function: manual control of the base signalQ1: 2N2222 NPN transistor, function: low-side switch to drive the motorM1: 9 V DC motor, function: inductive mechanical loadD1: 1N4007 diode, function: flyback diode to suppress inductive spikesR1: 1 kΩ resistor, function: base current limiting resistorR2: 10 kΩ resistor, function: pull-down resistor for the control signal
Wiring guide
V1: connects between nodes9 V_PWRand0V2: connects between nodes5 V_CTRLand0SW1: connects between nodes5 V_CTRLandCTRL_INR2: connects between nodesCTRL_INand0R1: connects between nodesCTRL_INandBASEQ1: Collector connects to nodeCOLLECTOR, Base connects to nodeBASE, Emitter connects to node0M1: connects between nodes9 V_PWRandCOLLECTORD1: Anode connects to nodeCOLLECTOR, Cathode connects to node9 V_PWR
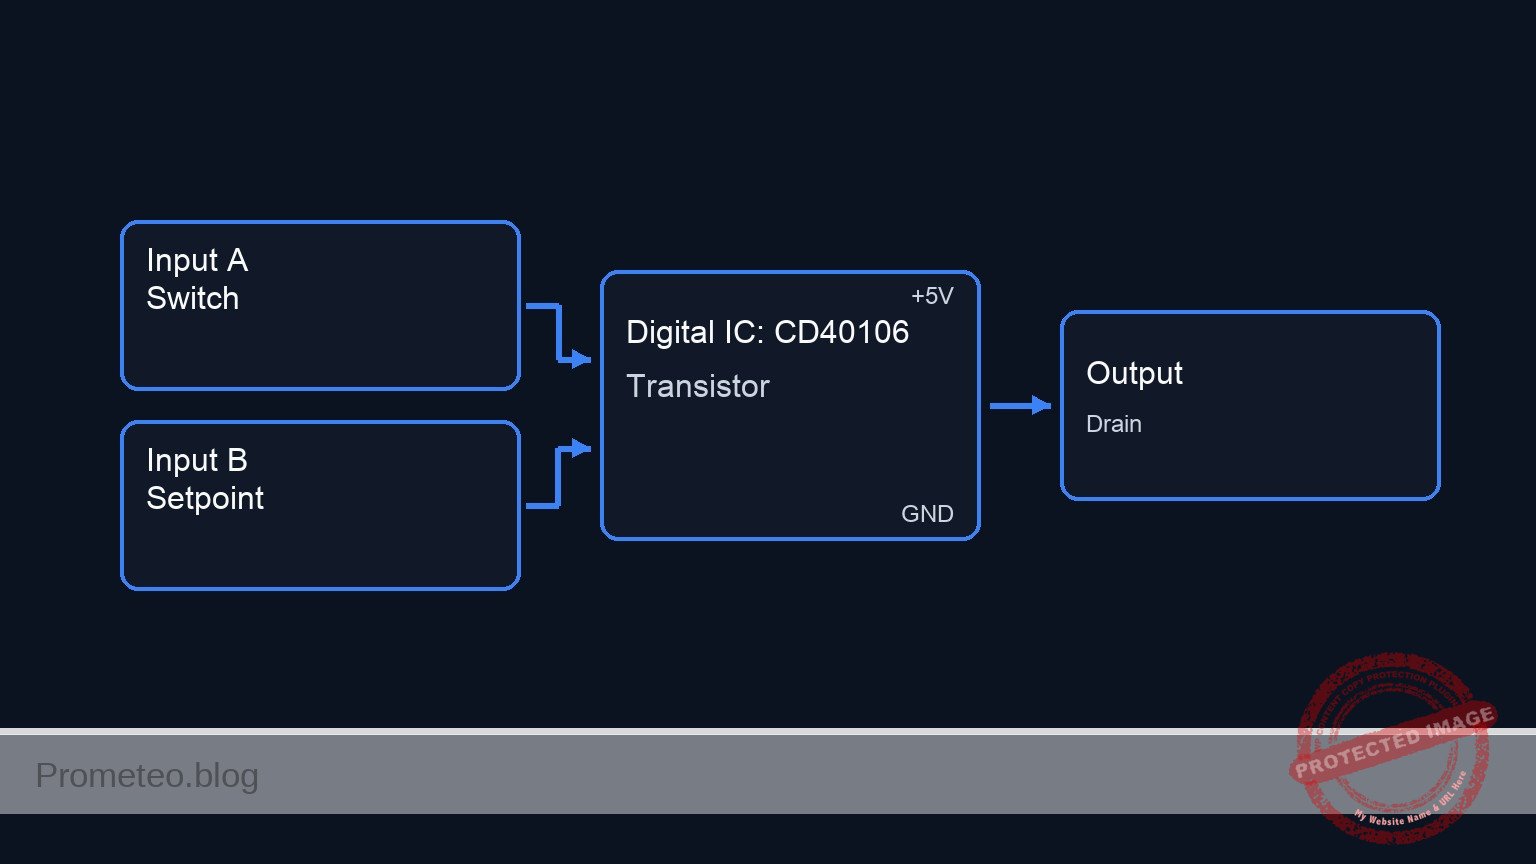
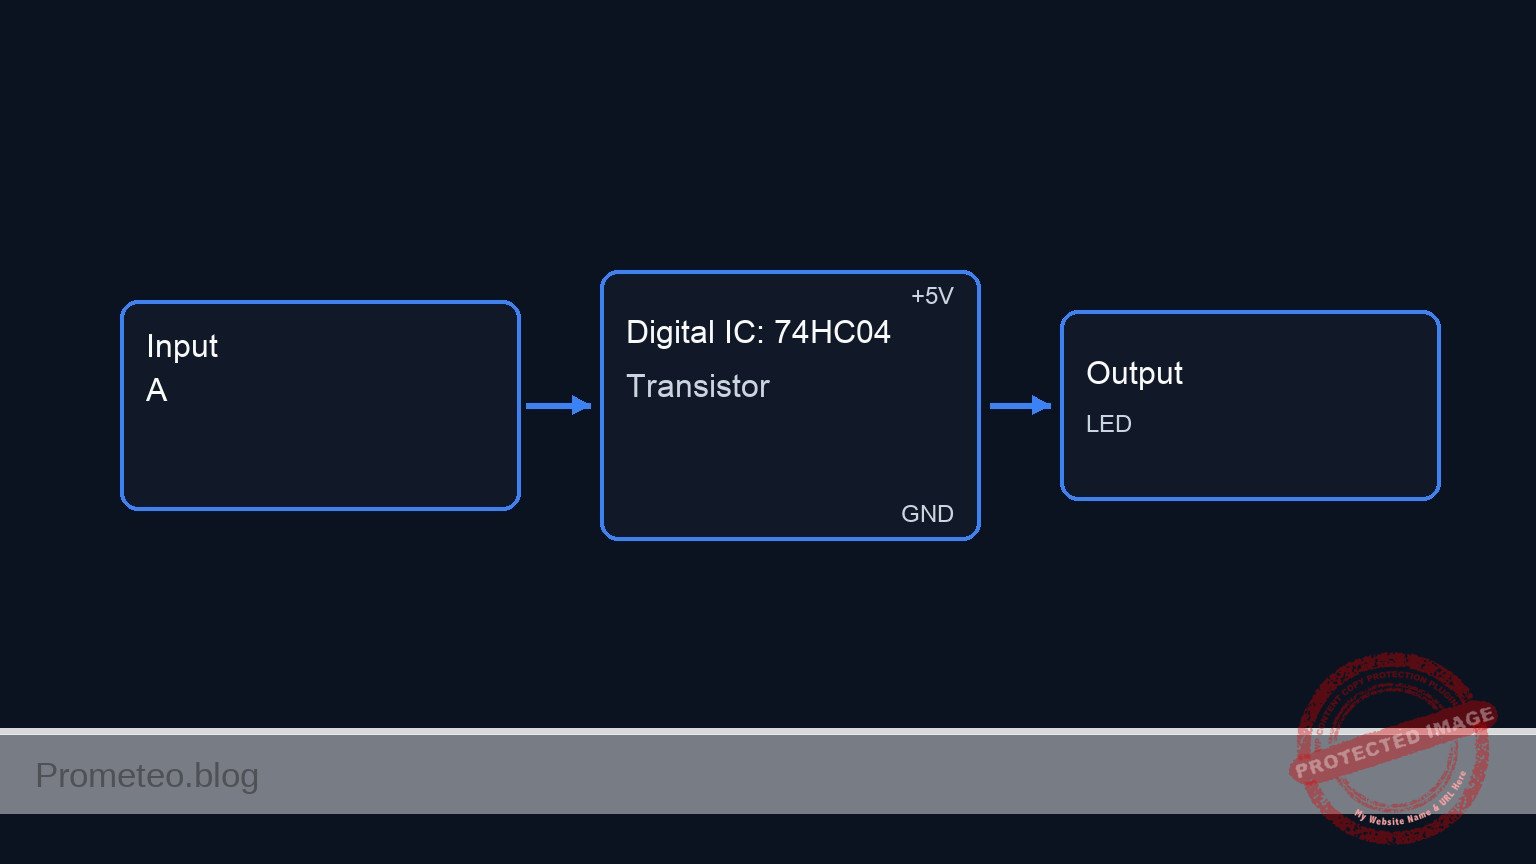
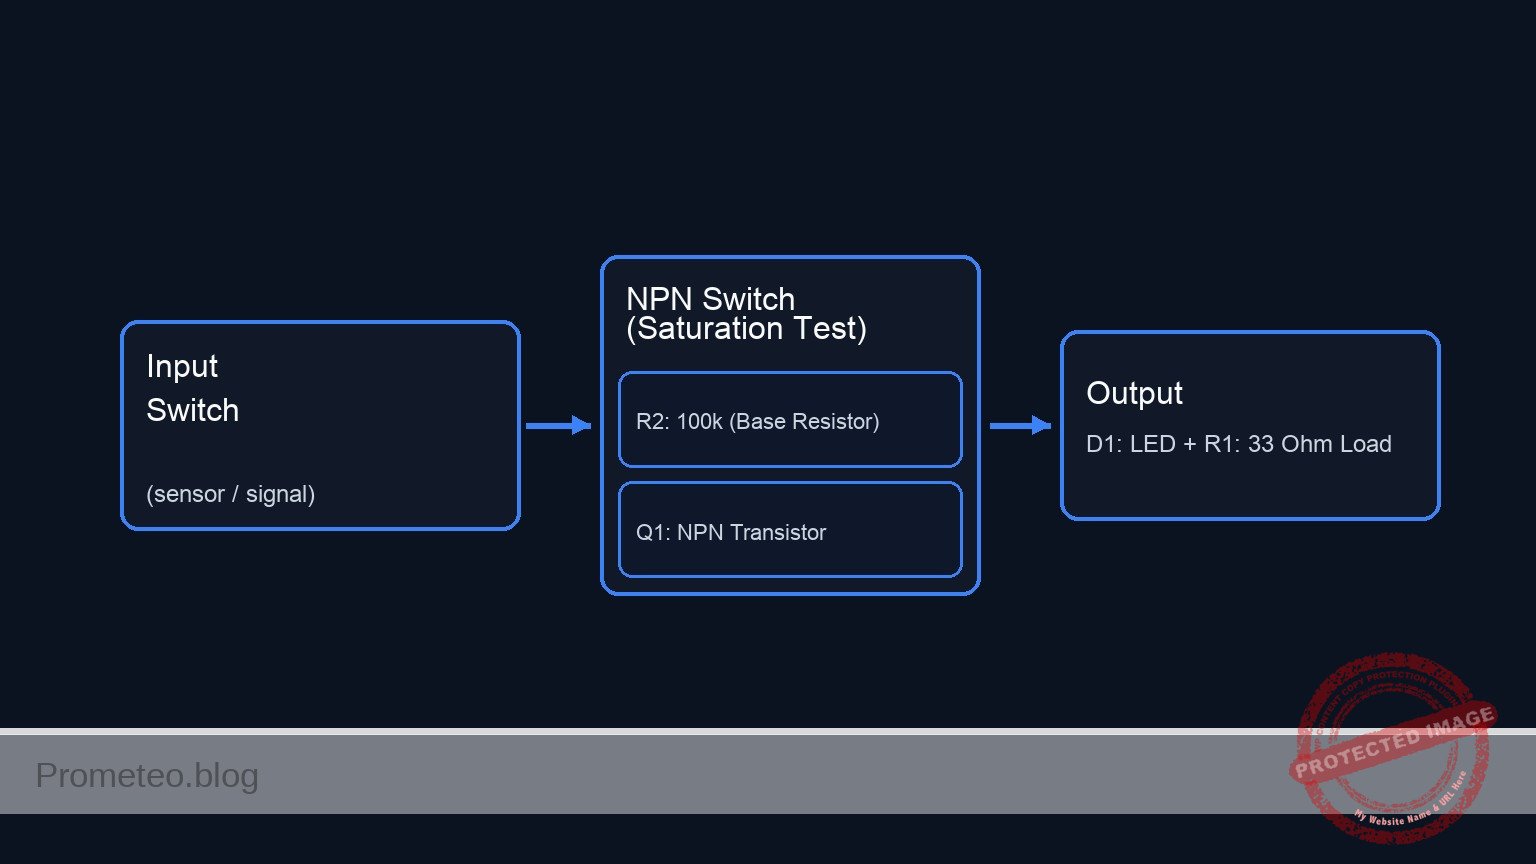
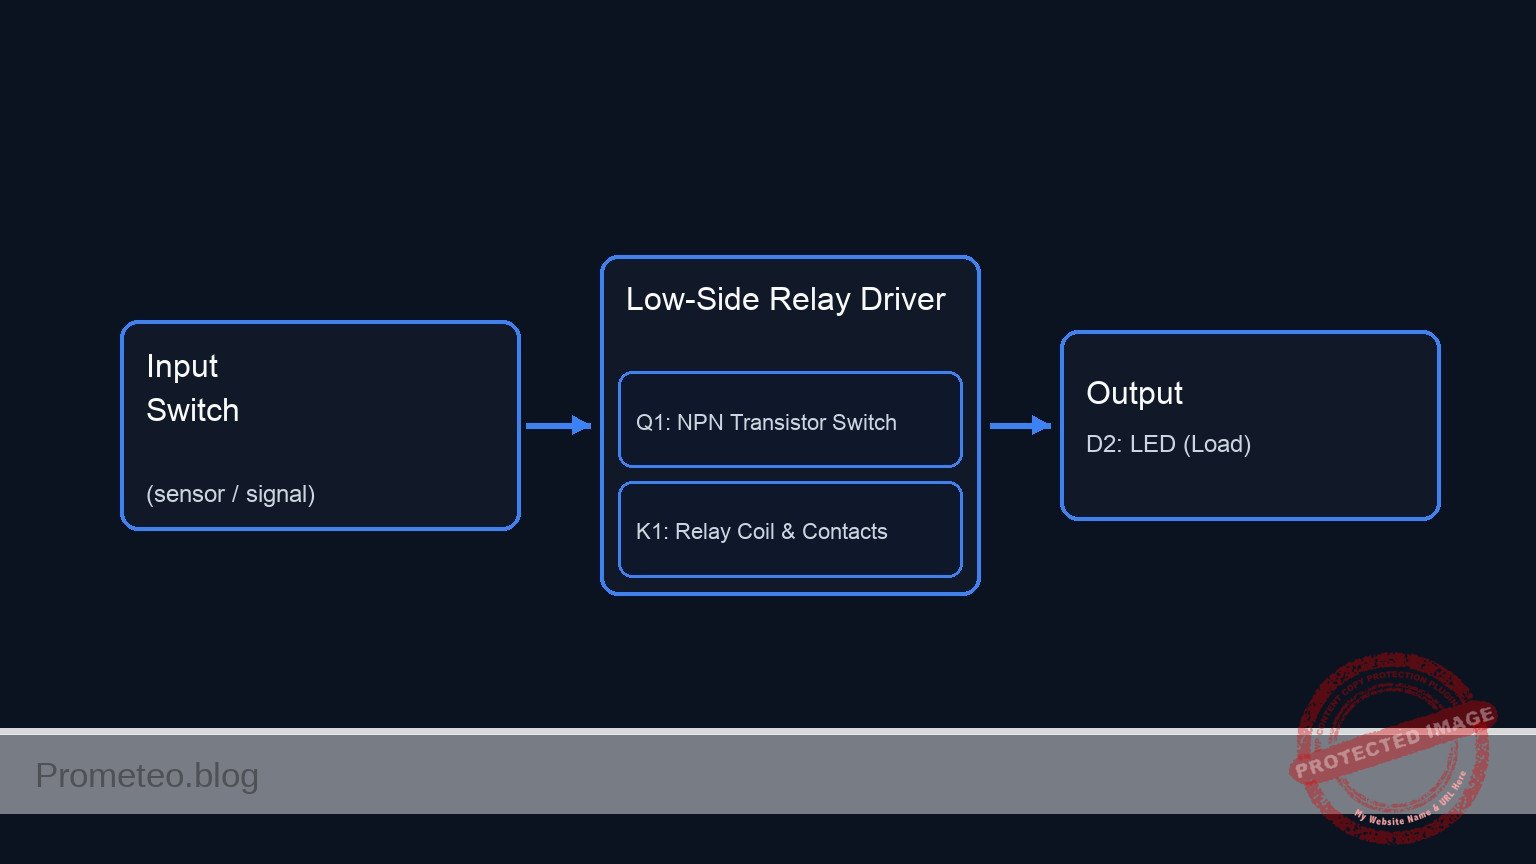
Conceptual block diagram
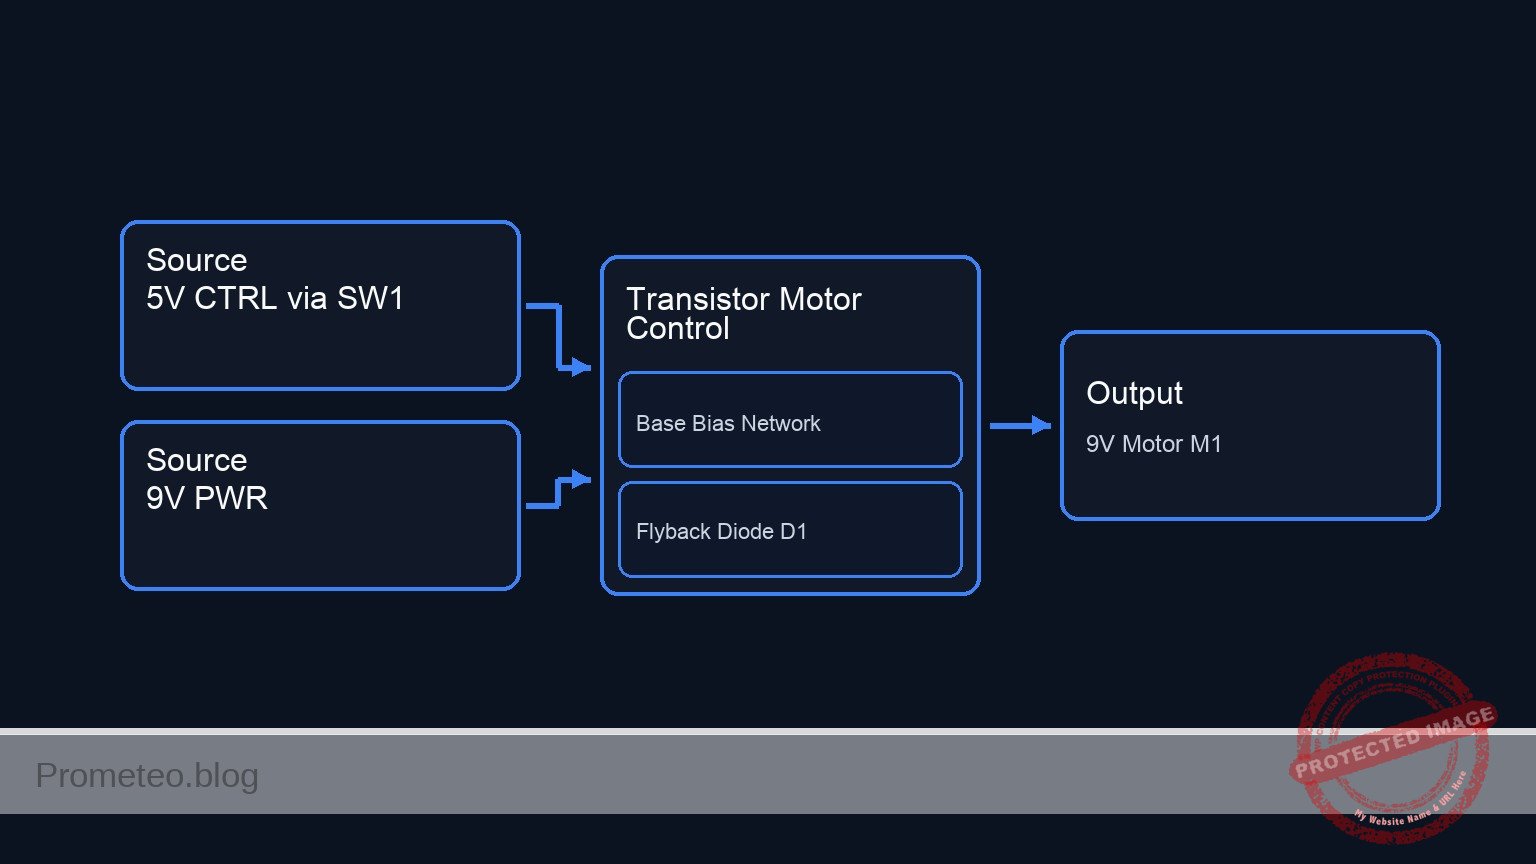
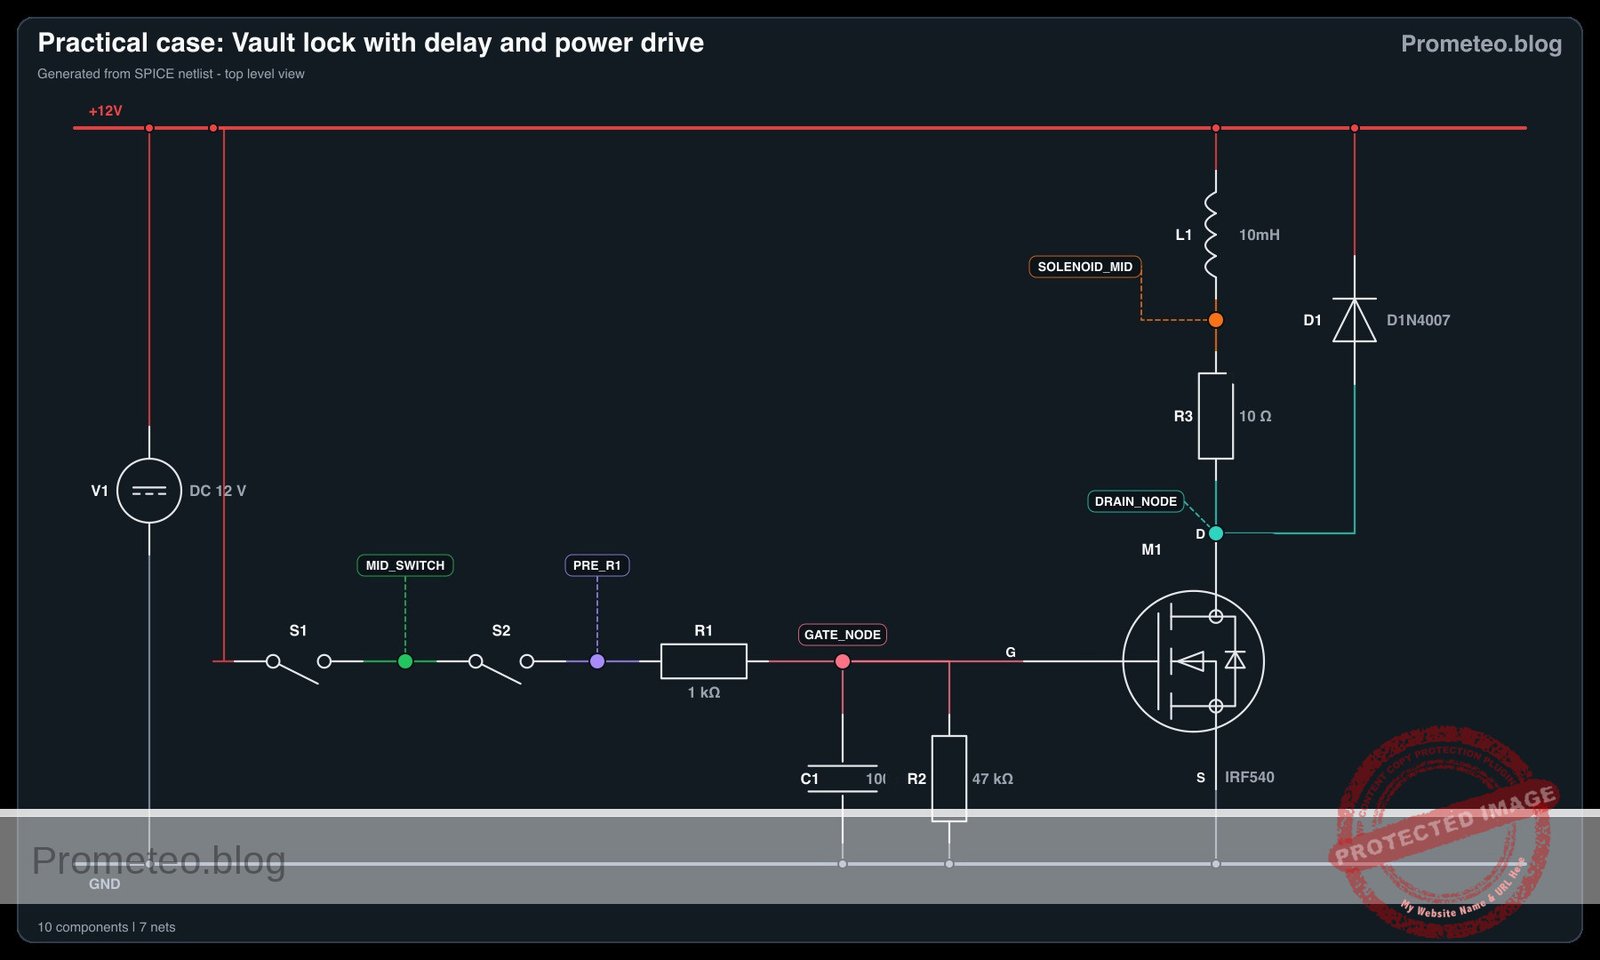
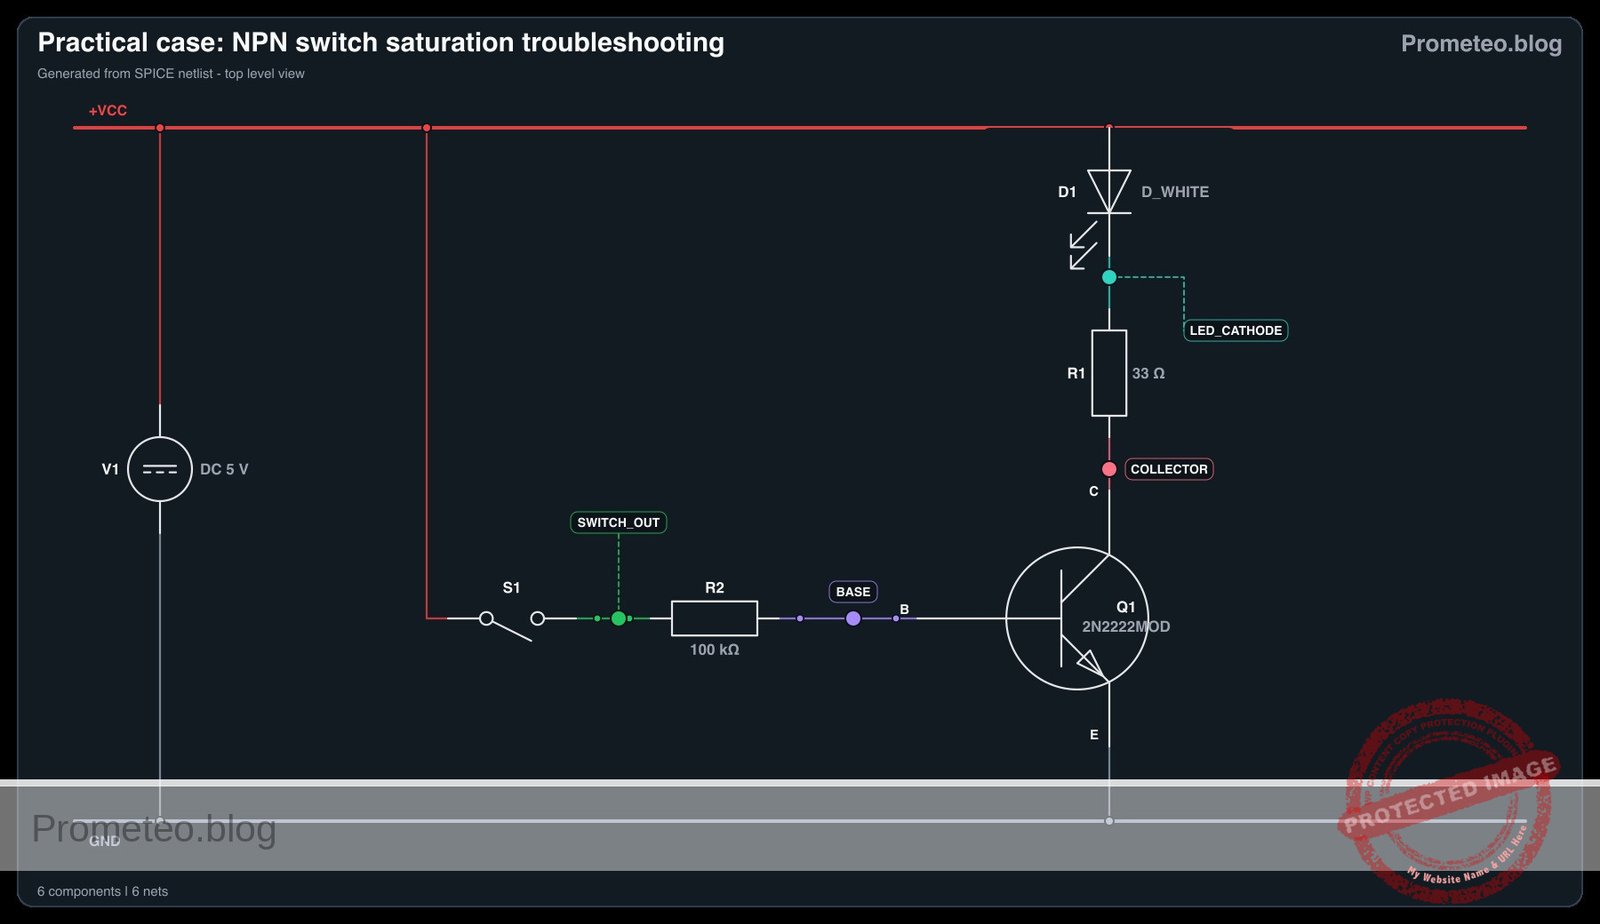
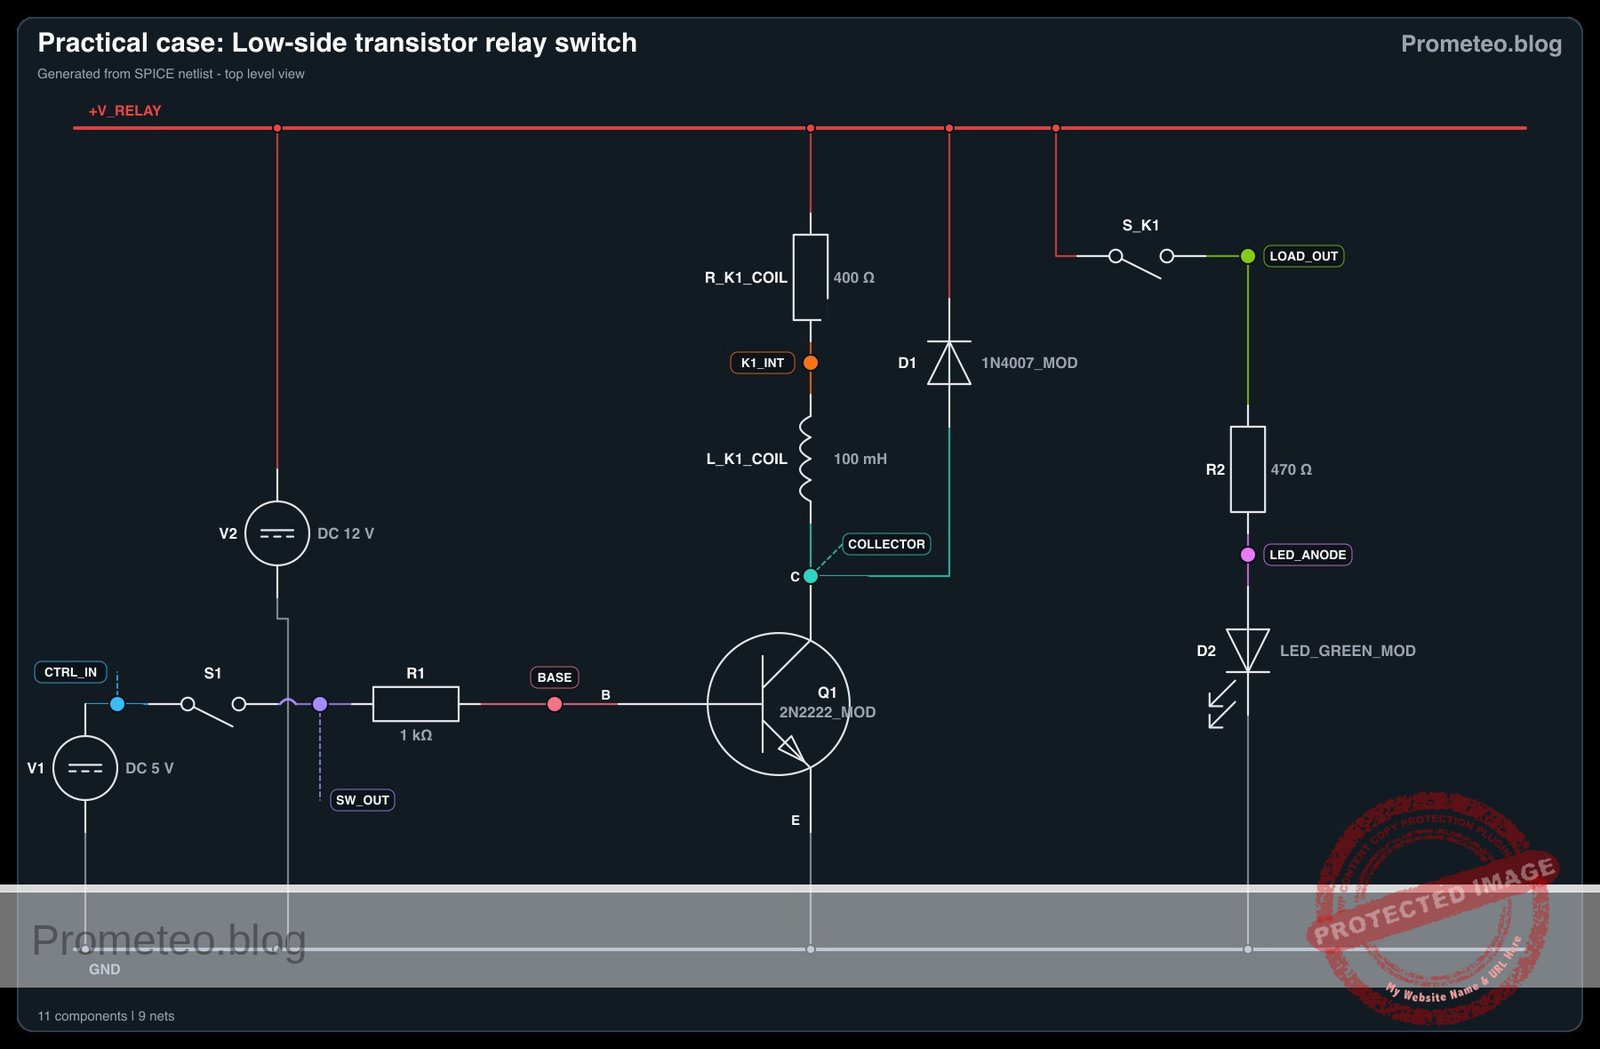
Schematic
[ 5 V_CTRL ] --> [ SW1 ] --(CTRL_IN)--+--> [ R1: 1 kΩ ] --(BASE)--> [ Q1:Base ]
                                           |                                |
                                       [ R2: 10 kΩ ]                         |
                                           |                                |
                                          GND                               |
                                                                            |
      [ 9 V_PWR ] --+--> [ M1: 9 V Motor ] -----------------+--(COLLECTOR)--> [ Q1:Collector ] --( )-- [ Q1:Emitter ] --> GND
                   |                                      |
                   +--> [ D1: 1N4007 (Cath->Anode) ] -----+
Electrical diagram
Measurements and tests
- Verify Control Signal: Close
SW1. Measure the voltage at nodeCTRL_INwith respect to node0. It should read 5 V. When open, it should read 0 V due to the pull-down resistorR2. - Measure Base-Emitter Voltage (VBE): With
SW1closed, place your multimeter probes across nodeBASEand node0. You should measure approximately 0.7 V, confirming the transistor’s base-emitter junction is forward-biased. - Measure Collector-Emitter Voltage (VCE): With the motor running (
SW1closed), measure the voltage between nodeCOLLECTORand node0. A reading of around 0.2 V indicates the transistor is correctly operating in the saturation region. WhenSW1is open, this voltage should rise to 9 V. - Measure Base Current (IB): Set your multimeter to measure current (mA range) and place it in series between
R1and nodeBASE. You should measure a small current (around 4.3 mA). - Measure Collector Current (IC): Place your ammeter in series between
M1and nodeCOLLECTOR. You will measure the actual current drawn by the motor (which could range from tens to hundreds of mA depending on the specific motor).
SPICE netlist and simulation
Reference SPICE Netlist (ngspice) — excerptFull SPICE netlist (ngspice)
* DC Motor Control with a Transistor
.width out=256

* Power Supplies
V1 9V_PWR 0 DC 9
V2 5V_CTRL 0 DC 5

* Switch SW1 modeled as a voltage-controlled switch to simulate user interaction
S1 5V_CTRL CTRL_IN SW_CTRL 0 mySW
.model mySW SW(Vt=2.5 Vh=0.5 Ron=0.1 Roff=100MEG)

* Control signal to simulate the user pressing the switch
V_SW_CTRL SW_CTRL 0 PULSE(0 5 10m 1u 1u 245m 1s)

* Resistors
R2 CTRL_IN 0 10k
R1 CTRL_IN BASE 1k

* Transistor Q1 (Low-side switch)
Q1 COLLECTOR BASE 0 2N2222MOD
* ... (truncated in public view) ...
Copy this content into a .cir file and run with ngspice.
* DC Motor Control with a Transistor
.width out=256

* Power Supplies
V1 9V_PWR 0 DC 9
V2 5V_CTRL 0 DC 5

* Switch SW1 modeled as a voltage-controlled switch to simulate user interaction
S1 5V_CTRL CTRL_IN SW_CTRL 0 mySW
.model mySW SW(Vt=2.5 Vh=0.5 Ron=0.1 Roff=100MEG)

* Control signal to simulate the user pressing the switch
V_SW_CTRL SW_CTRL 0 PULSE(0 5 10m 1u 1u 245m 1s)

* Resistors
R2 CTRL_IN 0 10k
R1 CTRL_IN BASE 1k

* Transistor Q1 (Low-side switch)
Q1 COLLECTOR BASE 0 2N2222MOD

* Motor M1 modeled as a series inductor and resistor representing the inductive mechanical load
LM1 9V_PWR M1_INT 1mH
RM1 M1_INT COLLECTOR 20

* Flyback diode D1
D1 COLLECTOR 9V_PWR 1N4007MOD

* Component Models
.model 2N2222MOD NPN(IS=1E-14 VAF=100 BF=200 IKF=0.3 XTB=1.5 BR=3 CJC=8E-12 CJE=25E-12 TR=100E-9 TF=400E-12 ITF=1 VTF=2 XTF=3 RB=10 RC=0.3 RE=0.2)
.model 1N4007MOD D(IS=7.02767n RS=0.0341512 N=1.80803 EG=1.11 XTI=3.0 BV=1000 IBV=5e-08 CJO=1e-11 VJ=0.7 M=0.5 FC=0.5 TT=1e-07)

* Simulation Commands
.op
.tran 0.1m 250m
.print tran V(CTRL_IN) V(COLLECTOR) V(BASE) I(LM1)
.end
Simulation Results (Transient Analysis)

Show raw data table (2541 rows)
Index   time            v(ctrl_in)      v(collector)    v(base)         lm1#branch
0	0.000000e+00	5.000400e-04	9.000000e+00	5.000490e-04	1.799750e-11
1	1.000000e-06	5.000400e-04	9.000000e+00	5.000490e-04	1.800624e-11
2	2.000000e-06	5.000400e-04	9.000000e+00	5.000490e-04	1.800815e-11
3	4.000000e-06	5.000400e-04	9.000000e+00	5.000490e-04	1.800528e-11
4	8.000000e-06	5.000400e-04	9.000000e+00	5.000490e-04	1.799050e-11
5	1.600000e-05	5.000400e-04	9.000000e+00	5.000490e-04	1.798412e-11
6	3.200000e-05	5.000400e-04	9.000000e+00	5.000490e-04	1.797999e-11
7	6.400000e-05	5.000400e-04	9.000000e+00	5.000490e-04	1.798801e-11
8	1.280000e-04	5.000400e-04	9.000000e+00	5.000490e-04	1.797977e-11
9	2.280000e-04	5.000400e-04	9.000000e+00	5.000490e-04	1.799637e-11
10	3.280000e-04	5.000400e-04	9.000000e+00	5.000490e-04	1.799685e-11
11	4.280000e-04	5.000400e-04	9.000000e+00	5.000490e-04	1.799640e-11
12	5.280000e-04	5.000400e-04	9.000000e+00	5.000490e-04	1.799689e-11
13	6.280000e-04	5.000400e-04	9.000000e+00	5.000490e-04	1.799636e-11
14	7.280000e-04	5.000400e-04	9.000000e+00	5.000490e-04	1.799685e-11
15	8.280000e-04	5.000400e-04	9.000000e+00	5.000490e-04	1.799639e-11
16	9.280000e-04	5.000400e-04	9.000000e+00	5.000490e-04	1.799690e-11
17	1.028000e-03	5.000400e-04	9.000000e+00	5.000490e-04	1.799645e-11
18	1.128000e-03	5.000400e-04	9.000000e+00	5.000490e-04	1.799690e-11
19	1.228000e-03	5.000400e-04	9.000000e+00	5.000490e-04	1.799640e-11
20	1.328000e-03	5.000400e-04	9.000000e+00	5.000490e-04	1.799689e-11
21	1.428000e-03	5.000400e-04	9.000000e+00	5.000490e-04	1.799641e-11
22	1.528000e-03	5.000400e-04	9.000000e+00	5.000490e-04	1.799690e-11
23	1.628000e-03	5.000400e-04	9.000000e+00	5.000490e-04	1.799640e-11
... (2517 more rows) ...
Common mistakes and how to avoid them
- Omitting the flyback diode (
D1): A DC motor is an inductive load. When the transistor turns off, the collapsing magnetic field creates a massive voltage spike. Without the diode, this spike will instantly destroy the transistor. Always place a diode in parallel with the motor, reverse-biased relative to the normal current flow. - Forgetting the base resistor (
R1): Connecting a 5 V control signal directly to the transistor’s base will draw excessive current, immediately destroying the control source (e.g., your microcontroller) or the transistor. Always use a current-limiting resistor. - Swapping the Collector and Emitter pins: Inserting the NPN transistor backward will result in very poor current gain (hFE). The motor may barely turn, and the transistor will heat up significantly because it cannot fully saturate. Double-check the datasheet for your specific transistor’s pinout.
Troubleshooting
- Symptom: The motor does not spin when the switch is closed.
- Cause: The transistor is not turning on, or the motor lacks power.
- Fix: Measure the voltage at node
BASE. If it is 0 V, check your switchSW1and resistorR1. Measure node9 V_PWRto ensure the main power supply is active.
- Symptom: The transistor becomes extremely hot very quickly.
- Cause: The transistor is operating in the active/linear region instead of fully saturating, usually because the base current (IB) is too low for the required collector current (IC).
- Fix: Calculate the required base current (IC / hFE). If the current is too low, reduce the value of
R1(e.g., to 470 Ω or 330 Ω) to allow more base current, ensuring saturation.
- Symptom: The microcontroller resets or behaves erratically when the motor turns on/off.
- Cause: Electrical noise from the motor brushes or voltage drops on the power line.
- Fix: Ensure the motor power supply (
V1) is completely separate from the control logic supply (V2), sharing only the ground (0) connection. Add a 100 nF ceramic capacitor across the motor terminals to suppress brush noise.
Possible improvements and extensions
- PWM Speed Control: Replace the manual switch (
SW1) with a Pulse Width Modulation (PWM) signal from a microcontroller. By rapidly turning the transistor on and off, you can smoothly control the rotational speed of the motor rather than just having it on or off. - Optoisolation for superior safety: Introduce an optocoupler between the control signal and the transistor base. This physically separates the low-voltage control circuit from the higher-voltage motor circuit using light, providing total electrical isolation and preventing catastrophic failures from reaching your logic board.
More Practical Cases on Prometeo.blog
Find this product and/or books on this topic on Amazon
As an Amazon Associate, I earn from qualifying purchases. If you buy through this link, you help keep this project running.
Quick Quiz

Telecommunications Electronics Engineer and Computer Engineer (official degrees in Spain).