Objective and use case
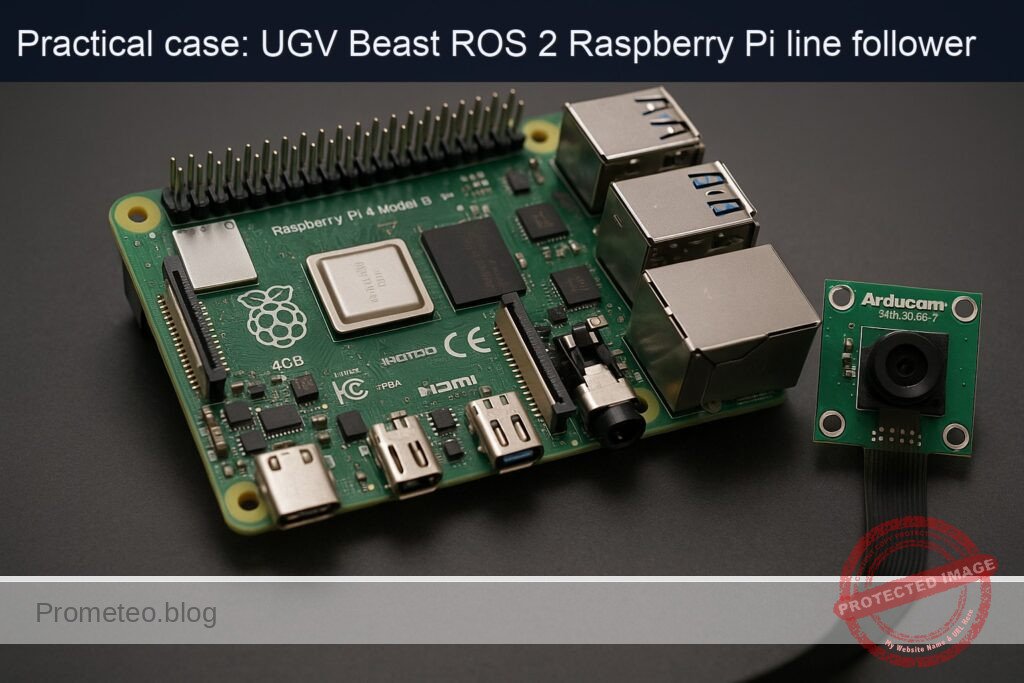
What you’ll build: A ROS 2–enabled patrol robot based on a Raspberry Pi 4 and Camera Module 3 that follows a simple patrol loop, publishes camera images to ROS 2 topics at ~20–30 FPS, and exposes them over the network for viewing from a remote ROS 2 workstation.
Why it matters / Use cases
- Remote monitoring of indoor spaces: Patrol corridors or labs and stream 720p video at ~20–25 FPS with <200 ms end-to-end latency to a control station to visually check doors, obstacles, and unattended equipment.
- Security and anomaly snapshots: Add motion detection by comparing consecutive frames and save JPEG snapshots, logging timestamps when motion exceeds a configurable pixel-change threshold.
- Educational platform for ROS 2 perception: Use the robot to teach ROS 2 image transport, topic introspection, QoS tuning, and node composition on real hardware instead of simulation.
- Prototype telepresence robot: Combine the video stream with teleop control so a remote operator can drive the UGV over Wi‑Fi while watching the live camera feed in RViz or a custom dashboard.
Expected outcome
- A running ROS 2 camera node on Raspberry Pi 4 publishing images over Wi‑Fi at ~20–30 FPS 720p with CPU usage <60% and GPU usage <40% when using hardware-accelerated encoding.
- A ROS 2 patrol node driving the robot in a repeatable loop (e.g., timed forward/turn motions) while concurrently streaming video without frame drops >5%.
- Verified remote visualization of the camera topic on another ROS 2 machine, with measured end-to-end latency generally <250 ms on a typical 5 GHz Wi‑Fi network.
- Basic logging of patrol runs (timestamps, pose or wheel odometry, and optional motion-detection events) for later review and debugging.
Audience: Hobbyists, students, and developers exploring ROS 2 on low-cost robots; Level: Comfortable with Linux and basic ROS 2 (topics, nodes, workspaces), but new to integrating real hardware.
Architecture/flow: Raspberry Pi 4 runs ROS 2 with a camera node (publishing sensor_msgs/Image) and a patrol/control node; both publish to ROS 2 topics over Wi‑Fi using a shared DDS domain, while a remote ROS 2 workstation subscribes to the image and status topics for live video, monitoring, and optional teleop control.
Prerequisites
- ROS / Linux background
- Comfortable with the Linux terminal (bash).
- Basic understanding of ROS 2 nodes, topics, and packages.
-
Some Python programming experience.
-
System assumptions
- Raspberry Pi 4 Model B with Ubuntu Server 22.04 64‑bit (aarch64) installed.
- Network connectivity (Ethernet or Wi‑Fi) between the Raspberry Pi and at least one other ROS 2 machine.
-
You have sudo access on the Pi.
-
ROS 2 version
- ROS 2 Humble Hawksbill installed via
apton the Raspberry Pi. - You may optionally have a second Ubuntu 22.04 desktop (x86_64 or aarch64) with ROS 2 Humble for remote viewing.
Materials
| Item type | Exact model / description | Notes |
|---|---|---|
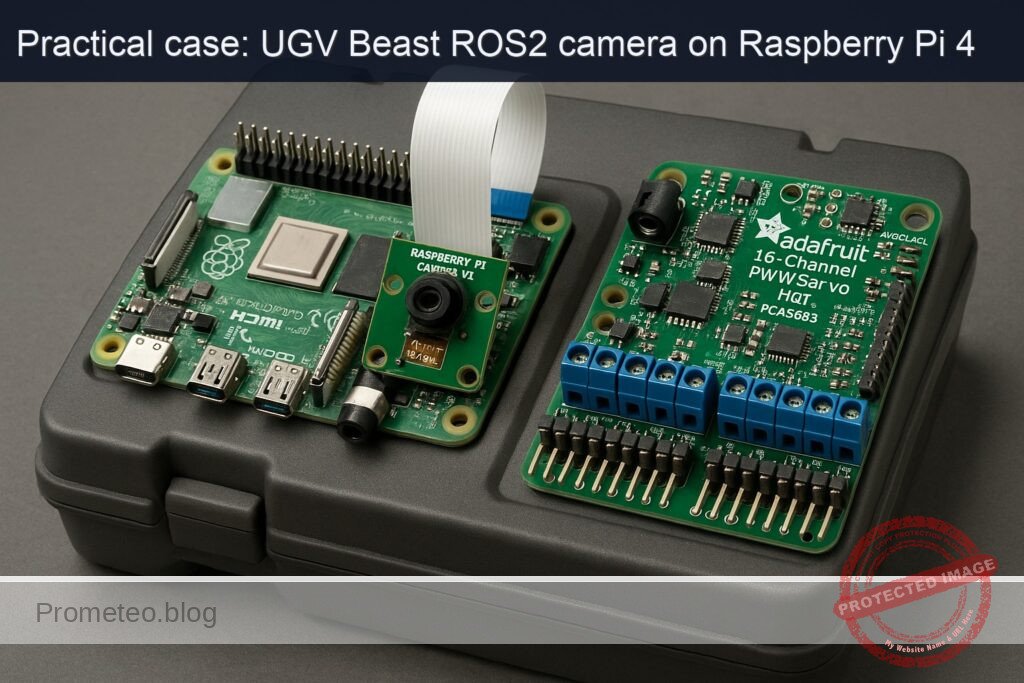
| SBC | Raspberry Pi 4 Model B (2 GB or more, recommended 4 GB) | Runs Ubuntu 22.04 64‑bit + ROS 2 Humble |
| Camera | Raspberry Pi Camera Module 3 (any FOV variant) | CSI‑2 ribbon connector to Pi |
| Servo HAT | Adafruit 16‑Channel PWM/Servo HAT (PCA9685) | I²C address 0x40 by default; can drive 2 pan/tilt servos (optional in this basic patrol) |
| Storage | microSD card (16 GB minimum, 32 GB recommended) | For OS and ROS 2 installation |
| Power | 5 V / 3 A USB‑C PSU for Raspberry Pi 4 | Stable power is important |
| Network | Ethernet cable or Wi‑Fi connection | For ROS 2 communication and remote viewing |
| Optional | 2 × small hobby servos for camera pan/tilt (e.g., SG90), plus UGV base and DC motors | For physical movement; patrol logic can be simulated if base is not built |
Setup / Connection
1. Physical connections
- Mount the Camera Module 3
- Power off the Raspberry Pi.
- Open the CSI camera connector clip on the Pi.
- Insert the ribbon cable from the Raspberry Pi Camera Module 3:
- Shiny contacts facing the HDMI ports (for most Pi 4 boards).
-
Close the clip and secure the camera.
-
Attach the Adafruit 16‑Channel PWM/Servo HAT
- Stack the HAT directly on the Raspberry Pi 4’s 40‑pin header.
- Ensure all pins are correctly aligned (no offset).
-
If you are using servos:
- Connect servos to channels (e.g., channel 0 for pan, channel 1 for tilt).
- Red wire → V+; brown/black → GND; yellow/orange → signal.
-
Power
- Power the Pi via USB‑C.
- If you drive multiple servos, supply external 5 V power to the HAT’s screw terminals, obeying servo current requirements.
2. Enable camera interface on Ubuntu 22.04
On recent Ubuntu images for Raspberry Pi, the camera uses the standard libcamera stack.
Install camera utilities:
sudo apt update
sudo apt install -y libcamera-apps v4l-utils
Test the camera (directly on the Pi, headless):
libcamera-hello --timeout 2000
You should see no errors; if you have a local monitor, you’ll see a preview. Headless, just confirm it runs without failures.
ROS 2 and workspace setup
1. Install ROS 2 Humble and packages
On the Raspberry Pi (Ubuntu 22.04 aarch64):
sudo apt update
sudo apt install -y curl gnupg2 lsb-release

sudo curl -sSL https://raw.githubusercontent.com/ros/rosdistro/master/ros.asc \
  -o /usr/share/keyrings/ros-archive-keyring.gpg

echo "deb [arch=arm64 signed-by=/usr/share/keyrings/ros-archive-keyring.gpg] \
  http://packages.ros.org/ros2/ubuntu $(lsb_release -sc) main" | \
  sudo tee /etc/apt/sources.list.d/ros2.list > /dev/null

sudo apt update
sudo apt install -y \
  ros-humble-desktop \
  ros-humble-ros2-control \
  ros-humble-diff-drive-controller \
  ros-humble-robot-localization \
  ros-humble-slam-toolbox \
  ros-humble-nav2-bringup \
  ros-humble-nav2-common \
  ros-humble-nav2-msgs \
  ros-humble-nav2-util \
  ros-humble-nav2-core \
  ros-humble-nav2-map-server \
  ros-humble-nav2-lifecycle-manager \
  ros-humble-nav2-planner \
  ros-humble-nav2-controller \
  ros-humble-nav2-recoveries \
  ros-humble-nav2-bt-navigator \
  ros-humble-nav2-waypoint-follower \
  ros-humble-nav2-costmap-2d \
  ros-humble-rviz2 \
  python3-colcon-common-extensions \
  python3-rosdep
Initialize rosdep:
sudo rosdep init
rosdep update
Add sourcing to your shell profile:
echo "source /opt/ros/humble/setup.bash" >> ~/.bashrc
source ~/.bashrc
2. Create colcon workspace
mkdir -p ~/ros2_ws/src
cd ~/ros2_ws
colcon build
echo "source ~/ros2_ws/install/setup.bash" >> ~/.bashrc
source ~/.bashrc
Robot model and control (URDF, diff drive, ros2_control)
Even at basic level, we’ll create a simple URDF with:
base_link- Left/right wheel joints
camera_linkmounted on the baseros2_controldiff drive configuration
Assumptions:
- Wheel radius: 0.05 m (10 cm diameter).
- Track width (distance between wheel centers): 0.25 m.
You should later calibrate these:
- Drive the robot 1.0 m forward at constant command, measure actual distance.
- Adjust
wheel_radiusandtrack_widthuntil odometry matches real motion.
Full Code
We’ll create a single ROS 2 package: ugv_beast_patrol_cam.
1. Create package
cd ~/ros2_ws/src
ros2 pkg create --build-type ament_python ugv_beast_patrol_cam
Directory tree (after we add files):
ugv_beast_patrol_cam/
  package.xml
  setup.py
  resource/ugv_beast_patrol_cam
  ugv_beast_patrol_cam/
    __init__.py
    camera_node.py
    patrol_node.py
  urdf/
    ugv_beast.urdf.xacro
  config/
    diff_drive_controller.yaml
    ekf.yaml
2. package.xml
Edit ~/ros2_ws/src/ugv_beast_patrol_cam/package.xml:
<?xml version="1.0"?>
<package format="3">
  <name>ugv_beast_patrol_cam</name>
  <version>0.0.1</version>
  <description>Basic patrol and camera streaming for UGV Beast (ROS 2) - RPi</description>

  <maintainer email="you@example.com">Your Name</maintainer>
  <license>MIT</license>

  <buildtool_depend>ament_cmake</buildtool_depend>
  <buildtool_depend>ament_python</buildtool_depend>

  <exec_depend>rclpy</exec_depend>
  <exec_depend>sensor_msgs</exec_depend>
  <exec_depend>geometry_msgs</exec_depend>
  <exec_depend>std_msgs</exec_depend>
  <exec_depend>cv_bridge</exec_depend>
  <exec_depend>image_transport</exec_depend>
  <exec_depend>ros2_control</exec_depend>
  <exec_depend>controller_manager</exec_depend>
  <exec_depend>diff_drive_controller</exec_depend>
  <exec_depend>robot_state_publisher</exec_depend>

  <test_depend>ament_lint_auto</test_depend>
  <test_depend>ament_lint_common</test_depend>

  <export>
  </export>
</package>
Install runtime dependencies:
sudo apt install -y ros-humble-cv-bridge ros-humble-image-transport \
  ros-humble-controller-manager ros-humble-robot-state-publisher
sudo apt install -y python3-opencv
3. setup.py
~/ros2_ws/src/ugv_beast_patrol_cam/setup.py:
from setuptools import setup

package_name = 'ugv_beast_patrol_cam'

setup(
    name=package_name,
    version='0.0.1',
    packages=[package_name],
    data_files=[
        ('share/ament_index/resource_index/packages',
         ['resource/' + package_name]),
        ('share/' + package_name, ['package.xml']),
        ('share/' + package_name + '/urdf', ['urdf/ugv_beast.urdf.xacro']),
        ('share/' + package_name + '/config', [
            'config/diff_drive_controller.yaml',
            'config/ekf.yaml'
        ]),
    ],
    install_requires=['setuptools'],
    zip_safe=True,
    maintainer='Your Name',
    maintainer_email='you@example.com',
    description='UGV Beast patrol and camera streaming example',
    license='MIT',
    tests_require=['pytest'],
    entry_points={
        'console_scripts': [
            'camera_node = ugv_beast_patrol_cam.camera_node:main',
            'patrol_node = ugv_beast_patrol_cam.patrol_node:main',
        ],
    },
)
4. Camera streaming node (camera_node.py)
This node uses OpenCV + cv_bridge to capture frames via V4L2 (/dev/video0) and publish them as ROS 2 images.
Create ~/ros2_ws/src/ugv_beast_patrol_cam/ugv_beast_patrol_cam/camera_node.py:
import rclpy
from rclpy.node import Node
from sensor_msgs.msg import Image
from cv_bridge import CvBridge
import cv2


class CameraPublisher(Node):
    def __init__(self):
        super().__init__('camera_publisher')

        self.declare_parameter('device_id', 0)
        self.declare_parameter('frame_rate', 15)
        self.declare_parameter('width', 640)
        self.declare_parameter('height', 480)

        device_id = self.get_parameter('device_id').get_parameter_value().integer_value
        frame_rate = self.get_parameter('frame_rate').get_parameter_value().integer_value
        width = self.get_parameter('width').get_parameter_value().integer_value
        height = self.get_parameter('height').get_parameter_value().integer_value

        self.bridge = CvBridge()

        self.cap = cv2.VideoCapture(device_id, cv2.CAP_V4L2)
        if not self.cap.isOpened():
            self.get_logger().error(f'Failed to open video device {device_id}')
        else:
            self.cap.set(cv2.CAP_PROP_FPS, frame_rate)
            self.cap.set(cv2.CAP_PROP_FRAME_WIDTH, width)
            self.cap.set(cv2.CAP_PROP_FRAME_HEIGHT, height)
            self.get_logger().info(f'Opened /dev/video{device_id} at {width}x{height}@{frame_rate}fps')

        self.publisher_ = self.create_publisher(Image, 'camera/image_raw', 10)
        timer_period = 1.0 / float(frame_rate) if frame_rate > 0 else 0.1
        self.timer = self.create_timer(timer_period, self.timer_callback)

    def timer_callback(self):
        if not self.cap.isOpened():
            return

        ret, frame = self.cap.read()
        if not ret:
            self.get_logger().warning('Camera frame capture failed')
            return

        frame_rgb = cv2.cvtColor(frame, cv2.COLOR_BGR2RGB)
        msg = self.bridge.cv2_to_imgmsg(frame_rgb, encoding='rgb8')
        msg.header.stamp = self.get_clock().now().to_msg()
        msg.header.frame_id = 'camera_link'

        self.publisher_.publish(msg)

    def destroy_node(self):
        if self.cap.isOpened():
            self.cap.release()
        super().destroy_node()


def main(args=None):
    rclpy.init(args=args)
    node = CameraPublisher()
    try:
        rclpy.spin(node)
    except KeyboardInterrupt:
        pass
    node.destroy_node()
    rclpy.shutdown()


if __name__ == '__main__':
    main()
5. Patrol node (patrol_node.py)
This node periodically publishes /cmd_vel to move the robot in a simple square pattern (or simulated if you don’t yet have motors wired to ros2_control).
Create ~/ros2_ws/src/ugv_beast_patrol_cam/ugv_beast_patrol_cam/patrol_node.py:
import math
import rclpy
from rclpy.node import Node
from geometry_msgs.msg import Twist


class PatrolNode(Node):
    def __init__(self):
        super().__init__('patrol_node')

        self.declare_parameter('linear_speed', 0.15)   # m/s
        self.declare_parameter('angular_speed', 0.5)   # rad/s
        self.declare_parameter('forward_time', 4.0)    # s
        self.declare_parameter('turn_time', 3.2)       # s
        self.declare_parameter('stop_time', 1.0)       # s

        self.linear_speed = self.get_parameter('linear_speed').value
        self.angular_speed = self.get_parameter('angular_speed').value
        self.forward_time = self.get_parameter('forward_time').value
        self.turn_time = self.get_parameter('turn_time').value
        self.stop_time = self.get_parameter('stop_time').value

        self.publisher_ = self.create_publisher(Twist, 'cmd_vel', 10)
        self.timer_period = 0.1  # 10 Hz
        self.timer = self.create_timer(self.timer_period, self.timer_callback)

        self.state = 'forward'
        self.t_state = 0.0
        self.get_logger().info('Patrol node started (basic square pattern)')

    def timer_callback(self):
        msg = Twist()
        self.t_state += self.timer_period

        if self.state == 'forward':
            msg.linear.x = self.linear_speed
            msg.angular.z = 0.0
            if self.t_state >= self.forward_time:
                self.state = 'turn'
                self.t_state = 0.0

        elif self.state == 'turn':
            msg.linear.x = 0.0
            msg.angular.z = self.angular_speed
            if self.t_state >= self.turn_time:
                self.state = 'stop'
                self.t_state = 0.0

        elif self.state == 'stop':
            msg.linear.x = 0.0
            msg.angular.z = 0.0
            if self.t_state >= self.stop_time:
                # Next step in patrol: repeat
                self.state = 'forward'
                self.t_state = 0.0

        self.publisher_.publish(msg)


def main(args=None):
    rclpy.init(args=args)
    node = PatrolNode()
    try:
        rclpy.spin(node)
    except KeyboardInterrupt:
        pass

    node.destroy_node()
    rclpy.shutdown()


if __name__ == '__main__':
    main()
6. URDF model (ugv_beast.urdf.xacro)
Create directory:
mkdir -p ~/ros2_ws/src/ugv_beast_patrol_cam/urdf
Create ~/ros2_ws/src/ugv_beast_patrol_cam/urdf/ugv_beast.urdf.xacro:
<?xml version="1.0"?>
<robot name="ugv_beast" xmlns:xacro="http://www.ros.org/wiki/xacro">

  <xacro:property name="wheel_radius" value="0.05"/>  <!-- meters -->
  <xacro:property name="track_width" value="0.25"/>   <!-- meters -->

  <link name="base_link">
    <inertial>
      <mass value="3.0"/>
      <origin xyz="0 0 0.05"/>
      <inertia ixx="0.1" iyy="0.1" izz="0.1" ixy="0.0" ixz="0.0" iyz="0.0"/>
    </inertial>
    <visual>
      <geometry>
        <box size="0.30 0.20 0.10"/>
      </geometry>
      <origin xyz="0 0 0.05"/>
      <material name="blue"/>
    </visual>
    <collision>
      <geometry>
        <box size="0.30 0.20 0.10"/>
      </geometry>
      <origin xyz="0 0 0.05"/>
    </collision>
  </link>

  <link name="left_wheel_link"/>
  <link name="right_wheel_link"/>

  <joint name="left_wheel_joint" type="continuous">
    <parent link="base_link"/>
    <child link="left_wheel_link"/>
    <origin xyz="0 ${track_width/2.0} 0" rpy="0 0 0"/>
    <axis xyz="0 1 0"/>
  </joint>

  <joint name="right_wheel_joint" type="continuous">
    <parent link="base_link"/>
    <child link="right_wheel_link"/>
    <origin xyz="0 -${track_width/2.0} 0" rpy="0 0 0"/>
    <axis xyz="0 1 0"/>
  </joint>

  <!-- Camera link mounted slightly above base center -->
  <link name="camera_link">
    <visual>
      <geometry>
        <box size="0.02 0.02 0.02"/>
      </geometry>
      <origin xyz="0.1 0 0.10"/>
      <material name="green"/>
    </visual>
  </link>

  <joint name="camera_joint" type="fixed">
    <parent link="base_link"/>
    <child link="camera_link"/>
    <origin xyz="0.1 0 0.10" rpy="0 0 0"/>
  </joint>

  <!-- ros2_control hardware interface (placeholder for real hardware) -->
  <ros2_control name="ugv_beast_base" type="system">
    <hardware>
      <plugin>ros2_control_demo_hardware/DiffBotSystemHardware</plugin>
      <param name="wheel_separation">${track_width}</param>
      <param name="wheel_radius">${wheel_radius}</param>
    </hardware>

    <joint name="left_wheel_joint">
      <command_interface name="velocity"/>
      <state_interface name="velocity"/>
      <state_interface name="position"/>
    </joint>

    <joint name="right_wheel_joint">
      <command_interface name="velocity"/>
      <state_interface name="velocity"/>
      <state_interface name="position"/>
    </joint>

    <controller name="diff_drive_controller" type="diff_drive_controller/DiffDriveController">
      <param name="left_wheel_names">[left_wheel_joint]</param>
      <param name="right_wheel_names">[right_wheel_joint]</param>
      <param name="wheel_separation">${track_width}</param>
      <param name="wheel_radius">${wheel_radius}</param>
      <param name="publish_rate">50.0</param>
      <param name="use_stamped_vel">false</param>
    </controller>
  </ros2_control>

</robot>
7. Diff drive controller YAML (diff_drive_controller.yaml)
mkdir -p ~/ros2_ws/src/ugv_beast_patrol_cam/config
Create ~/ros2_ws/src/ugv_beast_patrol_cam/config/diff_drive_controller.yaml:
diff_drive_controller:
  ros__parameters:
    publish_rate: 50.0
    base_frame_id: base_link
    left_wheel_names: ["left_wheel_joint"]
    right_wheel_names: ["right_wheel_joint"]
    wheel_separation: 0.25
    wheel_radius: 0.05
    use_stamped_vel: false
    enable_odom_tf: true
    cmd_vel_timeout: 0.5
8. EKF configuration (robot_localization) — optional but included
Create ~/ros2_ws/src/ugv_beast_patrol_cam/config/ekf.yaml (for future IMU + wheel odom integration):
ekf_filter_node:
  ros__parameters:
    frequency: 30.0
    two_d_mode: true
    publish_tf: true
    map_frame: map
    odom_frame: odom
    base_link_frame: base_link
    world_frame: odom

    odom0: odom
    odom0_config: [true,  true,  false,
                   false, false, true,
                   false, false, false,
                   false, false, false,
                   false, false, false]

    imu0: imu/data
    imu0_config: [false, false, false,
                  true,  true,  true,
                  false, false, false,
                  false, false, true,
                  false, false, false]

    process_noise_covariance: [0.05, 0, 0, 0, 0, 0,
                               0, 0.05, 0, 0, 0, 0,
                               0, 0, 0.1, 0, 0, 0,
                               0, 0, 0, 0.05, 0, 0,
                               0, 0, 0, 0, 0.05, 0,
                               0, 0, 0, 0, 0, 0.05]
For this basic project, we won’t fully wire IMU/LiDAR, but this file prepares you for extension.
Build / Run commands
1. Build
From ~/ros2_ws:
cd ~/ros2_ws
colcon build --symlink-install
source install/setup.bash
2. Launch camera node
On the Pi:
source /opt/ros/humble/setup.bash
source ~/ros2_ws/install/setup.bash

ros2 run ugv_beast_patrol_cam camera_node --ros-args \
  -p device_id:=0 -p frame_rate:=15 -p width:=640 -p height:=480
Ensure /dev/video0 exists; if the camera is only reachable via libcamera and not V4L2, install libcamera-apps and ensure the libcamera V4L2 bridge is enabled (varies by Ubuntu image).
3. Launch patrol node
In another terminal (also on the Pi):
source /opt/ros/humble/setup.bash
source ~/ros2_ws/install/setup.bash

ros2 run ugv_beast_patrol_cam patrol_node --ros-args \
  -p linear_speed:=0.15 -p angular_speed:=0.5
If you haven’t connected real motors, this still publishes /cmd_vel for testing.
4. URDF and TF visualization (optional now, essential later)
Run robot_state_publisher using the URDF:
ros2 run robot_state_publisher robot_state_publisher \
  --ros-args -p robot_description:="$(xacro ~/ros2_ws/src/ugv_beast_patrol_cam/urdf/ugv_beast.urdf.xacro)"
Then inspect TF frames:
ros2 run tf2_tools view_frames
# Produces frames.pdf in current dir
Step‑by‑step Validation
1. Validate camera topic on the Raspberry Pi
- List topics
bash

   ros2 topic list
You should see at least:
/camera/image_raw-
/rosout -
Check message type
bash

   ros2 topic info /camera/image_raw
Should report type sensor_msgs/msg/Image.
- Check frame rate
bash

   ros2 topic hz /camera/image_raw
Confirm it’s close to the configured frame_rate (e.g., ~15 Hz).
2. View camera stream from remote machine
On your desktop (Ubuntu 22.04 with ROS 2 Humble):
- Configure ROS_DOMAIN_ID and networking
On both machines, ensure:
bash

   export ROS_DOMAIN_ID=0   # or any common ID
Multicast and firewall should allow DDS discovery (typically same LAN, no extra config).
- Check if topic is visible
On the remote machine:
bash

   source /opt/ros/humble/setup.bash

   ros2 topic list
You should see /camera/image_raw published by the Pi.
- View with rqt_image_view
bash

   sudo apt install -y ros-humble-rqt-image-view

   rqt_image_view
- Select
/camera/image_rawfrom the dropdown. -
You should see live video from the Raspberry Pi Camera Module 3.
-
Alternative: simple subscriber that saves frames
If you prefer no GUI, run a simple subscriber on the remote machine (or Pi) that prints info and optionally saves images. Example (save as image_sub.py in any Python environment):
«`python
import rclpy
from rclpy.node import Node
from sensor_msgs.msg import Image
from cv_bridge import CvBridge
import cv2
class ImageSaver(Node):
def init(self):
super().init(‘image_saver’)
self.bridge = CvBridge()
self.subscription = self.create_subscription(
Image, ‘camera/image_raw’, self.listener_callback, 10)
self.count = 0
   def listener_callback(self, msg):
       self.count += 1
       cv_image = self.bridge.imgmsg_to_cv2(msg, desired_encoding='rgb8')
       if self.count % 30 == 0:
           filename = f'frame_{self.count}.png'
           cv2.imwrite(filename, cv2.cvtColor(cv_image, cv2.COLOR_RGB2BGR))
           self.get_logger().info(f'Saved {filename}')
def main(args=None):
rclpy.init(args=args)
node = ImageSaver()
try:
rclpy.spin(node)
except KeyboardInterrupt:
pass
node.destroy_node()
rclpy.shutdown()
if name == ‘main‘:
main()
«`
Run:
bash

   python3 image_sub.py
Verify PNG images are being saved.
3. Validate patrol node behavior
- Check
/cmd_veltopic
On the Pi:
bash

   ros2 topic echo /cmd_vel
As patrol_node runs, you should see alternating sequences of:
linear.x ≈ 0.15, angular.z ≈ 0.0(forward),linear.x ≈ 0.0, angular.z ≈ 0.5(turn),-
linear.x ≈ 0.0, angular.z ≈ 0.0(stop). -
If robot base is wired to diff_drive_controller
-
Ensure
ros2_controlanddiff_drive_controllerare correctly launched (this tutorial keeps it simple; integrating actual motors depends on your motor drivers). -
Physically observe the robot moving in a pseudo‑square pattern.
-
Validate patrol + camera concurrency
Run both nodes simultaneously and confirm:
- Robot moves according to
/cmd_vel. - Camera continues streaming at expected FPS.
- No significant CPU overload (check with
toporhtop).
4. Record simple performance metrics
- Camera FPS
bash

   ros2 topic hz /camera/image_raw
Note mean rate.
-
Latency estimation
-
On remote viewer, display timestamp from message header (e.g., with a custom node).
- Compare Pi’s time vs remote time (ensure clocks are roughly synchronized, e.g., via NTP).
-
Alternatively, use a visual test: move your hand into frame and visually estimate the delay to screen response.
-
Network bandwidth
Approximate: width × height × 3 bytes × FPS. For 640×480 at 15 FPS:
640 * 480 * 3 * 15 ≈ 13.8 MB/s (uncompressed).
ROS 2 uses some overhead; you can measure with ifstat or nload.
Troubleshooting
Camera not detected (/dev/video0 missing)
- Ensure the camera is properly connected and the ribbon cable is correctly oriented.
- Run:
bash

  v4l2-ctl --list-devices
If nothing shows, check:
- Firmware and kernel support for the Camera Module 3 on your Ubuntu image.
-
Documentation for enabling
libcameraand V4L2 bridge (often handled by default, but may require enablingstart_x=1or overlays in/boot/firmware/config.txtdepending on image). -
Verify that
libcamera-helloworks.
camera_node shows “Failed to open video device 0”
- Check the permissions of
/dev/video0:
bash

  ls -l /dev/video0
- If needed, add your user to the
videogroup:
bash

  sudo usermod -aG video $USER

  newgrp video
- Try another device index (
device_id:=1) in case the camera is not at0.
Remote machine cannot see Pi topics
- Check that the machines are on the same subnet and can ping each other.
- Verify firewall settings (disable
ufwfor testing or allow multicast). - Set the same
ROS_DOMAIN_IDon both machines:
bash

  export ROS_DOMAIN_ID=10
- Try using Fast DDS environment variables to force shared memory off if on different nodes (for advanced users).
Patrol node publishes but robot does not move
- This tutorial assumes you have or will add motor drivers and a hardware interface; if not yet wired, movement simply won’t occur—this is expected.
- Once you add hardware:
- Ensure that
diff_drive_controlleris loaded and active. - Confirm that
/cmd_velis remapped to the correct controller command topic if your setup differs.
High CPU usage / low FPS
- Reduce resolution and frame rate:
bash

  ros2 run ugv_beast_patrol_cam camera_node --ros-args \

    -p frame_rate:=10 -p width:=320 -p height:=240
- Lower the patrol node’s publish rate if needed.
Improvements and Extensions
Even though this is a basic patrol + camera streaming project, it is designed to grow into a full UGV navigation stack:
- Add IMU and EKF (robot_localization)
- Connect a supported IMU (e.g., via I²C or serial) and publish data on
/imu/data. -
Launch
robot_localizationwith the providedekf.yaml:bash
ros2 run robot_localization ekf_node \
--ros-args -r /ekf_filter_node:=/ekf_filter_node \
-p use_sim_time:=false \
--params-file ~/ros2_ws/src/ugv_beast_patrol_cam/config/ekf.yaml -
Validate
/odometry/filteredtopic and TF (odom → base_link). -
Add LiDAR and SLAM (slam_toolbox)
- Attach an RPLIDAR and configure
rplidar_roswith udev rules so it appears as/dev/rplidar. - Run
slam_toolboxfor online mapping and verify map in RViz. -
Save the map using
map_server. -
Bring up Nav2 for autonomous patrol routes
- Use Nav2’s
nav2_bringupwith your map. -
Replace the simple
patrol_nodewith a waypoint follower using Nav2’s behavior tree. -
Pan/tilt camera using the PCA9685 HAT
- Drive two servos with the PCA9685 to pan and tilt the camera.
-
Implement a ROS 2 node that subscribes to e.g.
/camera_panand/camera_tiltcommands and adjusts PWM channels accordingly. -
Record patrol logs and annotated images
- Add logic to
camera_nodeto save snapshots when/cmd_velindicates the robot is at specific patrol points. - Store camera frames alongside odometry and timestamps for later analysis.
Final Checklist
Use this checklist to confirm you’ve achieved the ros2-patrol-camera-streaming objective:
- [ ] Raspberry Pi 4 Model B is running Ubuntu 22.04 64‑bit with ROS 2 Humble installed.
- [ ] Raspberry Pi Camera Module 3 is physically connected;
libcamera-helloruns without errors. - [ ]
~/ros2_wscolcon workspace exists, builds successfully, and sources correctly. - [ ] The
ugv_beast_patrol_campackage is created, installed dependencies are present (cv_bridge,image_transport, etc.). - [ ]
camera_noderuns on the Pi and publishes/camera/image_rawat the configured resolution and frame rate. - [ ] On a remote ROS 2 machine,
/camera/image_rawis visible viaros2 topic list. - [ ] Remote viewer (
rqt_image_viewor custom subscriber) displays/saves the camera stream with acceptable latency. - [ ]
patrol_noderuns and publishes/cmd_vel, showing a repeating pattern of movement commands. - [ ] If motors are wired, the robot executes a simple patrol loop corresponding to
/cmd_vel. - [ ] URDF (
ugv_beast.urdf.xacro) loads withrobot_state_publisher, and TF frames includebase_linkandcamera_link. - [ ] Performance metrics (FPS, basic latency) have been measured and are within your acceptable bounds.
Once all boxes are checked, you have a working UGV Beast (ROS 2) – RPi basic patrol robot with networked camera streaming, ready to be extended into a full navigation and mapping platform.
Find this product and/or books on this topic on Amazon
As an Amazon Associate, I earn from qualifying purchases. If you buy through this link, you help keep this project running.
Quick Quiz

Telecommunications Electronics Engineer and Computer Engineer (official degrees in Spain).