
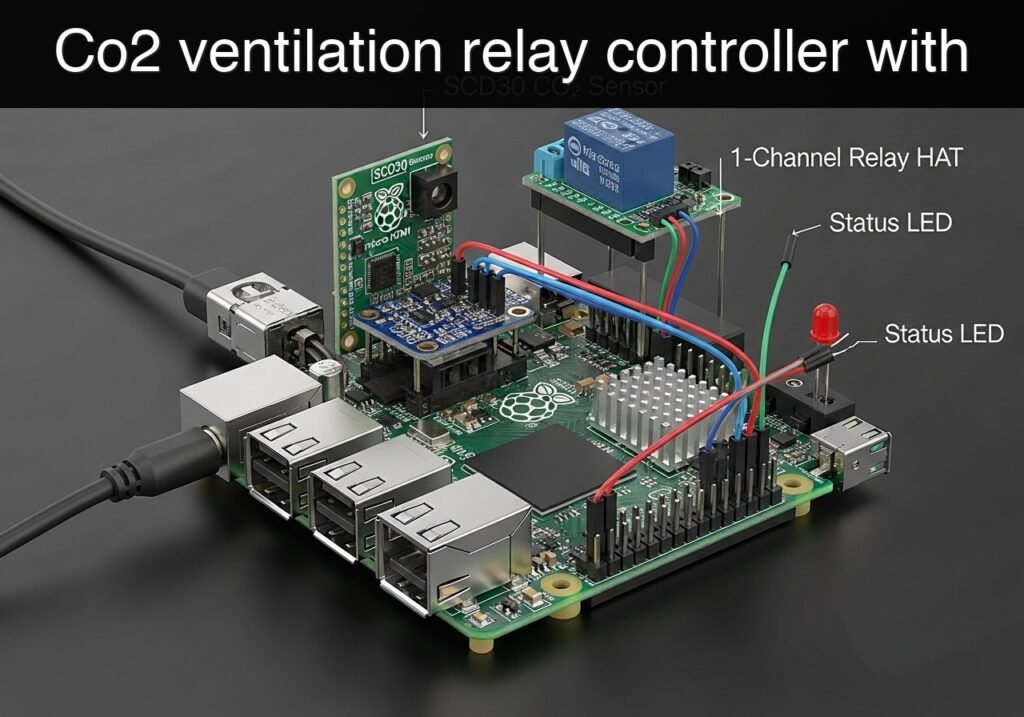
Objective and use case
What you’ll build: A Raspberry Pi controller that reads CO2 concentration from an MH-Z19B UART sensor and switches a relay to start or stop a ventilation fan based on configurable ppm thresholds. In a typical setup, the Pi polls the sensor every 1–2 seconds, drives the relay with sub-100 ms GPIO response time, and uses negligible compute resources (<5% CPU, 0% GPU).
Why it matters / Use cases
- Automate air-quality control in a home office, classroom, workshop, or meeting room when CO2 rises above levels such as 1000–1200 ppm.
- Reduce unnecessary fan runtime by turning ventilation off when CO2 falls below a lower threshold, for example 800 ppm, to avoid relay chatter and save energy.
- Learn practical Raspberry Pi interfacing with UART sensors, GPIO relay control, threshold logic, and basic environmental automation.
- Create a foundation for extensions such as logging ppm trends, adding alerts, or publishing data to a dashboard.
Expected outcome
- Stable CO2 readings from the MH-Z19B over UART, typically updated every 1–2 seconds.
- Reliable relay switching when CO2 crosses defined thresholds, with GPIO actuation latency typically under 100 ms after a new reading is processed.
- A simple hysteresis-based control loop, for example relay ON above 1000 ppm and OFF below 800 ppm, to prevent rapid toggling.
- A lightweight always-on service suitable for Raspberry Pi, usually consuming minimal system load (<5% CPU, 0% GPU, no FPS requirement).
Audience: Raspberry Pi beginners, makers, and students building environmental automation; Level: Basic
Architecture/flow: MH-Z19B CO2 sensor → Raspberry Pi UART read → threshold/hysteresis logic → GPIO output → isolated relay module → ventilation fan or low-voltage test load
Educational validation note
Before publication, this case passed the Prometeo automated validation gate with status PASS. The validator checked the code blocks, article structure, copy/paste-safe commands and consistency with the supported device catalog.
Published validation evidence
- Automatic result: PASS.
- Parsed structure: 3 sections, 3 tables and 7 code blocks detected before publication.
- Checked code: 1 Python/py_compile, 6 Bash/copy-paste checks.
- Supported catalog: the article text was checked against Prometeo’s validation-capable device profiles, and unsupported stacks block publication.
- Report findings: no blocking findings.
This validation confirms syntax and tool compatibility for the published material, but it does not replace physical testing on your exact hardware, wiring and runtime environment.
Educational safety note
Safety note
This project switches mains-powered ventilation equipment through a relay. Use a relay module with proper isolation, follow local electrical rules, and keep mains wiring physically separated from low-voltage Raspberry Pi wiring. If you are not qualified to work with AC mains, use the relay only to drive a low-voltage test load such as an LED module or ask a qualified electrician to connect the fan.
title: Raspberry Pi Practical Case: CO2-Based Ventilation Relay Controller
slug: practical-case-raspberry-pi
level: Basic
device: Raspberry Pi
objective: co2-ventilation-relay-controller
CO2 Ventilation Relay Controller with Raspberry Pi
This practical case shows how to build a CO2-based ventilation relay controller on a Raspberry Pi. The Raspberry Pi reads indoor CO2 concentration from an MH-Z19B UART sensor and switches a relay to enable or disable a ventilation fan when the measured value crosses defined thresholds.
Conceptual block diagram
High-level view: what enters the system, what each block processes, and what comes out.
Functional architecture
Conceptual signal and responsibility flow between device blocks.

Objective
Implement a ventilation controller that:
- Reads CO2 ppm
- Turns the ventilation relay ON when CO2 is high
- Turns the ventilation relay OFF when CO2 drops
- Uses hysteresis to avoid relay chatter
- Runs continuously as a simple Raspberry Pi service script
Hardware
- Raspberry Pi with 40-pin GPIO header
- MicroSD card with Raspberry Pi OS
- MH-Z19B CO2 sensor
- 5 V relay module, 1 channel, GPIO-compatible
- External 5 V supply for the relay module if required by the module current
- Jumper wires
- Optional: low-voltage lamp or LED load for safe bench testing
Wiring
Pin Mapping
| Function | Device Pin | Raspberry Pi Pin | Notes |
|---|---|---|---|
| 5 V for sensor | MH-Z19B Vin | Pin 2 (5V) | Sensor requires 5 V |
| Ground for sensor | MH-Z19B GND | Pin 6 (GND) | Common ground |
| Sensor TX | MH-Z19B TX | Pin 10 (GPIO15 / RXD) | Pi receives sensor data |
| Sensor RX | MH-Z19B RX | Pin 8 (GPIO14 / TXD) | Optional for command support |
| Relay input | Relay IN | Pin 11 (GPIO17) | Active-low example in software |
| Relay VCC | Relay VCC | 5 V supply | Check module rating |
| Relay GND | Relay GND | Pi GND | Common ground required |
Notes
- Many relay boards are active-low. The software below assumes that driving GPIO17 LOW energizes the relay.
- The MH-Z19B UART interface is 3.3 V logic safe on TX to Pi RX on common breakout boards. Verify your module before wiring.
- On Raspberry Pi OS, the serial console must be disabled so
/dev/serial0is free for the sensor.
Enable UART on Raspberry Pi
Run:
sudo raspi-config nonint do_serial_hw 0
sudo raspi-config nonint do_serial_cons 1
sudo reboot
After reboot, verify the UART device exists:
ls -l /dev/serial0
Install Dependencies
sudo apt update
sudo apt install -y python3 python3-rpi.gpio
Controller Program
Save this file as co2_ventilation_controller.py.
#!/usr/bin/env python3
import time
import serial
import RPi.GPIO as GPIO

UART_DEVICE = "/dev/serial0"
UART_BAUD = 9600

RELAY_GPIO = 17
RELAY_ACTIVE_LOW = True

CO2_ON_THRESHOLD = 1000   # ppm: turn ventilation ON at or above this level
CO2_OFF_THRESHOLD = 800   # ppm: turn ventilation OFF at or below this level

POLL_INTERVAL_SECONDS = 5.0


def relay_write(enabled: bool) -> None:
    if RELAY_ACTIVE_LOW:
        GPIO.output(RELAY_GPIO, GPIO.LOW if enabled else GPIO.HIGH)
    else:
        GPIO.output(RELAY_GPIO, GPIO.HIGH if enabled else GPIO.LOW)


def mhz19_checksum(packet: bytes) -> int:
    checksum = 0xFF - (sum(packet[1:8]) % 256) + 1
    return checksum & 0xFF


def read_co2_ppm(ser: serial.Serial) -> int:
    command = bytes([0xFF, 0x01, 0x86, 0x00, 0x00, 0x00, 0x00, 0x00, 0x79])
    ser.reset_input_buffer()
    ser.write(command)
    response = ser.read(9)

    if len(response) != 9:
        raise RuntimeError(f"Incomplete response: got {len(response)} bytes")

    if response[0] != 0xFF or response[1] != 0x86:
        raise RuntimeError(f"Unexpected response header: {response.hex()}")

    if response[8] != mhz19_checksum(response):
        raise RuntimeError(f"Checksum error: {response.hex()}")

    co2_ppm = response[2] * 256 + response[3]
    return co2_ppm


def main() -> None:
    GPIO.setmode(GPIO.BCM)
    GPIO.setup(RELAY_GPIO, GPIO.OUT)
    relay_enabled = False
    relay_write(relay_enabled)

    print("Starting CO2 ventilation relay controller")
    print(f"ON threshold : {CO2_ON_THRESHOLD} ppm")
    print(f"OFF threshold: {CO2_OFF_THRESHOLD} ppm")

    try:
        with serial.Serial(UART_DEVICE, UART_BAUD, timeout=1.0) as ser:
            while True:
                try:
                    co2_ppm = read_co2_ppm(ser)

                    if not relay_enabled and co2_ppm >= CO2_ON_THRESHOLD:
                        relay_enabled = True
                        relay_write(relay_enabled)
                    elif relay_enabled and co2_ppm <= CO2_OFF_THRESHOLD:
                        relay_enabled = False
                        relay_write(relay_enabled)

                    state = "ON" if relay_enabled else "OFF"
                    print(f"CO2={co2_ppm} ppm, ventilation relay={state}")
                except RuntimeError as exc:
                    print(f"Read error: {exc}")

                time.sleep(POLL_INTERVAL_SECONDS)
    finally:
        relay_write(False)
        GPIO.cleanup()


if __name__ == "__main__":
    main()
Run the Controller
python3 co2_ventilation_controller.py
Expected console output:
CO2=650 ppm, ventilation relay=OFFCO2=1100 ppm, ventilation relay=ON
Optional: Start Automatically at Boot
Create a systemd unit file:
sudo tee /etc/systemd/system/co2-ventilation.service >/dev/null <<'EOF'
[Unit]
Description=CO2 Ventilation Relay Controller
After=network.target

[Service]
Type=simple
User=pi
WorkingDirectory=/home/pi
ExecStart=/usr/bin/python3 /home/pi/co2_ventilation_controller.py
Restart=always
RestartSec=3

[Install]
WantedBy=multi-user.target
EOF
Enable and start it:
sudo systemctl daemon-reload
sudo systemctl enable --now co2-ventilation.service
sudo systemctl status co2-ventilation.service --no-pager
How the Ventilation Control Works
The Raspberry Pi implements a simple CO2 ventilation controller with hysteresis:
| CO2 value | Relay action | Ventilation state |
|---|---|---|
>= 1000 ppm | Energize relay | Ventilation ON |
801 to 999 ppm | Keep previous state | Stable, no chatter |
<= 800 ppm | Release relay | Ventilation OFF |
This avoids rapid switching near a single threshold.
Validation Method
To validate the CO2 ventilation relay controller behavior:
- Power the sensor and relay module.
- Run the Python script.
- Observe live output in the terminal.
- Expose the sensor to a higher CO2 level, for example by breathing near the sensor briefly in a ventilated test setup.
- Confirm:
- The printed CO2 value rises above
1000 ppm - The ventilation relay changes to
ON - Move the sensor back to fresh air and wait for the reading to fall.
- Confirm:
- The printed CO2 value drops to
800 ppmor lower - The ventilation relay changes to
OFF
Expected Evidence
- Terminal logs showing CO2 values crossing both thresholds
- Audible relay clicks or LED indicator change on the relay board
- Optional multimeter continuity check on relay contacts
- Optional airflow or fan activation when the ventilation output is connected
Troubleshooting
| Symptom | Likely cause | Fix |
|---|---|---|
Incomplete response | UART not enabled or wrong serial device | Re-enable UART and check /dev/serial0 |
| Constant checksum errors | Wiring issue or baud mismatch | Recheck TX/RX and use 9600 baud |
| Relay always ON | Module is active-low | Keep RELAY_ACTIVE_LOW = True |
| Relay never switches | Wrong GPIO pin or no common ground | Verify GPIO17 wiring and GND |
| CO2 reading does not change | Sensor warm-up or bad placement | Let sensor warm up for several minutes |
Result
You now have a working Raspberry Pi CO2 ventilation relay controller that reads a CO2 sensor and switches a relay to control ventilation automatically.
Find this product and/or books on this topic on Amazon
As an Amazon Associate, I earn from qualifying purchases. If you buy through this link, you help keep this project running.
Quick Quiz

Telecommunications Electronics Engineer and Computer Engineer (official degrees in Spain).

