
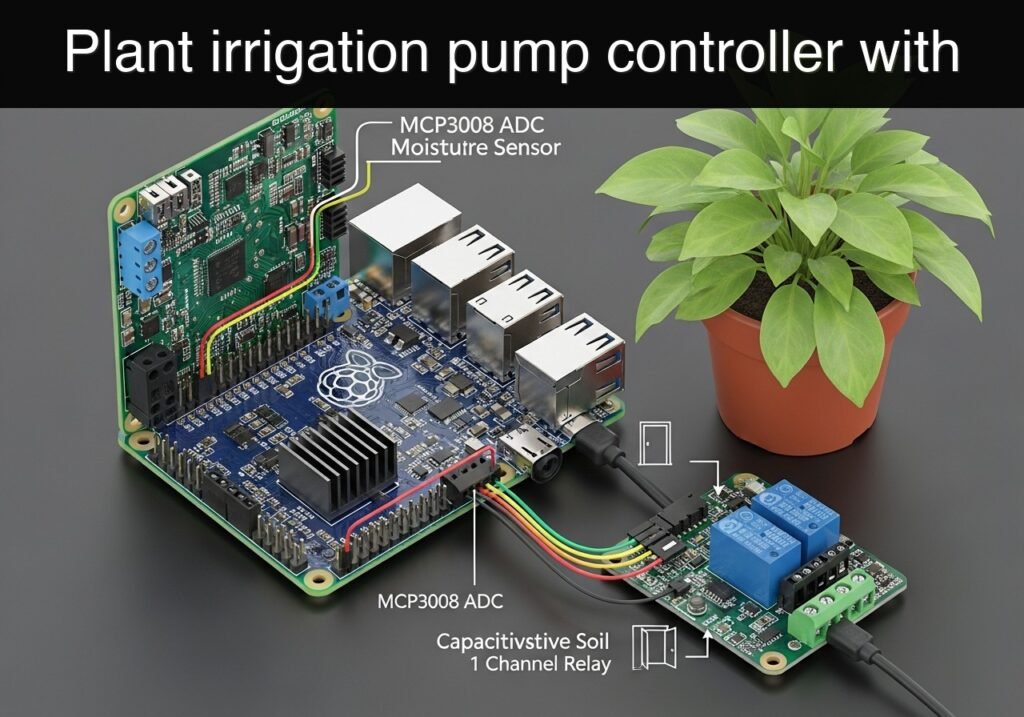
Objective and use case
What you’ll build: A Raspberry Pi plant irrigation controller that reads a digital soil-moisture sensor and activates a relay-driven water pump when the soil is too dry. The system performs short watering cycles, then pauses before rechecking to avoid overwatering and relay chatter.
Why it matters / Use cases
- Automates watering for a single houseplant, herb pot, or small seedling tray without constant manual checks.
- Helps maintain more consistent soil conditions by reacting within seconds of a dry-state signal rather than waiting hours or days for human intervention.
- Provides a simple introduction to GPIO control, relay switching, and sensor-based automation on Raspberry Pi.
- Useful for low-voltage indoor setups where a 5 V pump can run in short bursts such as 2–10 seconds per cycle.
Expected outcome
- A working Python-based controller that polls the moisture sensor on a timed interval, for example every 30–60 seconds.
- Automatic pump activation only when the sensor reports dry soil, with a controlled watering window such as 3–5 seconds.
- Low compute overhead on the Raspberry Pi, typically well under 5% CPU and with no meaningful GPU load for this headless automation task.
- A safer low-voltage prototype that keeps the Pi on 5 V, uses an isolated GPIO relay module, and powers the pump from a separate suitable supply.
Audience: Beginners, students, and DIY makers building their first sensor-and-actuator project; Level: Basic
Architecture/flow: Digital soil moisture sensor detects dry/wet state → Raspberry Pi GPIO reads thresholded digital signal → control script decides whether watering is needed → GPIO output toggles relay → relay powers external pump for a short cycle → system waits a cooldown period, then checks again.
Educational validation note
Before publication, this case passed the Prometeo automated validation gate with status PASS. The validator checked the code blocks, article structure, copy/paste-safe commands and consistency with the supported device catalog.
Published validation evidence
- Automatic result: PASS.
- Parsed structure: 3 sections, 3 tables and 10 code blocks detected before publication.
- Checked code: 4 Python/py_compile, 6 Bash/copy-paste checks.
- Supported catalog: the article text was checked against Prometeo’s validation-capable device profiles, and unsupported stacks block publication.
- Report findings: no blocking findings.
This validation confirms syntax and tool compatibility for the published material, but it does not replace physical testing on your exact hardware, wiring and runtime environment.
Educational safety note
This project is an educational prototype, not a certified product. Before powering the setup, verify the pinout of your exact ULX3S board revision, keep FPGA I/O signals at 3.3 V, never connect 5 V directly to I/O pins, disconnect power before changing wiring, and use suitable external supplies for loads, motors or servos while sharing ground only when the wiring requires it.
title: Practical Case: Raspberry Pi Plant Irrigation Pump Controller
slug: practical-case-raspberry-pi
level: Basic
Raspberry Pi Plant Irrigation Pump Controller
This practical case shows how to build a plant irrigation pump controller with a Raspberry Pi. The controller reads a soil moisture sensor and switches a water pump through a relay when the soil is dry.
Safety note
This is an educational low-voltage project. Keep the Raspberry Pi on 5 V only and use a relay module designed for Raspberry Pi GPIO isolation. Do not connect mains voltage directly to GPIO. Power the pump from its own suitable supply, share ground only where required by the relay design, and keep water away from electronics.
Conceptual block diagram
High-level view: what enters the system, what each block processes, and what comes out.
Functional architecture
Conceptual signal and responsibility flow between device blocks.

Objective
Build a Raspberry Pi based controller that:
- measures soil moisture,
- decides whether a plant needs irrigation,
- activates a pump for a short watering cycle,
- waits before checking again.
Because a Raspberry Pi does not have a built-in analog input, this tutorial uses a digital soil moisture module with an adjustable threshold and digital output.
Parts
- Raspberry Pi with Raspberry Pi OS
- MicroSD card
- Digital soil moisture sensor module with
DO,VCC,GND - 1-channel 5 V relay module compatible with 3.3 V GPIO trigger
- Small DC water pump
- External power supply matched to the pump
- Jumper wires
- Breadboard or screw terminals
- Tubing and water container
Wiring
The Raspberry Pi reads the sensor digital output and controls the relay input.
| Function | Module Pin | Raspberry Pi Pin | BCM GPIO |
|---|---|---|---|
| Soil sensor power | VCC | Pin 1 | 3.3 V |
| Soil sensor ground | GND | Pin 6 | GND |
| Soil sensor digital output | DO | Pin 11 | GPIO17 |
| Relay power | VCC | Pin 2 | 5 V |
| Relay ground | GND | Pin 9 | GND |
| Relay control input | IN | Pin 13 | GPIO27 |
Pump side wiring
The relay switches the pump supply, not the Raspberry Pi power rail.
| Pump circuit item | Connect to |
|---|---|
| Pump supply positive | Relay COM |
| Relay NO | Pump positive lead |
| Pump negative lead | Pump supply negative |
| Relay NC | Not used |
Use NO (normally open) so the pump stays off when the Raspberry Pi is booting or powered down.
How it works
A typical digital soil moisture module exposes a comparator output:
DO = 0or1depending on the board design and trimmer threshold,- the trimmer sets the dry/wet switching point.
This guide assumes:
GPIO17 == LOWmeans dry soilGPIO17 == HIGHmeans wet soil
If your sensor behaves the opposite way, the test script below will show it clearly.
Enable GPIO access
Update packages and install the GPIO library:
sudo apt update
sudo apt install -y python3-gpiozero
Code 1: Sensor and relay wiring test
Save as sensor_relay_test.py:
#!/usr/bin/env python3
from gpiozero import DigitalInputDevice, OutputDevice
from signal import pause
import time

SENSOR_PIN = 17
RELAY_PIN = 27

sensor = DigitalInputDevice(SENSOR_PIN, pull_up=False)
relay = OutputDevice(RELAY_PIN, active_high=False, initial_value=False)

def state_text() -> str:
    return "WET/HIGH" if sensor.value == 1 else "DRY/LOW"

print("Reading soil sensor for 10 seconds...")
for _ in range(10):
    print(f"Sensor raw state: {sensor.value} ({state_text()})")
    time.sleep(1)

print("Turning pump relay ON for 2 seconds...")
relay.on()
time.sleep(2)
print("Turning pump relay OFF")
relay.off()
Run it:
python3 sensor_relay_test.py
Expected result
- When you move the sensor between dry and wet soil, the printed state changes.
- The relay should click once when turned on and again when turned off.
- If the relay behavior is inverted, the
active_high=Falsesetting is likely correct for your relay module. Many Raspberry Pi relay boards are active low.
Code 2: Plant irrigation pump controller
Save as irrigation_controller.py:
#!/usr/bin/env python3
from gpiozero import DigitalInputDevice, OutputDevice
import time
from datetime import datetime

SENSOR_PIN = 17
RELAY_PIN = 27

CHECK_INTERVAL_SECONDS = 30
PUMP_ON_SECONDS = 5
POST_WATERING_DELAY_SECONDS = 60
MAX_CYCLES_PER_HOUR = 6

# Assumption for this tutorial:
# sensor.value == 0 means dry soil
# sensor.value == 1 means wet soil
DRY_SENSOR_VALUE = 0

sensor = DigitalInputDevice(SENSOR_PIN, pull_up=False)
relay = OutputDevice(RELAY_PIN, active_high=False, initial_value=False)

cycle_timestamps = []

def now_text() -> str:
    return datetime.now().strftime("%Y-%m-%d %H:%M:%S")

def is_dry() -> bool:
    return sensor.value == DRY_SENSOR_VALUE

def prune_old_cycles() -> None:
    global cycle_timestamps
    cutoff = time.time() - 3600
    cycle_timestamps = [t for t in cycle_timestamps if t >= cutoff]

def can_water() -> bool:
    prune_old_cycles()
    return len(cycle_timestamps) < MAX_CYCLES_PER_HOUR

def water_once() -> None:
    print(f"{now_text()} Pump ON for {PUMP_ON_SECONDS} s")
    relay.on()
    time.sleep(PUMP_ON_SECONDS)
    relay.off()
    cycle_timestamps.append(time.time())
    print(f"{now_text()} Pump OFF")

def main() -> None:
    print(f"{now_text()} Irrigation controller started")
    while True:
        dry = is_dry()
        print(f"{now_text()} Sensor value={sensor.value} dry={dry}")

        if dry:
            if can_water():
                water_once()
                print(f"{now_text()} Waiting {POST_WATERING_DELAY_SECONDS} s after watering")
                time.sleep(POST_WATERING_DELAY_SECONDS)
            else:
                print(f"{now_text()} Watering skipped: hourly cycle limit reached")
                time.sleep(CHECK_INTERVAL_SECONDS)
        else:
            time.sleep(CHECK_INTERVAL_SECONDS)

if __name__ == "__main__":
    try:
        main()
    except KeyboardInterrupt:
        relay.off()
        print(f"{now_text()} Stopped by user")
Run it:
python3 irrigation_controller.py
Optional: Start on boot with systemd
Copy the script to a stable path:
mkdir -p /home/pi/irrigation
cp irrigation_controller.py /home/pi/irrigation/
chmod +x /home/pi/irrigation/irrigation_controller.py
Create the service file:
sudo tee /etc/systemd/system/irrigation-controller.service >/dev/null <<'EOF'
[Unit]
Description=Raspberry Pi Plant Irrigation Pump Controller
After=multi-user.target

[Service]
Type=simple
User=pi
WorkingDirectory=/home/pi/irrigation
ExecStart=/usr/bin/python3 /home/pi/irrigation/irrigation_controller.py
Restart=on-failure
RestartSec=5

[Install]
WantedBy=multi-user.target
EOF
Enable and start it:
sudo systemctl daemon-reload
sudo systemctl enable irrigation-controller.service
sudo systemctl start irrigation-controller.service
sudo systemctl status irrigation-controller.service --no-pager
Calibration
The moisture module usually has a small potentiometer.
- Put the probe in soil at the depth you want to monitor.
- Run
python3 sensor_relay_test.py. - Turn the potentiometer slowly.
- Note the point where the digital output changes.
- Adjust until the output changes at the dryness level that should trigger irrigation.
Validation method
To support the claim that this Raspberry Pi project implements a working plant irrigation pump controller, validate it with observable evidence:
| Check | Method | Expected evidence |
|---|---|---|
| Sensor detection | Move the probe between dry soil and moist soil while running sensor_relay_test.py | Console output changes between dry and wet states |
| Pump switching | Run sensor_relay_test.py | Audible relay click and visible pump operation for 2 seconds |
| Automatic irrigation | Put the probe in dry soil and run irrigation_controller.py | Timestamped log shows dry detection, pump on, pump off |
| Recovery after watering | Wet the soil after a watering cycle | Controller logs wet state and stops activating the pump |
| Rate limiting | Keep the sensor dry continuously | Log eventually shows Watering skipped: hourly cycle limit reached |
Troubleshooting
The sensor never changes state
- Check
VCC,GND, andDOwiring. - Confirm the sensor module is powered from 3.3 V if its output goes directly to Raspberry Pi GPIO.
- Recalibrate the threshold potentiometer.
The relay clicks but the pump does not run
- Check the separate pump power supply.
- Confirm the pump is wired through COM and NO.
- Verify that the pump voltage matches its power supply.
The pump runs at the wrong time
- Your sensor logic may be inverted.
- Change this line in
irrigation_controller.py:
DRY_SENSOR_VALUE = 0
If your module reports dry as high, change it to:
DRY_SENSOR_VALUE = 1
Result
You now have a Raspberry Pi plant irrigation pump controller that:
- monitors soil moisture,
- drives a pump through a relay,
- waters only when the plant needs irrigation,
- includes a simple safety limit to reduce repeated pumping.
Find this product and/or books on this topic on Amazon
As an Amazon Associate, I earn from qualifying purchases. If you buy through this link, you help keep this project running.
Quick Quiz

Telecommunications Electronics Engineer and Computer Engineer (official degrees in Spain).

