
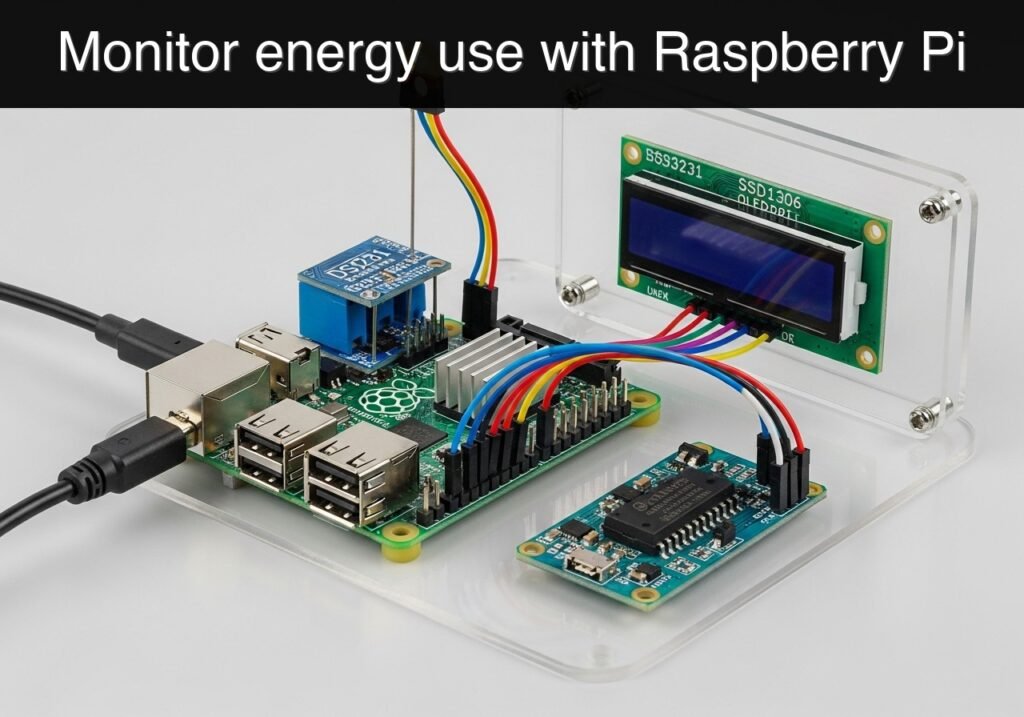
Objective and use case
What you’ll build: A Raspberry Pi utility meter pulse logger that reads a safe low-voltage pulse output on one GPIO pin, debounces each event, and writes timestamps, pulse totals, and calculated consumption to a local CSV file. It is designed for electricity LED pulses, gas reed switches, or water contact outputs, with practical timing accuracy in the millisecond range and very low system load, typically <5% CPU and negligible GPU use.
Why it matters / Use cases
- Track home or workshop electricity use from a meter constant such as 1000 pulses/kWh and estimate near-real-time demand from pulse spacing.
- Log gas or water consumption from reed/contact outputs for daily usage reports, leak detection, or comparing occupancy vs. utility use.
- Create a simple offline monitoring setup with no cloud dependency, using CSV data for spreadsheets, dashboards, or later import into Home Assistant/Grafana.
- Validate energy-saving changes by comparing pulse rates before and after replacing appliances, lighting, or pump schedules.
Expected outcome
- A reliable pulse counter that ignores switch bounce and false triggers, with event handling latency typically under 10 ms for low-rate meter pulses.
- A CSV log containing timestamp, pulse count, and converted units such as kWh, m³, or liters based on your meter constant.
- A working local prototype suitable for pulse rates far below Raspberry Pi GPIO limits, with no FPS requirement and 0% GPU dependence.
- A reusable foundation for adding alerts, charts, or periodic summaries once basic logging is verified.
Audience: Raspberry Pi beginners, makers, and homeowners building basic utility monitoring; Level: Basic
Architecture/flow: Meter pulse output or optical sensor → Raspberry Pi GPIO input with debounce logic → pulse event timestamping → consumption calculation from pulse constant → CSV file log
Educational validation note
Before publication, this case passed the Prometeo automated validation gate with status PASS. The validator checked the code blocks, article structure, copy/paste-safe commands and consistency with the supported device catalog.
Published validation evidence
- Automatic result: PASS.
- Parsed structure: 3 sections, 2 tables and 11 code blocks detected before publication.
- Checked code: 3 Python/py_compile, 1 service/config blocks, 6 Bash/copy-paste checks.
- Supported catalog: the article text was checked against Prometeo’s validation-capable device profiles, and unsupported stacks block publication.
- Report findings: no blocking findings.
This validation confirms syntax and tool compatibility for the published material, but it does not replace physical testing on your exact hardware, wiring and runtime environment.
Educational safety note
This project is an educational prototype, not a certified product. Before powering the setup, verify the pinout of your exact ULX3S board revision, keep FPGA I/O signals at 3.3 V, never connect 5 V directly to I/O pins, disconnect power before changing wiring, and use suitable external supplies for loads, motors or servos while sharing ground only when the wiring requires it.
title: Practical Case: Raspberry Pi Utility Meter Pulse Logger
slug: practical-case-raspberry-pi
level: Basic
Raspberry Pi Utility Meter Pulse Logger
This practical case shows how to build a utility meter pulse logger on a Raspberry Pi. The logger counts pulses from a utility meter output such as:
- an electricity meter LED pulse output
- a gas meter reed switch pulse output
- a water meter pulse contact
The result is a local CSV log with timestamps, pulse counts, and calculated consumption based on your meter constant.
Safety note
Utility meters may be connected to hazardous mains equipment. Do not open, modify, or probe inside a utility meter enclosure. Only use a manufacturer-provided low-voltage pulse output, an approved optical pulse sensor, or a dry-contact reed output. If you are not sure that the signal is extra-low-voltage and isolated, do not connect it to a Raspberry Pi.
Conceptual block diagram
High-level view: what enters the system, what each block processes, and what comes out.
Functional architecture
Conceptual signal and responsibility flow between device blocks.

Validation path
Conceptual summary of the tools used to check the published material.

Objective
Build a utility meter pulse logger that:
- reads one pulse input on a Raspberry Pi GPIO pin
- debounces the signal
- stores pulse events in a CSV file
- calculates consumption from a known meter pulse constant
Example pulse constants:
- electricity meter:
1000 pulses/kWh - water meter:
1 pulse/litre - gas meter: depends on meter model
Hardware
- Raspberry Pi with 40-pin header
- microSD card with Raspberry Pi OS
- utility meter pulse source:
- dry contact reed switch, or
- open collector / optocoupler output, or
- optical pulse sensor with isolated output
- jumper wires
- optional external resistor if your sensor requires it
Wiring
This example uses GPIO17 as the pulse input and the Raspberry Pi internal pull-up resistor. The sensor should pull the GPIO pin to GND briefly for each pulse.
| Raspberry Pi Pin | BCM GPIO | Connects to | Notes |
|---|---|---|---|
| Pin 11 | GPIO17 | Meter pulse signal | Active-low pulse input |
| Pin 6 | GND | Meter pulse ground / return | Required common reference for dry contact |
| 3V3 | — | Not used in this basic dry-contact example | Do not apply 5 V to GPIO |
Dry-contact pulse wiring
Use this if the utility meter provides a reed switch or dry contact:
- one contact ->
GPIO17 - other contact ->
GND
When the contact closes, the input goes low and one pulse is counted.
Open-collector pulse wiring
Use this only if the output is 3.3 V compatible and shares a safe low-voltage ground:
- collector/output ->
GPIO17 - emitter/ground ->
GND
The internal pull-up keeps the line high when idle.
Software setup
Update the system and install Python GPIO support.
sudo apt update
sudo apt install -y python3-rpi.gpio
mkdir -p ~/utility-meter-logger
cd ~/utility-meter-logger
Python logger
Create meter_logger.py:
#!/usr/bin/env python3
import csv
import os
import signal
import sys
import time
from datetime import datetime, timezone

import RPi.GPIO as GPIO

GPIO_PIN = 17
CSV_PATH = os.path.expanduser("~/utility-meter-logger/meter_log.csv")
STATE_PATH = os.path.expanduser("~/utility-meter-logger/state.txt")

# Example: 1000 pulses per kWh for an electricity meter.
# Change this value to match your utility meter.
PULSES_PER_UNIT = 1000.0
UNIT_NAME = "kWh"

# Debounce time in milliseconds. Increase if your contact bounces.
BOUNCE_MS = 50

running = True
pulse_count = 0


def load_state(path: str) -> int:
    if not os.path.exists(path):
        return 0
    with open(path, "r", encoding="utf-8") as f:
        text = f.read().strip()
    if text == "":
        return 0
    return int(text)


def save_state(path: str, count: int) -> None:
    tmp_path = path + ".tmp"
    with open(tmp_path, "w", encoding="utf-8") as f:
        f.write(f"{count}\n")
    os.replace(tmp_path, path)


def ensure_csv_header(path: str) -> None:
    if os.path.exists(path) and os.path.getsize(path) > 0:
        return
    os.makedirs(os.path.dirname(path), exist_ok=True)
    with open(path, "a", newline="", encoding="utf-8") as f:
        writer = csv.writer(f)
        writer.writerow(
            ["timestamp_utc", "pulse_count_total", "delta_pulses", "consumption_total", "unit"]
        )


def append_csv(path: str, count: int, delta: int) -> None:
    consumption = count / PULSES_PER_UNIT
    timestamp = datetime.now(timezone.utc).isoformat()
    with open(path, "a", newline="", encoding="utf-8") as f:
        writer = csv.writer(f)
        writer.writerow([timestamp, count, delta, f"{consumption:.6f}", UNIT_NAME])


def handle_pulse(channel: int) -> None:
    global pulse_count
    pulse_count += 1
    save_state(STATE_PATH, pulse_count)
    append_csv(CSV_PATH, pulse_count, 1)
    print(
        f"{datetime.now(timezone.utc).isoformat()} pulse={pulse_count} "
        f"consumption={pulse_count / PULSES_PER_UNIT:.6f} {UNIT_NAME}",
        flush=True,
    )


def handle_signal(signum, frame) -> None:
    global running
    running = False


def main() -> int:
    global pulse_count

    pulse_count = load_state(STATE_PATH)
    ensure_csv_header(CSV_PATH)

    GPIO.setmode(GPIO.BCM)
    GPIO.setup(GPIO_PIN, GPIO.IN, pull_up_down=GPIO.PUD_UP)

    signal.signal(signal.SIGINT, handle_signal)
    signal.signal(signal.SIGTERM, handle_signal)

    GPIO.add_event_detect(
        GPIO_PIN,
        GPIO.FALLING,
        callback=handle_pulse,
        bouncetime=BOUNCE_MS,
    )

    print(
        f"Utility meter pulse logger started on GPIO{GPIO_PIN}. "
        f"Current total pulses: {pulse_count}",
        flush=True,
    )

    try:
        while running:
            time.sleep(1.0)
    finally:
        GPIO.cleanup()

    return 0


if __name__ == "__main__":
    sys.exit(main())
Make it executable:
chmod +x ~/utility-meter-logger/meter_logger.py
Run the utility meter pulse logger
Start it manually for a first test:
cd ~/utility-meter-logger
python3 meter_logger.py
Expected behavior:
- the script prints a startup message
- each valid pulse prints one new line
meter_log.csvis createdstate.txtstores the total pulse count for restart recovery
Example output
A few lines from the serial console may look like this:
Utility meter pulse logger started on GPIO17. Current total pulses: 0
2026-06-27T12:00:01.100000+00:00 pulse=1 consumption=0.001000 kWh
2026-06-27T12:00:03.700000+00:00 pulse=2 consumption=0.002000 kWh
2026-06-27T12:00:04.900000+00:00 pulse=3 consumption=0.003000 kWh
CSV format
The logger writes one row per pulse event.
| Column | Meaning |
|---|---|
timestamp_utc | UTC timestamp of the pulse |
pulse_count_total | Total accumulated pulse count |
delta_pulses | Pulses added by this event, normally 1 |
consumption_total | pulse_count_total / PULSES_PER_UNIT |
unit | Consumption unit, for example kWh or litre |
Start automatically at boot
Create a systemd service file at /etc/systemd/system/utility-meter-logger.service:
[Unit]
Description=Utility Meter Pulse Logger
After=network.target

[Service]
Type=simple
User=pi
WorkingDirectory=/home/pi/utility-meter-logger
ExecStart=/usr/bin/python3 /home/pi/utility-meter-logger/meter_logger.py
Restart=always
RestartSec=2

[Install]
WantedBy=multi-user.target
Enable and start the service:
sudo systemctl daemon-reload
sudo systemctl enable utility-meter-logger.service
sudo systemctl start utility-meter-logger.service
sudo systemctl status utility-meter-logger.service --no-pager
Validation method
To validate that this utility meter pulse logger works correctly, use a known pulse source.
Method 1: Manual dry-contact test
- Stop the service if it is running:
bash

sudo systemctl stop utility-meter-logger.service - Run the logger in a terminal:
bash

cd ~/utility-meter-logger

python3 meter_logger.py - Briefly short
GPIO17toGNDexactly 10 times using a pushbutton or jumper wire. - Check that 10 new lines are printed and that the total pulse count increases by 10.
Expected evidence:
- console output increments once per short
tail -n 10 ~/utility-meter-logger/meter_log.csvshows 10 new rowscat ~/utility-meter-logger/state.txtmatches the expected total count
Method 2: Meter constant check
If your electricity meter is labeled 1000 imp/kWh or 1000 pulses/kWh, then:
- 1000 recorded pulses should equal
1.000000 kWh - 100 pulses should equal
0.100000 kWh
Expected evidence:
- the
consumption_totalfield in the CSV matchespulse_count_total / 1000
Troubleshooting
No pulses are counted
Check:
- sensor output really pulls the line to GND
- GPIO number is correct:
GPIO17, not physical pin number17 - the meter output is safe and low voltage
- debounce time is not too short for a reed contact
Double counting
If you see extra counts from a reed switch, increase:
BOUNCE_MS = 100
Then restart the script.
Wrong consumption units
Set these values correctly for your utility meter:
PULSES_PER_UNIT = 1000.0
UNIT_NAME = "kWh"
Examples:
- water meter with
1 pulse/litre: PULSES_PER_UNIT = 1.0UNIT_NAME = "litre"- electricity meter with
1000 pulses/kWh: PULSES_PER_UNIT = 1000.0UNIT_NAME = "kWh"
Result
You now have a Raspberry Pi utility meter pulse logger that records pulse events, persists the total count across restarts, and stores timestamped consumption data in CSV format.
Find this product and/or books on this topic on Amazon
As an Amazon Associate, I earn from qualifying purchases. If you buy through this link, you help keep this project running.
Quick Quiz

Telecommunications Electronics Engineer and Computer Engineer (official degrees in Spain).

