
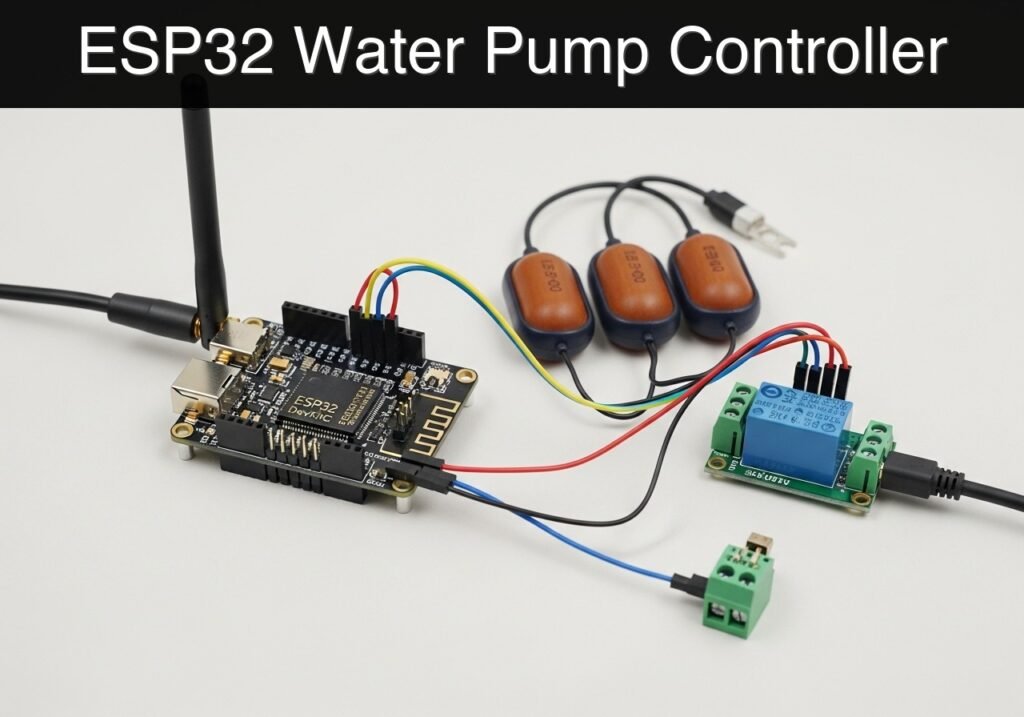
Objective and use case
What you’ll build: A smart, web-enabled water pump controller that monitors tank levels via physical float switches and automatically cuts power to prevent catastrophic dry-running.
Why it matters / Use cases
- Equipment protection: Prevents motor and seal destruction within minutes by actively guarding against dry-running in centrifugal and submersible pumps.
- Agricultural automation: Ensures hydroponic nutrient delivery pumps operate only when the reservoir has sufficient liquid.
- Off-grid water transfer: Automates cistern-to-holding-tank transfers, pausing instantly if the source runs dry.
- Local-first control: Operates entirely on a local WiFi Access Point (AP) with zero internet, cloud, or external MQTT dependency.
Expected outcome
- The ESP32 broadcasts an independent WiFi network (
ESP32_Pump_Guard) for direct, low-latency local access. - A hosted web dashboard displays real-time metrics: Tank Status, Pump Status, and the active/inactive state of the Dry-Run Guard.
Audience: IoT hobbyists, agricultural engineers, and off-grid enthusiasts; Level: Intermediate
Architecture/flow: Float switch inputs → ESP32 microcontroller → Relay module (pump power control) & Local Web Server (UI dashboard).
Educational validation note
Before publication, this case passed the Prometeo automated validation gate with status PASS. For this ESP32 DevKitC profile, the project was checked as a PlatformIO project: the validator extracted platformio.ini and src/main.cpp, created a temporary project and ran pio run against platform = espressif32, board = esp32dev and framework = arduino. It also checked article structure, copy/paste-safe ASCII command options, and unsupported stacks such as direct ESP-IDF or non-scoped ESP32 boards.
Published validation evidence
- Automatic result: PASS.
- Parsed structure: 4 sections, 1 tables and 5 code blocks detected before publication.
- Checked code: 1 PlatformIO config + 1 ESP32 source/pio run, 3 Bash/copy-paste checks.
- Supported catalog: the article text was checked against Prometeo’s validation-capable device profiles, and unsupported stacks block publication.
- Report findings: no blocking findings.
This validation confirms syntax and tool compatibility for the published code, but it does not replace physical testing on your exact ESP32 DevKitC board, wiring, power supply and local WiFi environment.
Educational safety note
This project is a low-voltage educational prototype, not a certified product. Before powering the setup, verify the pinout of your exact ESP32 DevKitC board, keep GPIO signals within 3.3 V limits, never apply 5 V to ESP32 inputs, disconnect power before changing wiring, and use suitable external supplies for relays, motors or loads while sharing GND only when the schematic requires it.
Conceptual block diagram
High-level view: what enters the system, what each block processes, and what comes out.
Functional architecture
Conceptual flow: moisture detection, local decision and user alert.

Validation path
Conceptual summary of the tools used to check the published ESP32 project.

Prerequisites and Materials
- Software: Visual Studio Code (VSCode) with the PlatformIO IDE extension installed.
- Microcontroller: ESP32 DevKitC V4 (38-pin or 30-pin variant).
- Sensors: 2x Vertical Liquid Level Float Switches (Standard PP plastic).
- Actuator: 1x 5 V Relay Module (Standard 1-channel, Active-HIGH).
- Power: 5 V / 2 A USB power supply.
- Hardware Setup Note (Drivers): Depending on your specific ESP32 DevKitC manufacturer, you may need to install the CP210x or CH34x USB-to-UART bridge drivers on your computer to allow PlatformIO to recognize the board over USB.
Setup and Connection
This project uses the ESP32’s internal pull-up resistors for the float switches, simplifying wiring by removing the need for external resistors.
Wiring Table
| Component | Component Pin / Wire | ESP32 DevKitC Pin | Notes |
|---|---|---|---|
| Low Float Switch | Wire 1 | GPIO 27 | Bottom of tank (Dry-run guard). |
| Low Float Switch | Wire 2 | GND | Closes to GND when float is UP (water present). |
| High Float Switch | Wire 1 | GPIO 14 | Top of tank (Full indicator). |
| High Float Switch | Wire 2 | GND | Closes to GND when float is UP (tank full). |
| 5 V Relay Module | VCC | 5V / VIN | Powers the relay coil. |
| 5 V Relay Module | GND | GND | Common ground. |
| 5 V Relay Module | IN (Signal) | GPIO 26 | Active-HIGH signal to trigger the relay. |
Float Switch Orientation: Configure both switches so that when the float is resting at the bottom (no water), the switch is OPEN (disconnected, reads HIGH via pull-up). When water lifts the float UP, the switch becomes CLOSED (connected to GND, reads LOW).
Project Code
Create a new PlatformIO project for the ESP32 DevKitC. Replace the contents of platformio.ini and src/main.cpp with the code below.
platformio.ini
[env:esp32dev]
platform = espressif32
board = esp32dev
framework = arduino
monitor_speed = 115200
src/main.cpp
Public preview of the validated file. The complete source is shown to members and in PDF/Print.
#include <Arduino.h>
#include <WiFi.h>
#include <WebServer.h>

// ---------------------------------------------------------
// Pin Definitions
// ---------------------------------------------------------
const int RELAY_PIN = 26;
const int LOW_FLOAT_PIN = 27;
const int HIGH_FLOAT_PIN = 14;

// ---------------------------------------------------------
// State Variables
// ---------------------------------------------------------
bool pumpIsOn = false;
bool lowFloatActive = false;  // true = tank empty (dry run risk)
bool highFloatActive = false; // true = tank full

// ---------------------------------------------------------
// Network & Web Server Setup
// ---------------------------------------------------------
const char* AP_SSID = "ESP32_Pump_Guard";
const char* AP_PASS = "admin1234";

WebServer server(80);

// ---------------------------------------------------------
// HTML Dashboard (Stored in PROGMEM)
// ---------------------------------------------------------
const char index_html[] PROGMEM = R"rawliteral(
<!DOCTYPE html>
<html lang="en">
<head>
    <meta charset="UTF-8">
    <meta name="viewport" content="width=device-width, initial-scale=1.0">
    <title>Pump Dry-Run Guard</title>
    <style>
        body { font-family: 'Segoe UI', Tahoma, Geneva, Verdana, sans-serif; background-color: #f4f7f6; color: #333; text-align: center; margin: 0; padding: 20px; }
        .card { background: white; padding: 20px; border-radius: 10px; box-shadow: 0 4px 8px rgba(0,0,0,0.1); max-width: 500px; margin: 0 auto 20px auto; }
        h1 { color: #2c3e50; }
        .status-badge { display: inline-block; padding: 8px 15px; border-radius: 20px; font-weight: bold; color: white; margin-bottom: 10px; }
        .bg-green { background-color: #27ae60; }
        .bg-red { background-color: #e74c3c; }
        .bg-gray { background-color: #7f8c8d; }
        button { padding: 12px 24px; font-size: 16px; margin: 10px; border: none; border-radius: 5px; cursor: pointer; transition: 0.3s; color: white; font-weight: bold;}
        .btn-on { background-color: #3498db; }
        .btn-on:hover { background-color: #2980b9; }
        .btn-off { background-color: #95a5a6; }
        .btn-off:hover { background-color: #7f8c8d; }
        .data-row { display: flex; justify-content: space-between; padding: 10px 0; border-bottom: 1px solid #eee; }
        .data-row:last-child { border-bottom: none; }
    </style>
</head>
<body>
    <div class="card">
        <h1>Pump Controller</h1>
        <div id="guard-badge" class="status-badge bg-gray">Loading Status...</div>

        <div class="data-row">
            <span>Tank Level:</span>
            <strong id="tank-level">Unknown</strong>
        </div>
        <div class="data-row">
            <span>Pump State:</span>
            <strong id="pump-state">Unknown</strong>
        </div>

        <div style="margin-top: 20px;">
            <button class="btn-on" onclick="controlPump('on')">Start Pump</button>
            <button class="btn-off" onclick="controlPump('off')">Stop Pump</button>
        </div>
    </div>

    <script>
        function updateDashboard() {
            fetch('/api/status')
                .then(response => response.json())
                .then(data => {
                    document.getElementById('tank-level').innerText = data.tank_status;
                    document.getElementById('pump-state').innerText = data.pump_on ? "RUNNING" : "STOPPED";
                    const badge = document.getElementById('guard-badge');
                    if (data.dry_run_guard) {
                        badge.innerText = "DRY RUN GUARD ACTIVE";
                        badge.className = "status-badge bg-red";
                    } else {
                        badge.innerText = "SYSTEM SAFE";
                        badge.className = "status-badge bg-green";
                    }
                })
                .catch(err => console.error('Error fetching status:', err));
        }

        function controlPump(action) {
            fetch('/api/pump?state=' + action, { method: 'POST' })
                .then(response => response.json())
                .then(data => {
                    if (data.error) {
                        alert("Command rejected: " + data.error);
                    }
                    updateDashboard();
                });
        }
// ...#include <Arduino.h>
#include <WiFi.h>
#include <WebServer.h>
// ---------------------------------------------------------
// Pin Definitions
// ---------------------------------------------------------
const int RELAY_PIN = 26;
const int LOW_FLOAT_PIN = 27;
const int HIGH_FLOAT_PIN = 14;
// ---------------------------------------------------------
// State Variables
// ---------------------------------------------------------
bool pumpIsOn = false;
bool lowFloatActive = false; // true = tank empty (dry run risk)
bool highFloatActive = false; // true = tank full
// ---------------------------------------------------------
// Network & Web Server Setup
// ---------------------------------------------------------
const char* AP_SSID = "ESP32_Pump_Guard";
const char* AP_PASS = "admin1234";
WebServer server(80);
// ---------------------------------------------------------
// HTML Dashboard (Stored in PROGMEM)
// ---------------------------------------------------------
const char index_html[] PROGMEM = R"rawliteral(
<!DOCTYPE html>
<html lang="en">
<head>
<meta charset="UTF-8">
<meta name="viewport" content="width=device-width, initial-scale=1.0">
<title>Pump Dry-Run Guard</title>
<style>
body { font-family: 'Segoe UI', Tahoma, Geneva, Verdana, sans-serif; background-color: #f4f7f6; color: #333; text-align: center; margin: 0; padding: 20px; }
.card { background: white; padding: 20px; border-radius: 10px; box-shadow: 0 4px 8px rgba(0,0,0,0.1); max-width: 500px; margin: 0 auto 20px auto; }
h1 { color: #2c3e50; }
.status-badge { display: inline-block; padding: 8px 15px; border-radius: 20px; font-weight: bold; color: white; margin-bottom: 10px; }
.bg-green { background-color: #27ae60; }
.bg-red { background-color: #e74c3c; }
.bg-gray { background-color: #7f8c8d; }
button { padding: 12px 24px; font-size: 16px; margin: 10px; border: none; border-radius: 5px; cursor: pointer; transition: 0.3s; color: white; font-weight: bold;}
.btn-on { background-color: #3498db; }
.btn-on:hover { background-color: #2980b9; }
.btn-off { background-color: #95a5a6; }
.btn-off:hover { background-color: #7f8c8d; }
.data-row { display: flex; justify-content: space-between; padding: 10px 0; border-bottom: 1px solid #eee; }
.data-row:last-child { border-bottom: none; }
</style>
</head>
<body>
<div class="card">
<h1>Pump Controller</h1>
<div id="guard-badge" class="status-badge bg-gray">Loading Status...</div>
<div class="data-row">
<span>Tank Level:</span>
<strong id="tank-level">Unknown</strong>
</div>
<div class="data-row">
<span>Pump State:</span>
<strong id="pump-state">Unknown</strong>
</div>
<div style="margin-top: 20px;">
<button class="btn-on" onclick="controlPump('on')">Start Pump</button>
<button class="btn-off" onclick="controlPump('off')">Stop Pump</button>
</div>
</div>
<script>
function updateDashboard() {
fetch('/api/status')
.then(response => response.json())
.then(data => {
document.getElementById('tank-level').innerText = data.tank_status;
document.getElementById('pump-state').innerText = data.pump_on ? "RUNNING" : "STOPPED";
const badge = document.getElementById('guard-badge');
if (data.dry_run_guard) {
badge.innerText = "DRY RUN GUARD ACTIVE";
badge.className = "status-badge bg-red";
} else {
badge.innerText = "SYSTEM SAFE";
badge.className = "status-badge bg-green";
}
})
.catch(err => console.error('Error fetching status:', err));
}
function controlPump(action) {
fetch('/api/pump?state=' + action, { method: 'POST' })
.then(response => response.json())
.then(data => {
if (data.error) {
alert("Command rejected: " + data.error);
}
updateDashboard();
});
}
        setInterval(updateDashboard, 2000);
        updateDashboard();
    </script>
</body>
</html>
)rawliteral";

// ---------------------------------------------------------
// Helper Functions
// ---------------------------------------------------------
void updateSensorStates() {
    // Switch Open (Float down/Empty) -> Pin is HIGH
    // Switch Closed (Float up/Water present) -> Pin is LOW
    lowFloatActive = (digitalRead(LOW_FLOAT_PIN) == HIGH);
    highFloatActive = (digitalRead(HIGH_FLOAT_PIN) == LOW);

    // Hardware Dry-Run Override Protection
    if (lowFloatActive && pumpIsOn) {
        Serial.println("CRITICAL: Dry run detected! Forcing pump OFF.");
        pumpIsOn = false;
        digitalWrite(RELAY_PIN, LOW); // Turn off relay safely
    }
}

String getTankStatusString() {
    if (lowFloatActive) return "Empty (Low Level)";
    if (highFloatActive) return "Full (High Level)";
return "Normal (Mid Level)";
}
// ---------------------------------------------------------
// Web Server Route Handlers
// ---------------------------------------------------------
void handleRoot() {
server.send(200, "text/html", index_html);
}
void handleApiStatus() {
updateSensorStates();
String json = "{";
json += "\"pump_on\":" + String(pumpIsOn ? "true" : "false") + ",";
json += "\"tank_status\":\"" + getTankStatusString() + "\",";
json += "\"dry_run_guard\":" + String(lowFloatActive ? "true" : "false");
json += "}";
server.send(200, "application/json", json);
}
void handleApiPump() {
if (!server.hasArg("state")) {
server.send(400, "application/json", "{\"error\":\"Missing state argument\"}");
return;
}
String stateArg = server.arg("state");
updateSensorStates();
if (stateArg == "on") {
if (lowFloatActive) {
Serial.println("API: Pump ON command rejected. Dry run guard is active.");
server.send(403, "application/json", "{\"error\":\"Dry run guard active. Tank is empty.\"}");
return;
} else {
pumpIsOn = true;
digitalWrite(RELAY_PIN, HIGH);
Serial.println("API: Pump turned ON manually.");
}
} else if (stateArg == "off") {
pumpIsOn = false;
digitalWrite(RELAY_PIN, LOW);
Serial.println("API: Pump turned OFF manually.");
}
handleApiStatus();
}
// ---------------------------------------------------------
// Main Setup & Loop
// ---------------------------------------------------------
void setup() {
Serial.begin(115200);
delay(1000);
Serial.println("\n--- ESP32 Water Pump Dry-Run Guard ---");
// Initialize Pins
pinMode(RELAY_PIN, OUTPUT);
digitalWrite(RELAY_PIN, LOW); // Ensure pump is OFF at boot
// Use internal pull-ups for float switches
pinMode(LOW_FLOAT_PIN, INPUT_PULLUP);
pinMode(HIGH_FLOAT_PIN, INPUT_PULLUP);
// Setup WiFi Access Point
Serial.print("Setting up WiFi AP...");
WiFi.softAP(AP_SSID, AP_PASS);
Serial.println("Done.");
Serial.print("AP IP Address: ");
Serial.println(WiFi.softAPIP());
// Configure Web Server Routes
server.on("/", handleRoot);
server.on("/api/status", handleApiStatus);
server.on("/api/pump", HTTP_POST, handleApiPump);
server.begin();
Serial.println("HTTP server started.");
}
void loop() {
server.handleClient();
updateSensorStates();
delay(50); // Small yield to prevent watchdog starvation
}
Compilation and Upload
To build and flash the project to your ESP32 DevKitC, open the VSCode terminal and execute the following exact PlatformIO commands:
- Compile the firmware to ensure there are no syntax errors:
bash

pio run - Upload the compiled firmware to the ESP32:
bash

pio run --target upload - Open the serial monitor to view the AP creation logs and debug messages:
bash

pio device monitor
Validation Method and Expected Evidence
To rigorously validate the safety and accuracy of the dry-run guard:
- Network Connection: Connect a smartphone or laptop to the
ESP32_Pump_GuardWiFi network (Password:admin1234). - Access Dashboard: Open a browser and navigate to
http://192.168.4.1. - Test Normal Operation: Ensure the low float switch is manually held UP (simulating water present). Click “Start Pump” in the web UI.
- Expected Evidence: The physical relay should click (engage), the pump state in the UI should read “RUNNING”, and the serial monitor should log
API: Pump turned ON manually.
- Expected Evidence: The physical relay should click (engage), the pump state in the UI should read “RUNNING”, and the serial monitor should log
- Test Hardware Dry-Run Cutoff: While the pump is running, physically drop the low float switch DOWN (simulating the tank running dry).
- Expected Evidence: The relay must immediately click off. The serial monitor must print
CRITICAL: Dry run detected! Forcing pump OFF.The web dashboard will automatically update within 2 seconds to show “DRY RUN GUARD ACTIVE” in red.
- Expected Evidence: The relay must immediately click off. The serial monitor must print
- Test API Rejection: While the low float switch is still DOWN, attempt to click “Start Pump” again in the UI.
- Expected Evidence: The browser will display an alert: “Command rejected: Dry run guard active. Tank is empty.” The relay will not engage. The serial monitor will print
API: Pump ON command rejected. Dry run guard is active.
- Expected Evidence: The browser will display an alert: “Command rejected: Dry run guard active. Tank is empty.” The relay will not engage. The serial monitor will print
Find this product and/or books on this topic on Amazon
As an Amazon Associate, I earn from qualifying purchases. If you buy through this link, you help keep this project running.
Quick Quiz

Telecommunications Electronics Engineer and Computer Engineer (official degrees in Spain).

