
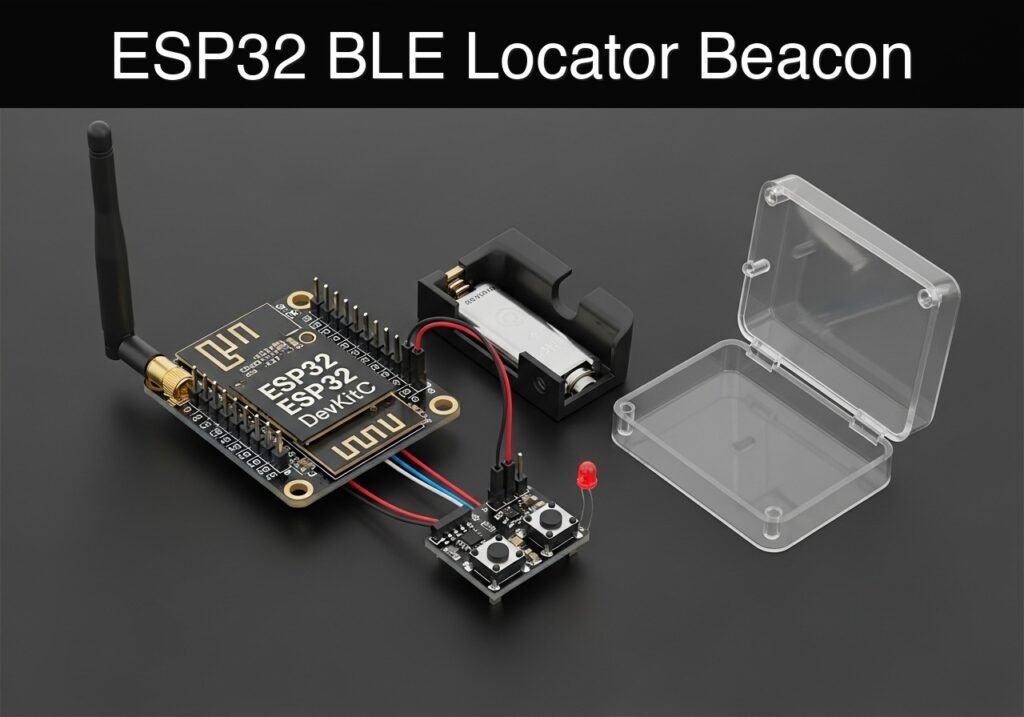
case-device-block-diagram, What you’ll build: A Bluetooth Low Energy (BLE) tool finder beacon that attaches to equipment, enabling users to trigger a localized audible and visual alarm via smartphone to quickly locate missing items. Audience: Embedded developers and IoT engineers; Level: Intermediate Architecture/flow: Smartphone (BLE Client) → RF Connection → ESP32 (BLE GATT Server) → Asynchronous Callback → Non-blocking GPIO Control (LED/Buzzer) High-level view: what enters the system, what each block processes, and what comes out. Conceptual flow: local configuration, BLE advertising and phone-side reading. Conceptual summary of the tools used to check the published ESP32 project. Before publication, this case passed the Prometeo automated validation gate with status PASS. For this ESP32 DevKitC profile, the project was checked as a PlatformIO project: the validator extracted This validation confirms syntax and tool compatibility for the published code, but it does not replace physical testing on your exact ESP32 DevKitC board, wiring, power supply and local WiFi environment. This project is a low-voltage educational BLE beacon, not a certified tracking, personal-safety, or critical-inventory system. Verify the pinout of your ESP32 DevKitC, keep GPIO signals at 3.3 V, use a suitable USB or battery supply, and respect privacy and local rules when broadcasting BLE identifiers in shared spaces. To successfully complete this tutorial, ensure you have the following software and background knowledge: You will need the exact hardware components listed below to build this prototype: The hardware setup requires connecting the pushbutton, piezo buzzer, and status LED to specific General Purpose Input/Output (GPIO) pins on the ESP32 DevKitC. We will utilize the ESP32’s internal pull-up resistor for the pushbutton to minimize the external component count. Wiring Instructions: Connection Summary Table: The project requires two files within your PlatformIO project structure: the configuration file ( Create a new PlatformIO project for the ESP32 DevKitC and replace the contents of Replace the contents of Public preview of the validated file. The complete source is shown to members and in PDF/Print. To compile, upload, and monitor the code on your ESP32 DevKitC, use the PlatformIO Core CLI. Ensure your terminal is navigated to the root directory of your project (where Execution Workflow: Follow these checkpoints to verify the functionality of your BLE Tool Finder Beacon. If you encounter issues during the build or validation phases, consult the following table for common problems and their solutions. Once the basic prototype is functioning, consider the following enhancements to move toward a production-ready device: Find this product and/or books on this topic on Amazon As an Amazon Associate, I earn from qualifying purchases. If you buy through this link, you help keep this project running.
.prometeo-educational-note,
.prometeo-device-postcode-section,
.prometeo-device-section-card {
margin: 2.4rem 0;
padding: 1.45rem 1.55rem;
border: 1px solid rgba(148, 163, 184, 0.30);
border-radius: 14px;
background:
linear-gradient(135deg, rgba(30, 41, 59, 0.50), rgba(15, 23, 42, 0.18)),
rgba(17, 24, 39, 0.48);
box-shadow: 0 18px 48px rgba(0, 0, 0, 0.20);
}
.case-objective > h2:first-of-type,
.case-device-block-diagram > h2:first-of-type,
.prometeo-device-postcode-section > h2:first-of-type,
.prometeo-device-section-card > h2:first-of-type {
margin-top: 0;
}
.prometeo-device-section-card > :last-child,
.case-objective > :last-child,
.case-device-block-diagram > :last-child,
.prometeo-device-postcode-section > :last-child {
margin-bottom: 0;
}
.prometeo-device-section-card.prometeo-device-section-card-code {
border-left: 4px solid rgba(56, 189, 248, 0.86);
background:
linear-gradient(135deg, rgba(8, 47, 73, 0.42), rgba(15, 23, 42, 0.18)),
rgba(15, 23, 42, 0.58);
}
.prometeo-device-section-card.prometeo-device-section-card-compact {
padding: 1.2rem 1.35rem;
}
.prometeo-device-section-card pre,
.case-objective pre,
.case-device-block-diagram pre,
.prometeo-device-postcode-section pre {
max-width: 100%;
}
.prometeo-device-postcode-section .prometeo-device-flow-item {
background:
linear-gradient(135deg, rgba(15, 23, 42, 0.50), rgba(30, 41, 59, 0.28)),
rgba(15, 23, 42, 0.28);
}
@media print {
.case-objective,
.case-device-block-diagram,
.prometeo-educational-note,
.prometeo-device-postcode-section,
.prometeo-device-section-card {
background: #fff;
color: #111827;
box-shadow: none;
break-inside: avoid;
page-break-inside: avoid;
}
}
Objective and use case
Why it matters / Use cases
Expected outcome
0x01) to the custom BLE characteristic triggers the hardware alarm with <50ms latency.Conceptual block diagram
Functional architecture
Validation path
Educational validation note
platformio.ini and src/main.cpp, created a temporary project and ran pio run against platform = espressif32, board = esp32dev and framework = arduino. It also checked article structure, copy/paste-safe ASCII command options, and unsupported stacks such as direct ESP-IDF or non-scoped ESP32 boards.Published validation evidence
Educational safety note
Prerequisites
* PlatformIO IDE: Installed as an extension within Visual Studio Code, or the PlatformIO Core CLI available in your system path.
* BLE Scanner Application: A smartphone with Bluetooth enabled and a generic BLE debugging app installed. Recommended apps include “LightBlue” (Punch Through) or “BLE Scanner” (Bluepixel Technologies).
* Basic C++ Knowledge: Familiarity with variables, functions, and standard control structures.
* USB Drivers: Appropriate drivers for the ESP32 DevKitC USB-to-UART bridge (commonly Silicon Labs CP210x or WCH CH34x) installed on your operating system.Materials
* ESP32 DevKitC: The core microcontroller development board featuring Wi-Fi and Bluetooth capabilities.
* Pushbutton: A standard 4-pin or 2-pin tactile momentary switch.
* Piezo buzzer: A passive piezo buzzer capable of generating different tones via Pulse Width Modulation (PWM).
* Status LED: A standard 5mm light-emitting diode (e.g., Red or Blue) to provide visual feedback.
* Resistor (330Ω): One current-limiting resistor for the status LED.
* Breadboard: A standard half-size or full-size prototyping breadboard.
* Jumper Wires: Male-to-male jumper cables to establish connections between components.
* Micro-USB Cable: A high-quality data-capable USB cable to connect the ESP32 DevKitC to your computer.Setup/Connection
1. Power Distribution: Connect the GND pin from the ESP32 DevKitC to the negative (blue/black) rail of your breadboard.
2. Status LED: Place the LED on the breadboard. Connect the anode (longer leg) to ESP32 GPIO 25. Connect the cathode (shorter leg) to one end of the 330Ω resistor. Connect the other end of the resistor to the breadboard’s GND rail.
3. Piezo Buzzer: Place the passive piezo buzzer on the breadboard. Connect its positive terminal to ESP32 GPIO 26. Connect its negative terminal to the GND rail.
4. Pushbutton: Insert the tactile pushbutton across the center trench of the breadboard. Connect one terminal of the button to ESP32 GPIO 27. Connect the diagonally opposite terminal (or the adjacent terminal on a 2-pin switch) directly to the GND rail.Component ESP32 DevKitC Pin Intermediate Component Destination Status LED (Anode) GPIO 25 None LED Anode Status LED (Cathode) N/A 330Ω Resistor GND Rail Piezo Buzzer (+) GPIO 26 None Buzzer (+) Piezo Buzzer (-) N/A None GND Rail Pushbutton (Side A) GPIO 27 None Button Terminal Pushbutton (Side B) N/A None GND Rail Validated Code
platformio.ini) and the main C++ source code (src/main.cpp).PlatformIO Configuration
platformio.ini with the following configuration. This sets the framework, board, and serial monitor baud rate.; platformio.ini
[env:esp32dev]
platform = espressif32
board = esp32dev
framework = arduino
monitor_speed = 115200
Main Application Source Code
src/main.cpp with the code below. This code initializes the BLE server, creates a custom service and characteristic, and implements a non-blocking loop to handle the alarm state and physical button presses.// src/main.cpp
#include <Arduino.h>
#include <BLEDevice.h>
#include <BLEServer.h>
#include <BLEUtils.h>
#include <BLE2902.h>
// Hardware Pin Definitions
const int LED_PIN = 25;
const int BUZZER_PIN = 26;
const int BUTTON_PIN = 27;
// LEDC PWM Settings for the passive buzzer
const int PWM_CHANNEL = 0;
const int PWM_FREQ = 2000;
const int PWM_RESOLUTION = 8;
// BLE UUIDs - Generated unique identifiers for our custom service
#define SERVICE_UUID "4fafc201-1fb5-459e-8fcc-c5c9c331914b"
#define CHARACTERISTIC_UUID "beb5483e-36e1-4688-b7f5-ea07361b26a8"
// Global State Variables
bool deviceConnected = false;
bool alarmActive = false;
// Timing variables for non-blocking alarm pattern
unsigned long previousMillis = 0;
const long interval = 250; // Toggle every 250 milliseconds
bool toggleState = false;
// BLE Server Callbacks: Handle connection and disconnection events
class MyServerCallbacks : public BLEServerCallbacks {
void onConnect(BLEServer* pServer) {
deviceConnected = true;
Serial.println("BLE Device Connected.");
}
void onDisconnect(BLEServer* pServer) {
deviceConnected = false;
Serial.println("BLE Device Disconnected. Restarting advertising...");
// Restart advertising so the device can be found again
pServer->startAdvertising();
}
};
// BLE Characteristic Callbacks: Handle incoming write requests from the smartphone
class MyCallbacks : public BLECharacteristicCallbacks {
void onWrite(BLECharacteristic *pCharacteristic) {
std::string value = pCharacteristic->getValue();
if (value.length() > 0) {
Serial.print("Received Value: ");
for (int i = 0; i < value.length(); i++) {
Serial.print(value[i], HEX);
Serial.print(" ");
}
Serial.println();
// Check if the received byte is 0x01 (Start Alarm) or 0x00 (Stop Alarm)
if (value[0] == 0x01) {
alarmActive = true;
Serial.println("Alarm TRIGGERED via BLE!");
} else if (value[0] == 0x00) {
alarmActive = false;
Serial.println("Alarm STOPPED via BLE.");
// Ensure hardware is turned off immediately
digitalWrite(LED_PIN, LOW);
ledcWriteTone(PWM_CHANNEL, 0);
}
}
}
};
// ...// src/main.cpp
#include <Arduino.h>
#include <BLEDevice.h>
#include <BLEServer.h>
#include <BLEUtils.h>
#include <BLE2902.h>
// Hardware Pin Definitions
const int LED_PIN = 25;
const int BUZZER_PIN = 26;
const int BUTTON_PIN = 27;
// LEDC PWM Settings for the passive buzzer
const int PWM_CHANNEL = 0;
const int PWM_FREQ = 2000;
const int PWM_RESOLUTION = 8;
// BLE UUIDs - Generated unique identifiers for our custom service
#define SERVICE_UUID "4fafc201-1fb5-459e-8fcc-c5c9c331914b"
#define CHARACTERISTIC_UUID "beb5483e-36e1-4688-b7f5-ea07361b26a8"
// Global State Variables
bool deviceConnected = false;
bool alarmActive = false;
// Timing variables for non-blocking alarm pattern
unsigned long previousMillis = 0;
const long interval = 250; // Toggle every 250 milliseconds
bool toggleState = false;
// BLE Server Callbacks: Handle connection and disconnection events
class MyServerCallbacks : public BLEServerCallbacks {
void onConnect(BLEServer* pServer) {
deviceConnected = true;
Serial.println("BLE Device Connected.");
}
void onDisconnect(BLEServer* pServer) {
deviceConnected = false;
Serial.println("BLE Device Disconnected. Restarting advertising...");
// Restart advertising so the device can be found again
pServer->startAdvertising();
}
};
// BLE Characteristic Callbacks: Handle incoming write requests from the smartphone
class MyCallbacks : public BLECharacteristicCallbacks {
void onWrite(BLECharacteristic *pCharacteristic) {
std::string value = pCharacteristic->getValue();
if (value.length() > 0) {
Serial.print("Received Value: ");
for (int i = 0; i < value.length(); i++) {
Serial.print(value[i], HEX);
Serial.print(" ");
}
Serial.println();
// Check if the received byte is 0x01 (Start Alarm) or 0x00 (Stop Alarm)
if (value[0] == 0x01) {
alarmActive = true;
Serial.println("Alarm TRIGGERED via BLE!");
} else if (value[0] == 0x00) {
alarmActive = false;
Serial.println("Alarm STOPPED via BLE.");
// Ensure hardware is turned off immediately
digitalWrite(LED_PIN, LOW);
ledcWriteTone(PWM_CHANNEL, 0);
}
}
}
};
void setup() {
    Serial.begin(115200);
    Serial.println("Starting Tool Finder Beacon...");

    // Initialize Hardware Pins
    pinMode(LED_PIN, OUTPUT);
    digitalWrite(LED_PIN, LOW);

    // Configure Pushbutton with internal pull-up resistor
    pinMode(BUTTON_PIN, INPUT_PULLUP);

    // Configure PWM for the passive buzzer
    ledcSetup(PWM_CHANNEL, PWM_FREQ, PWM_RESOLUTION);
    ledcAttachPin(BUZZER_PIN, PWM_CHANNEL);
    ledcWriteTone(PWM_CHANNEL, 0); // Ensure buzzer is quiet on boot

    // Initialize BLE Device
    BLEDevice::init("ToolFinder-Beacon");

    // Create BLE Server
    BLEServer *pServer = BLEDevice::createServer();
    pServer->setCallbacks(new MyServerCallbacks());

    // Create BLE Service
    BLEService *pService = pServer->createService(SERVICE_UUID);

    // Create BLE Characteristic (Write capability)
BLECharacteristic *pCharacteristic = pService->createCharacteristic(
CHARACTERISTIC_UUID,
BLECharacteristic::PROPERTY_WRITE
);
pCharacteristic->setCallbacks(new MyCallbacks());
// Start the service
pService->start();
// Start advertising
BLEAdvertising *pAdvertising = BLEDevice::getAdvertising();
pAdvertising->addServiceUUID(SERVICE_UUID);
pAdvertising->setScanResponse(true);
pAdvertising->setMinPreferred(0x06); // Functions that help with iPhone connections
pAdvertising->setMinPreferred(0x12);
BLEDevice::startAdvertising();
Serial.println("BLE Advertising Started. Waiting for connections...");
}
void loop() {
// 1. Check physical pushbutton to clear the alarm locally
// Since we use INPUT_PULLUP, a pressed button reads as LOW
if (digitalRead(BUTTON_PIN) == LOW) {
if (alarmActive) {
alarmActive = false;
Serial.println("Alarm STOPPED via physical button press.");
// Immediately turn off the hardware
digitalWrite(LED_PIN, LOW);
ledcWriteTone(PWM_CHANNEL, 0);
// Simple debounce delay
delay(300);
}
}
// 2. Handle the Alarm Pattern (Non-blocking)
if (alarmActive) {
unsigned long currentMillis = millis();
if (currentMillis - previousMillis >= interval) {
previousMillis = currentMillis;
toggleState = !toggleState;
if (toggleState) {
digitalWrite(LED_PIN, HIGH);
ledcWriteTone(PWM_CHANNEL, 2500); // 2.5 kHz tone
} else {
digitalWrite(LED_PIN, LOW);
ledcWriteTone(PWM_CHANNEL, 0); // Silence
}
}
} else {
// Ensure hardware remains off when alarm is inactive
digitalWrite(LED_PIN, LOW);
ledcWriteTone(PWM_CHANNEL, 0);
}
// Small delay to yield to FreeRTOS background tasks (BLE stack)
delay(10);
}
Build/Flash/Run commands
platformio.ini is located).Command Purpose pio runCompiles the project to ensure there are no syntax or dependency errors. pio run --target uploadCompiles and flashes the built firmware to the connected ESP32 over USB. pio device monitorOpens the serial monitor to view print statements and debug logs.
1. Connect the ESP32 DevKitC to your computer via the micro-USB cable.
2. Open your terminal or the PlatformIO CLI window.
3. Execute pio run to verify the code compiles cleanly.
4. Execute pio run --target upload to flash the device. If the upload process pauses at “Connecting…”, you may need to press and hold the “BOOT” button on the ESP32 until the flashing begins.
5. Execute pio device monitor to observe the serial output. You should see “Starting Tool Finder Beacon…” followed by “BLE Advertising Started.”Step-by-step Validation
pio device monitor) and press the “EN” (Reset) button on the ESP32.4fafc201...), and the serial monitor outputs “BLE Device Connected.”beb5483e...), tap the “Write” icon (usually an upward arrow), select “Byte Array” or “UINT8”, enter 01, and send.Troubleshooting
Symptom Likely cause Fix Upload fails / “Connecting…” timeout ESP32 is not automatically entering bootloader mode. Press and hold the “BOOT” button on the ESP32 DevKitC when the terminal displays “Connecting…”. No serial output visible Incorrect baud rate or missing CP210x/CH34x drivers. Ensure monitor_speed = 115200 in platformio.ini. Verify USB drivers are installed in your OS Device Manager.Device not showing in BLE scan Smartphone BLE cache issue or ESP32 power instability. Toggle Bluetooth off and on again on your smartphone. Ensure the ESP32 is powered by a capable USB port. App disconnects immediately GATT server crash or timeout. Reset the ESP32. Ensure you are writing to the Characteristic, not the Service descriptor. Buzzer emits continuous noise, no pulsing Blocking code (e.g., delay()) used inside the BLE callback.Verify that the loop() uses millis() for timing as provided in the Validated Code, avoiding delay() loops.Improvements
0x180F) to report the device’s remaining power to the smartphone.


Quick Quiz

Telecommunications Electronics Engineer and Computer Engineer (official degrees in Spain).

